What should newbies know?
When starting to work on a presentation, you need to carefully think through the concept, select ideas and style. Once you have decided on the overall picture, proceed to the following steps:
- Clearly define the target audience, taking into account that there may be several of them.
- Select photos of works that most accurately reflect a possible solution to customer problems.
- Process all images in a single unique style.
- If templates are used, they are selected so that the portfolio fits into one overall picture.
- Use only photographs of impeccable quality.
The most convenient option is a presentation of works sorted by thematic headings.
What does a good portfolio look like?
Since a manicurist’s work is assessed not only by reviews, but also by images, well-thought-out content is selected for the portfolio. Therefore, photographs taken on purpose, rather than randomly taken frames, are suitable.
Reference! Monotonous, albeit high-quality manicures will quickly lead to boredom.
The presentation reflects all the techniques in which the master works, his ability to process nails of different lengths and shapes. Be sure to include sections with the embodiment of interesting ideas and unusual designs.
Posing
Beautiful, harmonious images are an important factor in helping to build a personal brand. The recognition and style present in every photo will help to implement many more successful projects.
How to take beautiful nail photos:
- set the right light - bright but diffused sunlight is best;
- props will enliven the shooting, but if there are a lot of them, then the work will be lost in the frame;
- unusual angles often make even simple photographs look great;
- You can’t photograph only one nail, it looks unnatural;
- beautifully and softly intertwined fingers enliven the frame, even if the manicure is classic, ordinary;
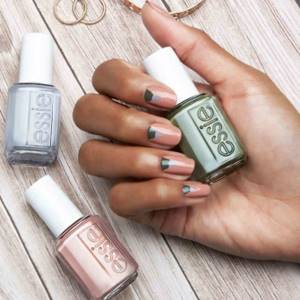
- a cup of coffee, some kind of fruit, a bottle of nail polish in your hands sets off the color and texture of your nails and adds interesting details.
Even if there is no beautiful background or unusual props, the pictures are attractive if the model maintains a natural pose. To do this, relax your hands and do not spread your fingers.
Reference! To prevent the veins on the model’s arms from standing out, they are held raised above the head right before shooting. 15–20 seconds is enough.
Position of hands in the frame
The hand pose should be photogenic. To do this, do not spread out or strain your hands. If shooting takes place on a surface, then there is no need to press your hands tightly against it. Professionals advise not to remove the tips of your nails. Otherwise, there is a risk of getting trapezoid arms.
Recommendations for position in the frame:
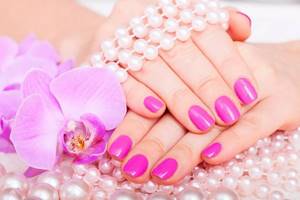
- They take pearl beads in one hand and lift their top with the other. In this case, the fingers should be relaxed. The movement should be easy.
- The hand is gracefully raised to a standing position.
- The hands are placed one on top of the other.
- Carefully grasp some props.
Hands are the focus of the frame. Therefore, they focus on them. You can place them in the frame as if randomly. For example, place the brush on the collarbone or on another part of the body.
Background and details
To keep attention on the master’s work, background details are selected so that the eye does not linger on them. It is important to come up with a harmonious combination. Make sure that the bright manicure is not lost on the colorful background, and that pastel shades of varnish are clearly visible, even if the background is light.
Some ideas for creating a background:
- minimalism is always in trend, so it is better to avoid excess details;
- a matte surface is an ideal option, even if it is a regular gray desktop, but clean and empty;
- an interesting effect is obtained if you lay a beautiful fabric or textured plain paper on the work surface;
- if you need the master’s logo in the frame, order personalized photo backdrops with different images in the same style;
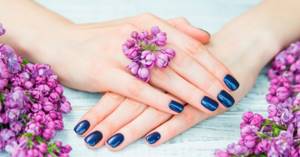
- A bright manicure is set off with light accessories in the hands, and for a classic manicure, contrasting accents are selected: dark glass perfume bottles, large flower buds.
An empty background is a boring solution; details in matching tones help out.
Suitable:
- delicate lace;
- twigs or feathers;
- fruits and berries;
- discreet bouquets.
The main condition is the harmonious distribution of main and secondary items.
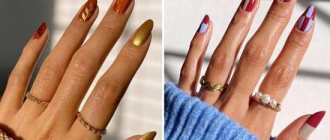
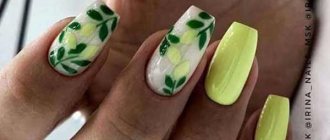
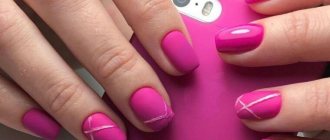
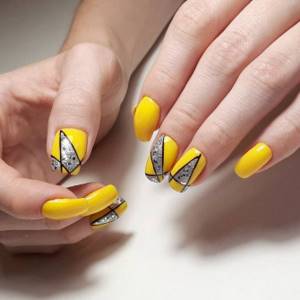
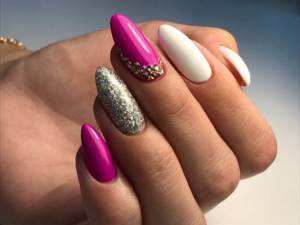
Bright manicure with sparkles and patterns
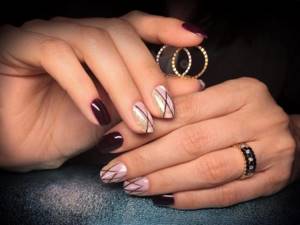
In the spring-summer season, bright or even neon manicures are gaining particular popularity. Of course, every fashionista wants to add noticeable accents to her image. In this case, yellow, orange, lilac, red and blue coating is the ideal solution in 2020. Just imagine how beautiful such a manicure looks with a pattern. Interestingly, you can choose it according to your own preference or even make it yourself. Pay attention to fruit and floral motifs. Basically, they reflect the brightness of the spring and summer seasons. Geometric and abstract designs look no less beautiful. Together with sparkles, it literally transforms before your eyes and looks completely new. But please note that there should not be too much decor. After all, the main thing is that the manicure looks harmonious.
Lighting
The best way to set the lighting is to sit the model near a window on a sunny day. Direct blinding rays should be avoided. Select a place where bright but diffused light falls. If only lamps are available from light sources, choose very bright ones, with a cool tone, without yellowness. Select two lamps and install them on both sides of the subject.
Backlight options:
- a sheet of white Whatman paper located as a reflector opposite the window;
- photo boxes for macro photography that fit the palm of your hand;
- a large piece of foil next to the work surface to reflect artificial light.
It is not recommended to use flash as the result with harsh shadows and lots of white highlights will not please or impress anyone.
Basic rules for a successful photo: take seven photos, think once
How to photograph your nails beautifully? This question is relevant not only for practicing manicurists, but also for their clients. After all, leaving the beauty salon, every girl has an insatiable desire to quickly click a couple of frames for “stories” on Instagram or even for a separate post, if the card is especially successful. This unconditioned reflex is developed under the influence of the constantly developing and overwhelming information space. And there are only two ways out of the situation: fight your desires or use them for your own good. ProstoNail experts choose the latter and we have a number of good reasons for this:
- beautiful photo cards and a gallery balanced in theme and color will attract subscribers to your account. A catchy idea, embodied in a bright frame, will make them comment on your creation, and this, in turn, will increase engagement. As a result, after some time of such regular posts, you are a Social Media Influencer with a loyal audience ready to cooperate;
- if you are already a successful blogger who feels confident at presentations and organizes fan meetings, then such photo cards will add a little lifestyle to your profile, thereby showing an example of a “happy and fulfilling life” (relevant for bloggers working in the field of beauty);
- maybe this is funny for some, but beautiful photos help to form a Personal Brand, which will subsequently help you create a successful and quite profitable business;
- Most social networks have an exclusively visual background, so it is logical that in an effort to attract new clients for manicures, you need to attract them with successful shots. By correctly using hashtags and geotags, you can find a “club” of admirers of your talent in a record amount of time, and 20-30% of them will certainly become your regular visitors in the salon or at home;
- approximately the same applies to pages created for inspiration. Having gathered an active, solvent audience in such an account, you can earn money by promoting advertising. And there will be a huge number of proposals about it;
- Having learned how to frame a frame competently and take stunning photographs, you can become a professional photographer working on commercial shoots and realizing your ambitions in interesting and well-paid projects.
We are sure that these facts are more than enough for you to understand the value of a good photo in the modern world. Well, it’s time to satisfy this interest and show you all the cards talking about how to successfully photograph manicured fingers. Write down and hurry to implement this knowledge by picking up an iPhone or camera:
- Don't forget about the composition of the photo and that the main subject should be in the center of the frame (ideally). In order to control the process, it is enough to simply put down a dimensional grid with a cross indicating centering;
- the best light is daylight. And we are not talking about direct sunlight, hitting and discoloring everything around, but about diffused daylight. Open the curtains, raise the blinds, place your hands in the direction of the rays - the perfect shot is guaranteed;
- more advanced users can experiment with other light sources, even artificial ones. But the emphasis here is only on the “advanced users” combination. Of course, a couple of programs can save a “deadly beautiful” photo, but, as it seems to us, it is better to set priorities correctly from the very beginning;
- Don't use a standard phone flash. It will either completely whiten the frame or turn it yellow;
- Don't know how to work with props? Then it’s better to remove everything unnecessary from the frame. The minimalistic atmosphere looks much nicer than the junkyard in the background;
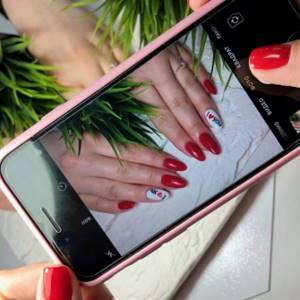
- decided to take a photo with your hands near your face? Then use not the front camera, but the main one and the self-timer. This is the only way to maintain the excellent quality of a fresh card;
- don't be afraid to experiment and stand out from the crowd. Develop your own style and change angles, take a million shots and only then post the most successful ones.
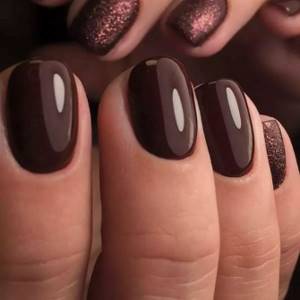
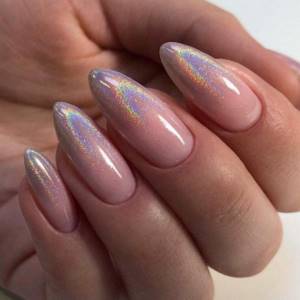
Perfect highlight
A beautiful reflection of the light source in the form of a shiny speck of reflection adds vitality and glossy chic to the photo. This detail is obtained if you use a bright white light lamp. It is placed directly above the hands, very close.
A few tips for getting the perfect highlight:
- smooth, carefully processed surface of the nail plates;
- the varnish is not matte, but shiny, glossy;
- lamp shape is round or oval;
- fingers are located parallel, in the same plane.
Beautiful highlights can also be made using Photoshop . To do this, choose a photo processing program with a special tool or a filter with highlights.
How to photograph nails with highlights
You can take a beautiful photo of your nails with a highlight for yourself if the nail art has a glossy finish. It will be impossible to achieve such an effect on a matte surface.
The following recommendations will help you get the glare effect:
- The nail surface should be smooth so that the rays of light are not refracted, but are evenly distributed over it.
- The lamp is placed as close to the nails as possible.
- The closer the nails are to the lamp, the more glare there is.
- The best effect will be obtained by shooting using a ring lamp.
- It is worth taking a photo before the sticky layer (finish gel) is removed.
A small life hack on how to add highlights using programs on your computer. To do this you will need Adobe Photoshop. In the “Filter” menu, select “Rendering” and then “Highlight”. In this parameter, the necessary indicators are built. When a cross appears, it marks the area in the photo where highlights should appear.
Features of shooting with a camera
The shots taken with the camera are distinguished by their depth and saturation. To ensure professional-quality images, set the correct settings on the camera.
- The digital value in the settings scale, indicated by the letter F, regulates the intensity of the light flux falling on the object. The higher the number, the stronger the brightness and higher the contrast.
- Photosensitivity is responsible for the presence of noise in the finished image. The higher the ISO number, the more noise-like visual “junk” will appear in your photos. These are fuzzy contours, a lot of unnecessary dots and blurry lines.
- The shutter speed is set short, since fixing motionless hands does not imply the appearance of blur. If the shooting is done dynamically, trying to capture fingers in motion, then the exposure time is increased.
Reference! It's easy to take good shots using the automatic Macro mode.
How to take beautiful pictures on your phone?
Modern phones have high-quality cameras. Therefore, many people collect material for a portfolio without using cameras. To make your shots attractive, follow these recommendations:
- lighting is either natural or artificial, without mixing sources;
- use grid-like framing so that the nails fall exactly in the center of the frame, in focus;
- the shiny coating is removed from the side, and matte nails are placed directly under the camera so that the highlights and texture look attractive;
- To take a high-quality close-up photo, they move the phone closer rather than using zoom.
If your phone camera has minimal settings, download one of the applications that allows you to take good pictures:
- Open Camera;
- HD camera;
- Procamera.
Shots on a smartphone
—
You can take a high-quality shot without using complex equipment. You can get a delicious picture in the field, armed with simple tips:
- center of the frame. For convenience, you can turn on a grid layout on your phone screen. The most important parts of the frame should be located in the central sector;
- Avoid sun rays. Natural lighting will play into the hands of the photographer, but will ruin the picture if a killer bleaching ray falls on the model’s brush;
- minimalism. Props are great, but you need to know how to work with them. In order not to clutter the frame, it is better to remove unnecessary details from it;
- thumbs up. The optimal angle is with the brush pointing upwards in the frame;
- purity. Any blemishes on the background, skin unevenness and other minor troubles are easier to prevent during shooting than to try to eliminate in a photo editor;
- proportions. It is best if the brush takes up exactly as much space as it would have in real life. The camera can be positioned at a distance of 50 cm from your hand. Agree, no one looks at a manicure by touching it with their nose;
- settings. Most smartphones are equipped with functions like macro or beauty. These settings will help you get a neat picture.
In addition to creating the frame itself, nail experts advise taking time to process the image. Almost every card needs cropping, exposure adjustments, and skin tone work.
You can process photos directly on your smartphone by downloading any convenient editor.
Instagram account as a master's portfolio
To ensure that your social network feed attracts attention and evokes positive emotions, follow the following rules when creating:
- think through the order of photographs in advance to maintain a harmonious overall style;
- avoid monotonous pictures in which hands are in the same poses and angles;
- make clear and readable inscriptions, use no more than two types of fonts;
- ugly pictures from the “Before and After” series are hidden in the image carousel under a beautiful cover.
The Instagram format uses not only photographs, but also video files that record interesting moments of work processes.
Reference! Photos are edited directly in the application when it was not possible to obtain a clear, color-saturated image.
Treatment
What is changed in the pictures:
- insufficient lighting is corrected using brightness settings;
- remove the yellow tint of artificial light;
- remove skin defects and unnecessary details;
- add contrast.
Using various applications, processing can be easily done right on your phone. Most popular:
- Snapseed (wide functionality);
- AirBrush (for whitening);
- Light (with color processing effects);
- Enlight (many filters).
Hand face
And this time we’re not talking about a funny meme that was popular a couple of years ago. In fact, photographs with areas of the face and manicure in the frame look very feminine, gentle and harmonious.
Of course, when a girl shows vulgar and sharp purple nails against the background of a smooth cheek, the composition will not work. But if you carefully place your hand in a thoughtful pose on your chin or cheek, barely touching the skin with your nails, the photo will turn out to be artistically attractive.
You can crop a similar photo until you get the interesting still life you need with an emphasis on manicure technique.
Common mistakes
In order for a portfolio posted on the Internet to attract clients, it is necessary to avoid mistakes that often spoil the reputation of even good professionals:
- too strong correction of pictures, due to which colors and shades become completely different from real ones;
- the oily sheen of a heavily oiled cuticle looks sloppy;
- a cloudy camera lens from which dust has not been erased, greasy fingerprints.
Models are selected without damage to the skin and nails, with well-groomed hands.
Ideas for photos
With cup:

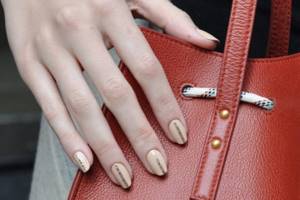
On the bag:
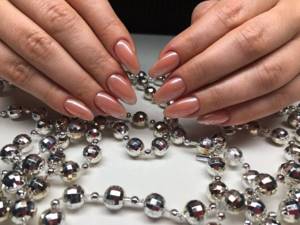
With beads:
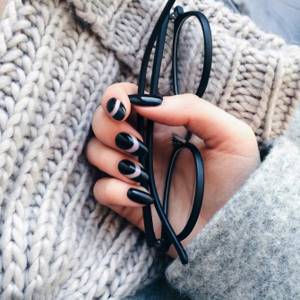
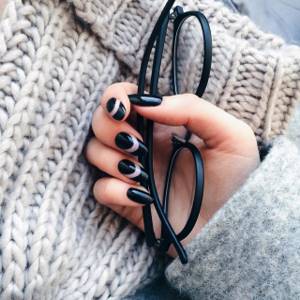
On the coat:
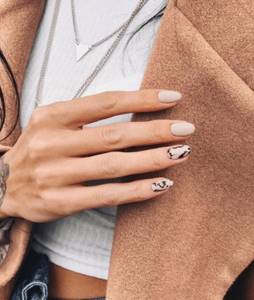
To be a sought-after master, you must not only follow trends, but also skillfully present your talents. Some ideas for photos:
- in hand is a tea cup with an unusual matte texture;
- fingers on the collar of a coat, on the buttons of a jacket, squeezing a thin scarf;
- accessories of contrasting shades in hands - leather bags, clutches;
- nails against the backdrop of a handful of mother-of-pearl beads or sea pebbles clutched in the palm.
Shots taken with imagination look more sincere and attract more attention than glamorous staged shots.
It’s easy to create a portfolio even using your phone camera if you follow the guidelines. Using unconventional ideas, creative professionals create content so captivating that they easily hold the attention of subscribers and find new clients.
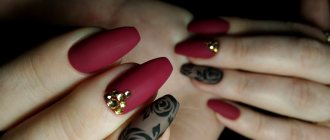
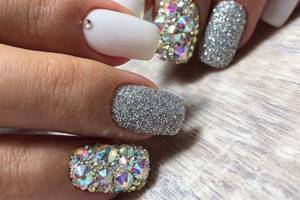
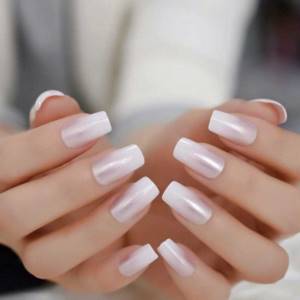
Gradient
The combination of different colors and shades on the nails together with sparkles looks stylish and original. There is a horizontal, vertical and diagonal gradient. The type depends on which direction the colors change.
Stretching with glitter looks impressive. You can achieve the desired result using dry types of decor or special varnishes. This type of coating is highly durable. To create nail designs at home, use a sponge or brush.
Shiny compositions help adjust the shape of the nails. To attach large sparkles you will need special glue. If you have doubts about your own abilities, then it is better to contact a specialist who will do the job efficiently.