What comes to mind when it comes to winter, cold and frost? Well, of course: snow, snowflakes, New Year, etc. So in manicure, nail art masters try to convey all the subtleties of the winter mood. The most popular option to depict a piece of winter on your nails is to draw a snowflake on them. Or maybe not draw? How about an applique or unusual snowflake shape? The more interesting and unusual you can make a snowflake on your nails, the more original the manicure will be. The envy of all your girlfriends!
Winter design drawing techniques
A simple snowflake with six blades with white varnish is not the limit of possibilities for nail art. Snowflake images can be made in various ways, but the result also depends on the basis of such a manicure: matte finish, French, etc.
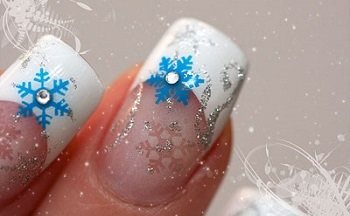
French with snowflakes
For a beautiful winter manicure, which could easily be a New Year's manicure, it is important to make a French base. The color scheme for the tip of the nail can be anything; it directly depends on the intended design. The background can also be made of any shade or simply use a transparent coating.
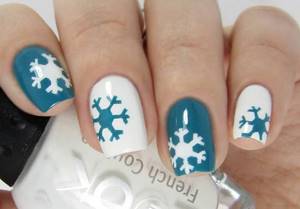
Example of a jacket with snowflakes
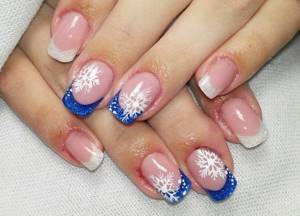
Snowflakes can be present as independent design elements or as part of it. They can be located on the nail in different ways: along the entire nail plate, at the tip, in the center of the nail (or on the left/right side).
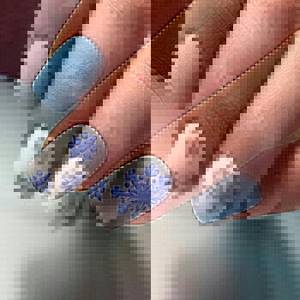
Ice ombre
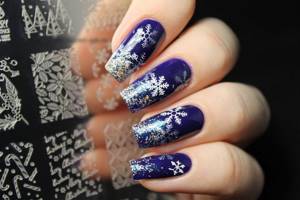
A soft play of shades as a background is a great idea for a winter manicure. To make a design that looks like ice, use the ombre technique using cool colors: blue, purple, green in tandem with white, gray. In ombre, you can add sparkles, which should be chosen lighter or darker than the main chosen colors. A smooth transition from one shade to another is best done with an airbrush, but with sufficient skill it can also be done with a brush.
Ombre with snowflakes
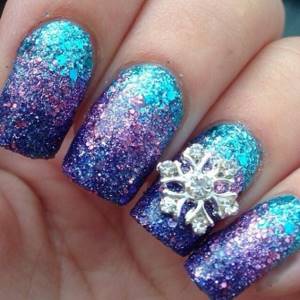
After creating the base of the ombre manicure, you can start decorating. For example, draw a snowflake and decorate it with rhinestones. On ombre nails, small snowflakes in large quantities in a contrasting color look impressive.
Large and small snowflakes with velvet sand
Such an unusual material as velvet sand helps create interesting effects on nails. The technique using this material is useful in making snowflakes more voluminous and attractive.
Snowflakes with velvet sand
The size of the snowflake created does not matter when using velvet sand. It is enough to follow a few steps to get a snowflake with acrylic sand:
- Use gel polish to paint a snowflake of the desired size using a thin brush;
- Apply powder/sand to the area where the snowflake was drawn;
- Dry the nail under the lamp;
- Use a dry wide brush to remove excess material.
There is no need to use nail topcoat after using powder/sand, otherwise the velvety effect will disappear.
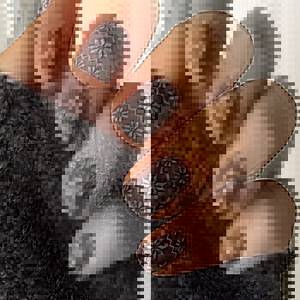
Matte design
Manicure with a matte finish is a fashion trend that cannot be ignored in winter nail design. Hit colors for manicure: dark burgundy, green, brown. Light colors include turquoise, blue, gray, and lilac.
Matte manicure with snowflakes
The trend is to combine matte with a glossy finish, and also use acrylic powder. Therefore, to create a beautiful snowflake on a matte background, acrylic powder, contrasting varnish, glitter, etc. are suitable.
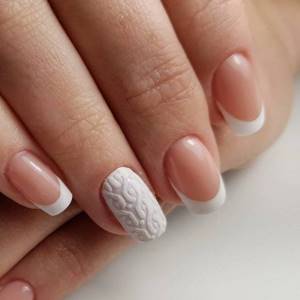
Scandinavian snowflakes
This unusual snowflake shape is often found on warm winter sweaters, but it looks no less beautiful on nails. It is important to complement a knitted manicure (both drawn and voluminous) with Scandinavian snowflakes. It is better to choose contrasting colors and use decorative elements to a minimum.
Scandinavian snowflakes in manicure
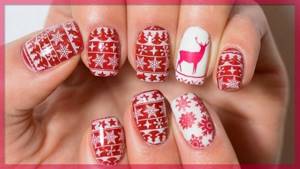
For a harmonious arrangement of the Scandinavian snowflake on the nail, it should be complemented with a stylistic pattern: a knitted pattern, stripes.
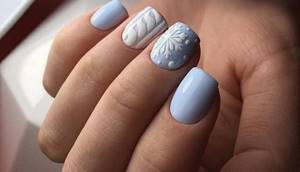
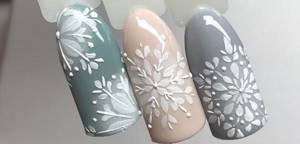
Volumetric snowflakes with acrylic paint and powder
A slight bulge for a snowflake can be created using gel polish or gel paint, and for greater highlight, use powder.
Volumetric snowflakes
You can create volume for a snowflake using gel paint like this:
- Cover your nails with a layer of gel polish of the desired color, after going through all the standard steps before application, and dry;
- Paint the required number of snowflakes with gel paint and dry;
- Apply another layer of gel paint on top of the dried snowflakes, dust with powder and dry;
- Remove excess material with a dry brush.
To cover snowflakes, you can choose matte powder, as well as shiny powder, to give them a shimmering effect.
Technique for painting with gel polish step by step
Before starting any manicure, you should treat the surface of the nails and remove the cuticle. After degreasing and applying the base coat, proceed to the base coat. Choose a color depending on what tone will be used to create snowflakes. White elements look good on a blue background or red nails. For a light coating, you should choose golden or dark shades.
After the last layer of colored gel polish has dried, you need to remove the sticky layer. Then you can paint snowflakes with gel polish on your nails.
Gel polish painting technique
Create a pattern step by step using one of the selected techniques. The drawn snowflake should turn out smooth, with identical rays. If that doesn't work, use stickers or a stencil.
How to draw a snowflake on your nails?
You can apply a snowflake image to your nail in different ways and the effect will vary in any case. Which drawing technique you ultimately choose depends on the personal skills of the manicurist. You can paint with anything: gel polish, gel paint, acrylic paint, regular varnish, etc., but not all of these materials are easy to use because they dry quickly.
Brush
For manicure painting, choose the thinnest brushes that hold any pigment well between the fibers and ensure uniform drawing of lines, which is necessary to depict a standard snowflake.
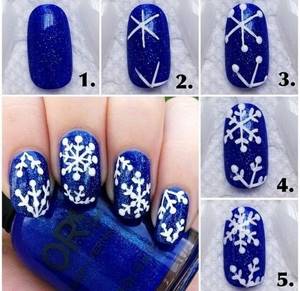
Drawing snowflakes with a brush (5 steps)
Step-by-step drawing of snowflakes with a brush
For a good result when painting with a brush, you should not apply a large amount of dye to it so that it does not drip and form blunders.
With a needle or toothpick
These “folk” drawing tools are convenient for drawing straight lines and dots, but their use is fraught with its own nuances:
- on the slippery surface of a thin needle, the coloring matter (for example, ordinary varnish) quickly flows down to the tip, which makes it difficult to beautifully draw the intended patterns, especially complex ones;
- It’s inconvenient to draw thin lines with a toothpick, but dots and monograms come out great.
Nail art professionals do not use such tools for painting nails, but at home they can completely replace dots.
Snowflake drawings made with a needle and toothpick
But you may not be able to draw with a needle and toothpick the first time, so before drawing snowflakes on your nails you should practice on any other surface.
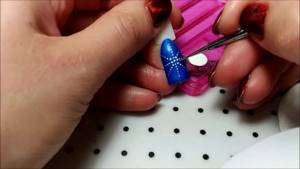
Dots
In skillful hands, dots become a universal drawing tool. For ease of application of the dye, different sizes of the ball at the tip of the dot can be used. This tool is convenient to use to create patterns of any complexity, as well as to use the dot pattern technique.

Snowflakes drawn with dots
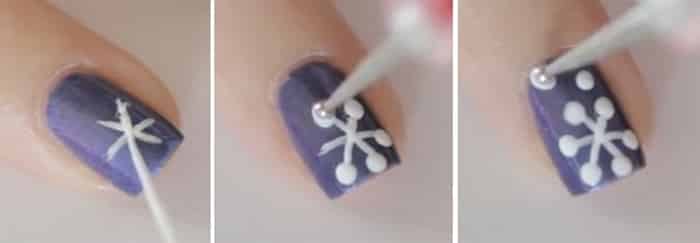
To avoid accumulation of varnish/paint in one place of the design, you need to dip only the tip of the dot into the coloring substance, and also dry the snowflake well before fixing it with a transparent coating.
Stamping technique
This design idea as stamping looks incredibly impressive in manicure, while making life much easier for masters who do not have drawing skills. In order to make this design on your nails, you need to purchase special templates (plates) and a stamp.
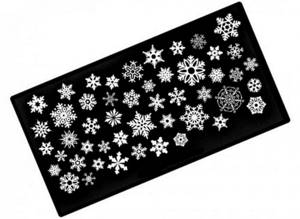
Plate with snowflakes for stamping
After the main color has been applied to the nails (background), you can start stamping:
- Wipe the disc and design stamp with nail polish remover;
- Apply gel paint (or acrylic) to the selected design. The stamping plates have small recesses that hold the required amount of paint. Excess from the plate must be removed with a scraper, and as an analogue, use an unnecessary bank card, which will remove excess paint from the surface;
- Attach the stamp to the design on the plate, then from one side nail fold to the other, use the stamp to transfer the image onto the nail.
If gel paint or varnish was used for stamping, then they need to be dried after application to the nail. To consolidate the result, it is worth covering the drawing with a colorless varnish (or top coat).
An example of a manicure using stamping
Stepping can be done effectively against a gradient or ombre background, but a plain base will also work perfectly. At the same time, it is permissible to decorate the drawings with sparkles, rhinestones, etc.
Snowflakes stencil
What could be easier than drawing an openwork snowflake through a stencil? Having made the base coat and the colored layer, remove the stickiness with a clinser and press a special stencil (usually paper) tightly against the nail. After covering it with a layer of varnish of a different color, dry the nail and remove the stencil. All that remains is to decorate and secure with a top if necessary. The same actions are carried out with regular varnish.
Snowflakes made using a stencil
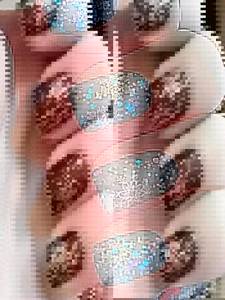
Decorating nails with rhinestones and sparkles
Snowflakes decorated with sparkles or rhinestones look organic and stylish in winter. Festive or everyday design can contain either a large number of shiny elements or a small part of them. For example, with glitter you can only embellish the design of a snowflake or even cover the entire nail with it as a background. Rhinestones can also become part of a snowflake (in the center of the snowflake, on the blades) or a moon manicure.
Glitter in winter manicure with snowflakes.
Rhinestones with snowflakes on nails
Gel pens
Painting on your nails with manicure gel pens is as easy as shelling pears. The process of applying an image is no different from that on paper. Having drawn a snowflake of the chosen color, the drawing is dried in a lamp and covered with a top coat.
Special gel pens for manicure
For the “folk” version of this nail painting, ordinary stationery gel pens are also used, but they do not give the desired effect on the nails, they take a long time to dry and can smudge when covered with a fixing transparent layer.

Manicure with snowflakes made with gel pens
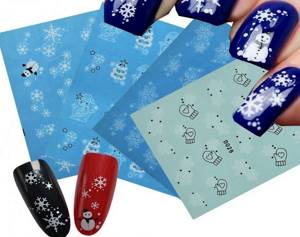
Stickers and foil
If you really don’t want to do “painting” on your nails, you can simply glue snowflakes on. You just need to choose a sticker (you can take a ready-made one, with an adhesive side), soak its film in water and place it on the nail. Making an applique from foil tape (strips) is a spectacular idea, but foil for the imprint will add a special shine to the snowflake. Foil is also used for the background, and then the nail is painted.
Foil manicure with snowflakes
Manicure stickers with snowflakes
Nail art. Let's draw a snowflake!
Homemade nail art with snowflakes can look just as good as a professional one. But the matter must be taken seriously.
How to prepare your nails for nail art?
- Before you start designing your nails, you need to carefully process them and, if necessary, shorten them. This is easy to do with nail scissors or nail clippers.
- File irregularities To avoid injuring the nail plate, use a gentle file - glass, plastic or ceramic, and direct all movements from the edge to the center.
- Polish the surface Polishing improves blood circulation in the fingertips and stimulates nail growth, and the varnish lays evenly on the smooth surface. So this procedure is worth the time spent.
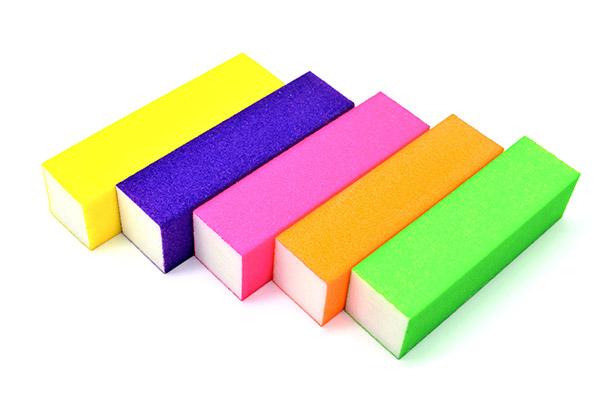
Next you need to soften the nail plate. To do this, soak your hands in warm soapy water for 15-20 minutes, then rinse them and pat dry with a towel.For the procedure you will need a soft file called a “buff”. You need to polish your nails very carefully, gradually reducing the abrasive from coarse grains to finer grains, then even finer grains, and so on until you have a smooth rubber surface. The result should be a perfectly smooth surface.
- Remove sawed off particles. It is better to do this with a napkin or brush. Don’t rush to wash your hands right away, otherwise you risk getting a sloppy manicure, because if water particles saturate the nail plate, the polish won’t stick to it.
- Degrease your nails. Regular medical alcohol or acetone will help with this. Wet a cotton pad and wipe the nail surface.
Preparations for nail art are complete. All that remains is to choose what design to draw on your nails: a snowman, a Christmas tree, gifts, lollipops or a snowflake, and this can be done at home with either regular or gel polish.
Snowflakes as a universal winter pattern
Snowflake is the most popular and easiest winter pattern to make.
The choice on this theme is very large: snow crystals can be of different colors and sizes, decorate one or all fingers, be shiny or matte, intricate or traditional.
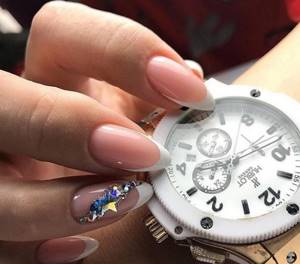
- One of the most feminine is the almond-shaped nail shape. It is this that allows you to create a creative and extraordinary manicure.
- If you are interested in a beautiful French design with a pattern on short nails, then read the details at the link.
Background colors for nail art with snowflakes
The current shade for the background of the manicure is selected taking into account some features:
- outfit color;
- fashion trends;
- intended design.
But there are also background colors that remain beyond competition and do not depend on trends.
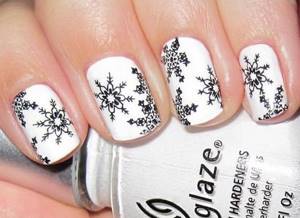
White varnish
White is one of the “winter shades” that can fit perfectly into any look. This tone can be used with different techniques, and the color of the snowflake can be any color. For long and short nails, a matte finish is in trend.
White polish as a background for a manicure with snowflakes
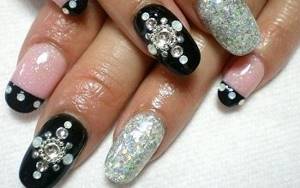
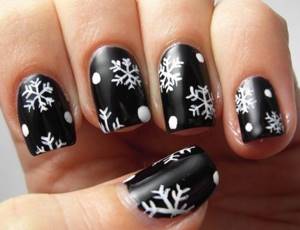
Black varnish
A black polish for the background will help you recreate a dark winter night on your nails. On such a coating it is effective to draw snowflakes in blue and blue shades, as well as depict them in silver and white. Black varnish can be chosen in any interpretation: matte, glossy, cat-eye or with glitter in the composition.
Black polish as a background for a manicure with snowflakes

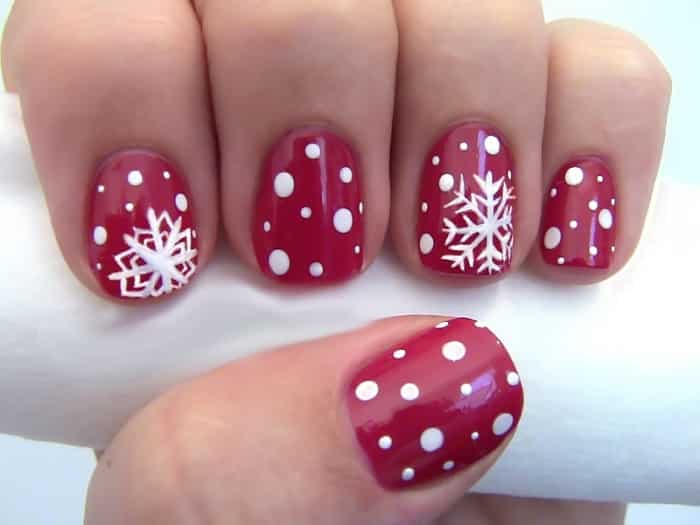
Red and purple background
Bright and bold winter-themed designs are created by using rich shades of red or purple as the background. To create a calm design, choose dark shades of these colors. Against a background of red and purple, it is effective to paint with white varnish, as well as use gold and silver glitter.
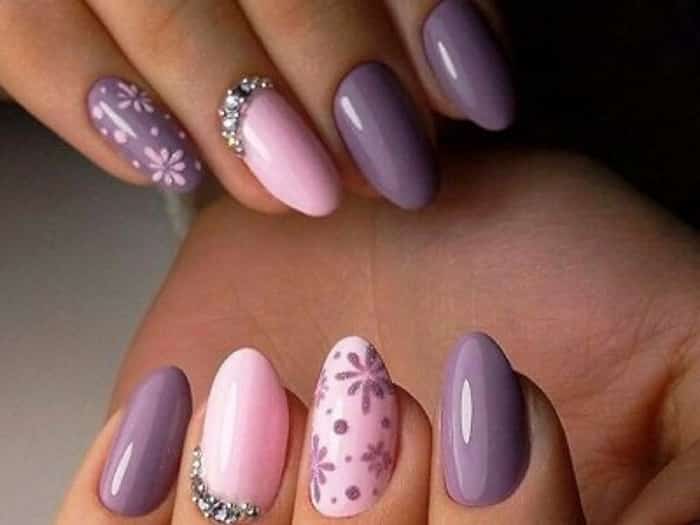
Purple nail polish with snowflakes

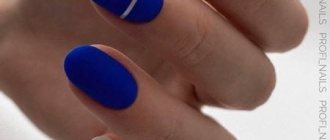
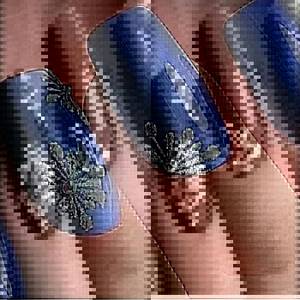
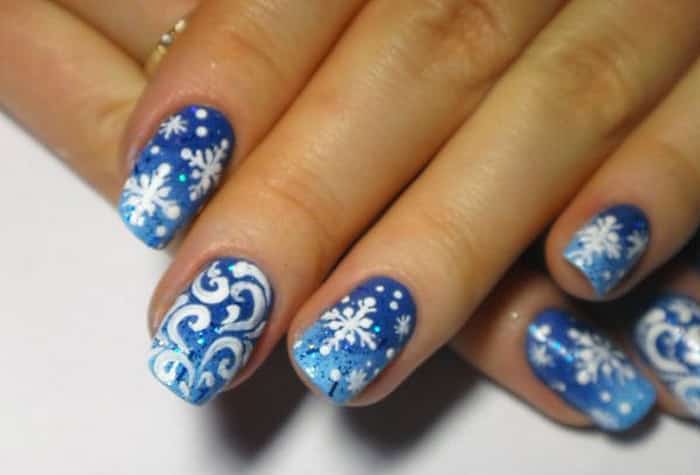
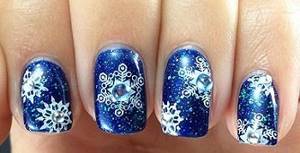
Blue and light blue shades
These tones look very “winter”, so they harmonize perfectly with designs in the form of snowflakes and patterns. It is important to combine blue and cyan with white, black or gray and make a gradient transition. For the design of light blue and cyan shades, it is better to choose silver materials; for dark ones, it is optimal to select golden tones of jewelry.
Blue background in manicure with snowflakes

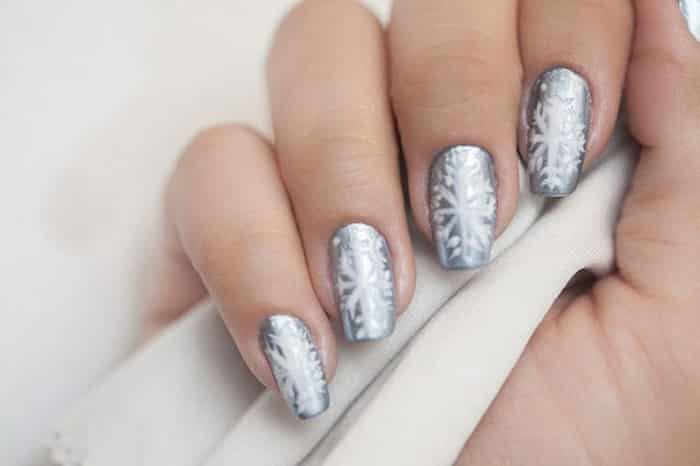
Silver background
The nail design turns out to be incredibly elegant if you use a silver color for the base coat, and the trend is to use both varnishes with a metallic effect, as well as glitter, shiny varnish, rubbing, and foil. “Silver” can be combined with other colors, making the ombre technique: with black, blue, etc.
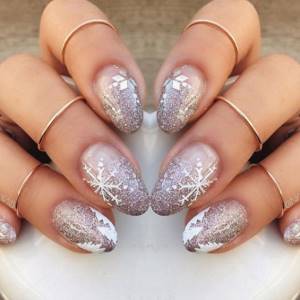
Silver background in manicure with snowflakes
Specifics of snow manicure
Since snowflakes are always a symbol of winter and are associated with the onset of the New Year holidays, such a design on nails is especially relevant in the winter . However, snowflakes, made in an unusual style and in bright colors, allow you to use this manicure idea even in the summer.
There are a lot of options for applying this pattern, the main thing is not to limit your imagination.
Manicure with snowflakes in “winter” colors
Snowflakes in classic “winter” colors : blue, white, cyan, cold purple and their shades will evoke associations with the winter holidays, because these cold colors are most characteristic of the winter period.
This manicure always looks stylish and expensive, so it’s perfect for a New Year’s outfit.
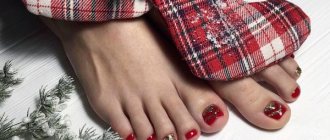
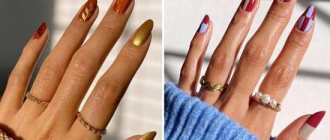
Manicure with snowflakes for summer
Bright warm colors : orange, pink and green will make snowflakes symbols of summer fun, and make your manicure especially cheerful and attractive. Bright snowflakes in summer colors will look good on the nails of young and daring girls, and adding multi-colored or gold sparkles to such a pattern will evoke even more associations with summer fun and bright colors.
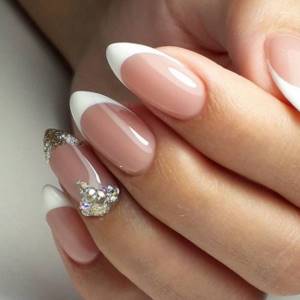
Snowflakes made of rhinestones on nails
Snowflakes made on the nail using decorative materials: sparkles, beads, pieces of foil and rhinestones will be an excellent addition to make your manicure more expressive. They play well with the pattern and allow you to more fully give expressiveness and volume to the resulting pattern, which becomes a real work of art.
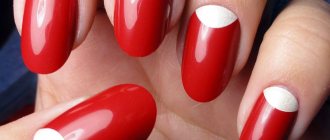
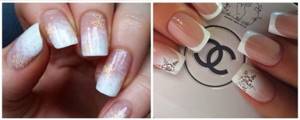
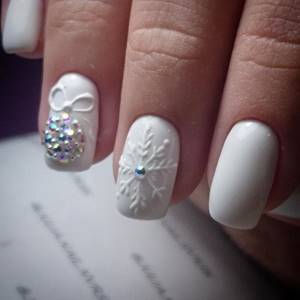
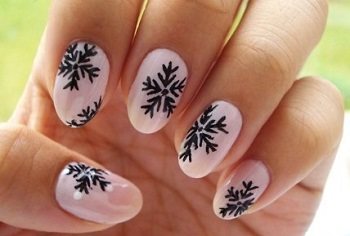
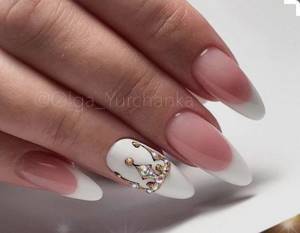
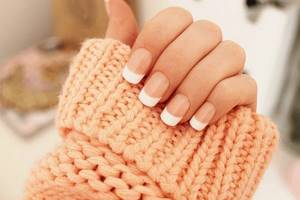
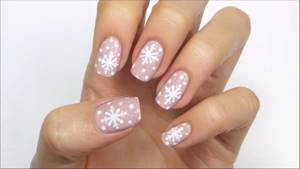
The combination of snowflakes and French manicure
The image of snowflakes against the background of French manicure is especially popular. As a rule, it is performed in classic nude colors .
This manicure emphasizes the femininity of the hands and the grace of the fingers. It is universal and suitable for any look, but very often this combination is used to create a bridal look .
Photos with snowflakes on short nails
A winter design with snowflakes on short nails can be done in different ways: cover the entire nail with small snowflakes, draw half a snowflake on the nail, decorate only a few nails with snowflakes, etc. Short nails should not be decorated with large snowflakes over the entire nail, much less place them on each nail.
New Year's jacket with a themed pattern
Among the huge variety of New Year's designs, you will definitely find an interesting and festive option. Not only winter iconic attributes and the design of the year's mascot (a white mouse) can decorate your nails for the New Year. As an option, you can choose images of fairy-tale characters, crowns, monograms or frosty streaks, drawing them on one finger. At a gala event, girls can’t go wrong with a design like this – the attention of their colleagues is guaranteed.
New Year's design idea for long nails
Whatever method you choose to draw a snowflake, you can create a New Year’s or winter mood only with a harmonious combination of the background color, the shape of the nail and the style of the drawn snowflake. For everyday winter manicure, it is better to choose a convenient long nail shape - an oval, a rounded square, for a festive design - any one you like.
Rhinestones, foil and sparkles in a New Year's jacket design
In the ranking of popular New Year's nail decorations, these decorations always take the first positions. So, thanks to the brilliant design of the jacket, the design sparkles and shines on the nails of girls and women. In addition, the French gradient with sparkles is gaining popularity. This is another interesting type of festive French manicure. As a rule, combining several shades of sparkles and rhinestones looks good with New Year's dresses and blouses.
Nail shape
Any nail shape is suitable for a French manicure. When choosing design ideas for a New Year's jacket, you need to pay attention not only to the decor, but also to the sawdust. It depends on the shape of the cuticle. An experienced master will always recommend the ideal sawdust shape that will look harmonious with both the anatomy of the hand and the design.
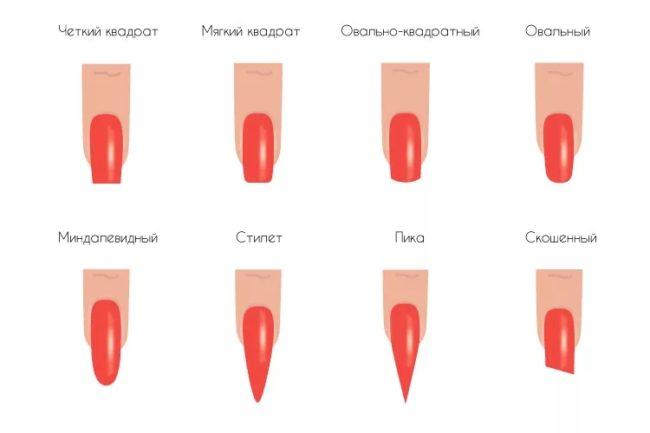
Square nail shape
The square shape is suitable for those with square cuticles. If the bed is elongated, then this choice will be ideal. Everything else will look pretty ridiculous. Beware of wide stock and short length. In this case, the nails will look like shovels.
The shape of a Frenchie's smile on a square file can be any shape: straight, slightly rounded, arched with the drawing of the tails extending to the middle of the nail folds.
Oval nails
Oval is suitable for absolutely all types of cuticles. The length can also be any. The main thing is not to turn your nails into cakes. The oval can be soft or slightly narrowed.
The drawing in this case has a rounded line. The boundaries of the jacket can be at the points of growth, or extend to the middle of the nail folds.
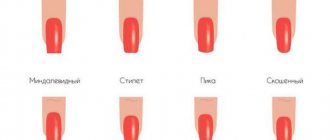
Almond, lance, stiletto
Long, pointed nails look strict and elegant. They visually lengthen naturally short plates, make a wide bed elegant, and allow you to choose absolutely any nail design. This shape is not suitable for short nails.
The pattern on this form should follow the line of the sawdust. There is no need to make it wide. But the thinner the smile, the more elegant the appearance of the hands will be.
How to make snowflakes
Of course, not everyone can be an artist, and not every girl can draw a pattern with a brush. This method requires a certain skill and experience - all lines must be clear, thin and neat.
Therefore, to create this beauty, you can use both special manicure devices and improvised means - a toothpick or a needle. Simple methods also include stickers and decorative strips for manicure.
Using stencils
You can purchase a stencil in the cosmetics department of any store or make it yourself from tape - cut the desired pattern on a small piece with a blade.
After covering the nail plate with the desired color and drying the varnish, the homemade stencil is pasted onto the nail, and the slots in the design are painted over with varnish of the selected shade using a brush or sponge.
Carefully, trying not to smudge the drawing, remove the stencil. If you want to make not one element, but several, each subsequent one needs to be decorated only after the previous one has dried.
Finally, cover the resulting pattern with a transparent topcoat. Using this decor will save a lot of time, quickly enliven any manicure and give your nails a festive look.
Needles
With the help of a sewing needle or toothpick, after several trial attempts, you can create a winter composition or a simple snow pattern no worse than with a professional brush. The appearance of the design depends on what layer of varnish the pattern is drawn on - if you let the varnish dry, it will be thin and neat, but if you draw on something that has not dried, the contours will become more blurry.
In order to draw a snowflake on your nails with a needle, you need to put a dot with varnish of the chosen color and quickly, before the varnish has time to dry, stretch it in different directions with the thin end of the needle.
Dots
This is a double-sided thin stick with tips made of balls of various diameters. With this tool you can easily and simply place neat dots of different sizes, thus creating, for example, snowfall, individual elements of a large snowflake or any other pattern.
Dots are also useful for gluing and fixing rhinestones. To obtain even and neat dots, the dots should be held strictly perpendicular to the nail plate.