- 4874
- 0
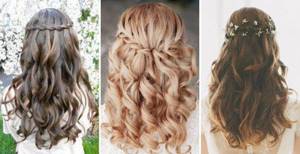
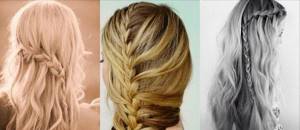
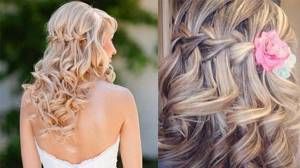
Women's hairstyles have always been distinguished by a wide variety, especially when it comes to long hair. And, since France is a trendsetter, French weaving also did not go unnoticed. Today we offer you to learn the technique of weaving a French braid waterfall with your own hands. During the article, you will be presented with photo and video lessons on the topic (step-by-step instructions) for hair of different lengths and different structures: long or medium, straight or with curls.
Who is the waterfall suitable for?
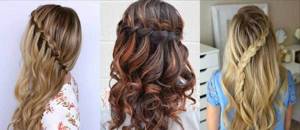
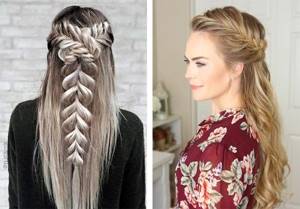
This variation of the French braid is truly versatile. It can be combined with traditional three-strand or four-strand braids, small braids and voluminous braids, as well as braids, curls and straight hair. A waterfall will help create an elegant image for a young business woman, a romantic one for a young girl, a mischievous one for a schoolgirl or little girl.
There are variations of waterfall hairstyles for different occasions. A woman can choose the one that is ideal for her in a particular situation. The only difficulty will be the insufficient hair length. Alas, a lover of very short haircuts is unlikely to be able to create a hairstyle with strands of French braids released. For a beautiful weave to succeed, you need chin-length hair.
Styling variations allow you to decorate faces of different shapes:
- for chubby young ladies, a hairstyle with increased volume in the crown area, freely hanging strands on the sides and bangs cut on the side looks very attractive;
- For those with a face shape close to a square, it is better to choose a waterfall hairstyle with braiding that runs diagonally along the head. In this option, you should not pull the strands too tightly;
- For girls with long faces, stylists advise not to give up bangs. It is better for them to weave a waterfall braid around the top of the head, parallel to the line of the shoulders;
- For those with a triangle-shaped face, a waterfall placed at the back or side will visually balance the contour.
The hairstyle is suitable for everyday wear to work, school, but can be used as a holiday option. Hairdressers advise brides and graduates to create a waterfall on their heads. This hairstyle is the perfect solution if you need to quickly get ready for an unplanned celebration. For evening styling, strands of braids are made voluminous or the hair is curled into ringlets.
For everyday life, weaving is simpler. The ends of the hair are left to hang freely. But a braid with loose strands is also suitable for curly hair. Unruly medium-length curls sticking out in different directions add ease and charm to the look. For those with thick, heavy hair, braiding helps to lighten the appearance of the hair.
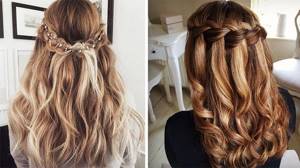
Fashionable today, ombre dyeing or strands of different shades also looks very advantageous if you braid your hair with a waterfall. Coloring or highlighting enhances the feeling that the strands are flowing and shimmering. A monochromatic color looks no worse in combination with a waterfall hairstyle.
Stylists do not recommend making a waterfall on dyed hair with regrown roots. This hairstyle will only emphasize the unkempt appearance of your hair. Mature ladies should also consider another styling option. A French braid with loose strands is considered ideal for little girls, young women and young women. The hairstyle emphasizes their sophistication, sophistication and spirituality.
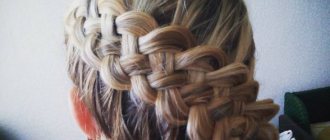
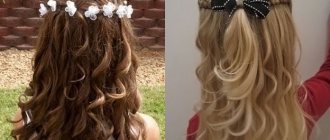
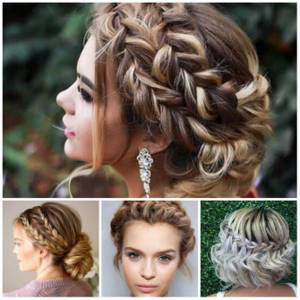
With curls
Waterfall hairstyle for long hair: step-by-step diagram.
- Before styling your hair, all your hair is curled using a straightening iron. The strands must be treated with special styling products that will protect the hair from exposure to high temperatures.
- After curling, backcombing is done in the root zone.
- A strand of hair is separated from the side.
- They begin to braid the waterfall; it must be remembered that the lower curl is not woven in, but replaced with a new one.
- Only the top hair is involved in the weaving process.
- The finished braid is secured with bobby pins, and the curls are sprayed with varnish.
- If some of the curls unraveled during manipulation, you should curl them again with an iron.
Adviсe
When starting to make a spikelet with released strands, you should familiarize yourself with the recommendations of professional hairdressers. This will help you avoid mistakes in your work and will allow you to quickly create a beautiful hairstyle that will not unravel all day:
- do not pull the strands too tightly (so as not to impair blood circulation and provoke a headache);
- it is easier and more convenient to weave if you use two mirrors at the same time - one should be installed in front, the other behind;
- if you are planning a grand entrance, you need to try the weaving option in advance;
- It is more convenient to weave on even hair of the same length; working on the basis of a short haircut “cascade” or “ladder” requires skill.
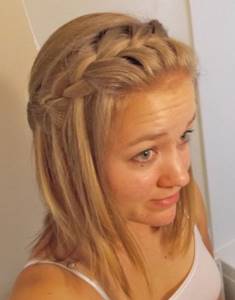
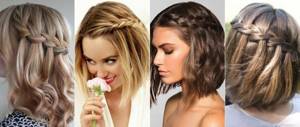
How to braid a waterfall braid on your own medium hair (video)?
With the help of a waterfall braid, not only long curls, but also medium-length hair are beautifully shaped. This hairstyle with a low waterfall braid looks especially impressive. The hair for the hairstyle must first be curled with curlers or a curling iron.
- If the hairstyle has bangs, it is separated and secured with a hairpin.
- Weaving begins above the ear, highlighting three starting strands.
- Braid the waterfall, making even strands.
- The direction of weaving leads first down to the base of the neck, and then smoothly rising up to the ear. You should get a neat crescent.
- Secure the remaining strand with an elastic band and hide it in your hair.
Types of “waterfall” with diagrams and step-by-step photos
It’s not difficult to create an original styling. Step-by-step instructions and video tutorials will help beginners braid their hair with a waterfall.
Before you start, you should stock up on the necessary tools - a thick comb, a comb with a thin long end, several colorless silicone rubber bands. To add volume and fix the finished styling, you can use foam, varnish or wax.
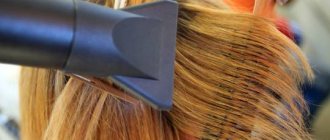
First you need to wash your hair. Squeeze a little mousse into your palm and distribute it over the strands. After this, you can dry your curls and get to work.
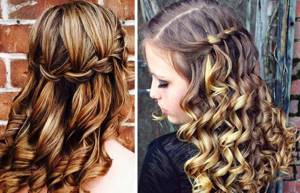
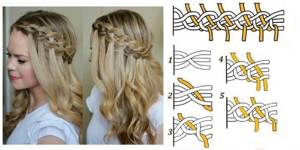
Classic waterfall
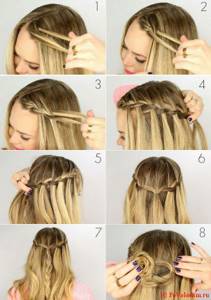
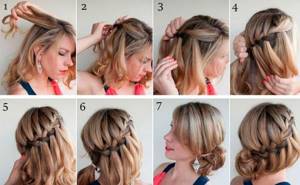
Almost all variants of this styling are created on the basis of the classic French spikelet with flowing strands. To master the weaving technique, you should follow the instructions:
- Comb your hair thoroughly.
- Part your hair.
- At the left temple, grab a strip of hair and divide it into three strands.
- Start braiding according to a regular braid pattern.
- After the first link, release the lower strand and replace it with a new one, grabbed from above.
- Next, weave all the upper tufts of hair, capturing additional strands from the non-working part of the hair, while the lower ones should be left freely flowing outside the braid.
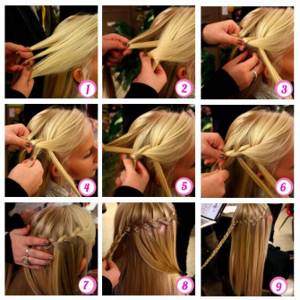
Following the step-by-step description, continue weaving to the required length. The ends of the braids are secured with an elastic band, the loose hair is carefully combed and left straight or curled into curls (you will need a curling iron).
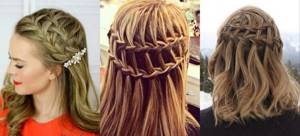
Double waterfall
A waterfall with two parallel braids looks very unusual. The technique for creating it is the same as the classic version. The upper braid completely repeats the above diagram, and the lower braid captures loose strands.
From two strands
In a double waterfall, you can use a fishtail, spikelet, or other weave format. How to create a hairstyle is well shown in the video.
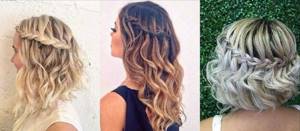
One-sided option
In the asymmetrical version of the waterfall hairstyle, the braid is braided on one side of the head. Work begins from the temple, moving to the opposite one and going down to the occipital area. A very interesting hairstyle that captures the hair only above one ear.
Double-sided option
The technique is no different, except that the weaving is not performed on one side, but from one temple to the other towards the back of the head.
Master class in step-by-step photos:
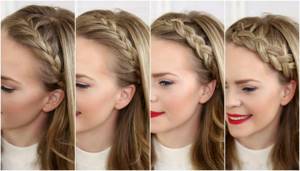
Waterfall-rim
This hairstyle is ideal if a girl wants to free her forehead from hair and focus on the beauty of her eyes. Start braiding the headband from the temple and continue working along the hairline. Grasp the strands above the face, leaving the loose ones at the back of the braid.
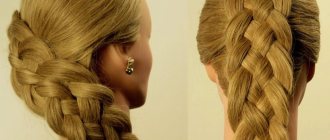
With a voluminous braid
At first glance, the original three-dimensional design may seem difficult to implement. In fact, everything is simple:
- Well-combed hair grabs near the temple.
- The strand is divided into 3 equal bundles, and the braid begins to be braided.
- In each new link, the strands are not laid on the main braid, but placed under it.
- Next they weave like a classic waterfall, releasing the free ends from the outside.
- The completed braid is secured with an elastic band, then the halves of each link are carefully pulled up, making them fluffy.
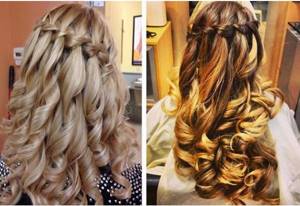
Waterfall on curls
Long or medium-length curls go well with the original braid. It is braided in the same way as on straight hair. For those with thick, heavy hair, experts recommend curling your locks after braiding. For those whose locks are not too long, it is better to twist them before styling. This option definitely requires the use of hairspray to fix the curls, otherwise the hairstyle will lose its original appearance in a few hours.
With ribbons
To create this version of a waterfall, you need to prepare in advance a narrow ribbon, which contrasts in color with your hair or its shade matches the color of your clothes or eyes:
- The ribbon is tied at the base of the working strand so that the tip of the ribbon can be hidden under the hair.
- The braid is braided according to the classic pattern. During operation, you need to ensure that the tape is always on top.
- When the braid is finished, its tip is fixed with the free part of the ribbon, a knot is tied, and a small bow is made.
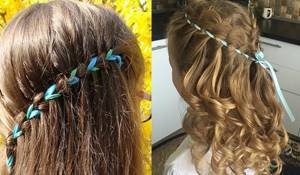
This braid is ideal for a girl to attend kindergarten or school.
With knots
A very original hairstyle can be easily created even by inexperienced braiders. This version of the waterfall braid can be braided yourself while going to work; it is also suitable as an evening hairstyle. The video tutorial will introduce you in detail to the knot waterfall technology.
Loose, loose strands can be left to fall or gathered together, secured with an elegant hairpin. Another option is to braid each strand into simple braids, the ends of which are secured with bright thin or transparent silicone rubber bands.
Like a princess
No less interesting than the double French waterfall is a hairstyle in which the braids are braided, starting from the temples, and gathered together in the central part of the head. This option is called a Disney princess braid. And, although the name of the hairstyle will appeal more to the baby, in fact this is an option that can be used for daily trips to school or work by an adult girl.
The technology for creating a hairstyle is simple:
- A bunch of hair (the collected ends of the braids) is divided into 3 strands, and they begin to weave like a regular braid.
- From the second link, grabbing the hanging strands. First, take those tufts of hair that are closer to the center of the head, and pick up the distant ponytails in the next links.
- The end of the vertical braid is secured with a small decorative hairpin or elastic band.
The video tutorial will be a visual aid for those who want to make an unusual hairstyle on their own.
With a bun
Using the classic method, braid your hair from one ear to the other. Lightly comb the hair that is not involved in the work to create volume.
Twist the strands into a not too tight bun, lay it at the back of your head, secure with several bobby pins or hairpins.
Classic weaving
You will be interested in:Hairstyles of the 30s: recognizable style, haircut patterns, shape and styling method, use of hair accessories and fashionable colors for dyeing
You may be interested in: How to tie a bandana beautifully: photo options
Classic styling looks romantic and is very easy to do.
Here are step by step instructions for the French Falls hairstyle.
- Comb the entire hair thoroughly and treat it with styling foam.
- A small strand is separated in the temporal part (above the ear).
- It is divided into three parts, several braids are made according to the pattern of a regular braid.
- We make the first “stream of water” from the hair. To do this, leave the top curl of the braid free.
- Next (from under the weave) a strand is taken from below, woven in and a free strand taken from above is released again.
- Then you need to continue weaving in a circle to the next ear, each time the curl taken from above is left free, and the lower one (from under the braid) is woven in instead.
- Finish weaving on the opposite side.
- The finished braid must be secured with a bobby pin or elastic band.
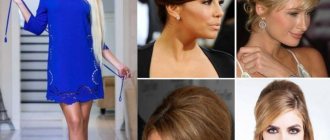
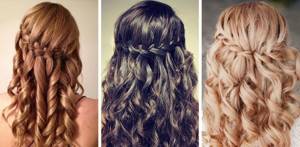
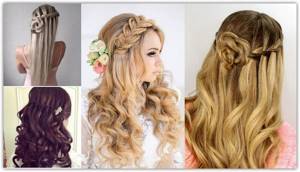
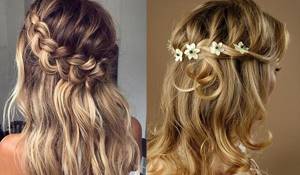
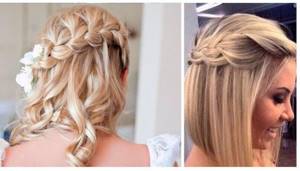
Photos of wedding, evening and everyday hairstyles
Our selection of photographs will help you decide on the most suitable option for a special occasion - a wedding, graduation or romantic date.
A mandatory addition to festive braids is decoration. It could be one large or a bouquet of small flowers, a hairpin with crystals, or any other thing you like.
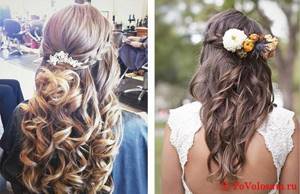
You don't have to go to the hairdresser to get such a luxurious hairstyle. With the help of our master classes, you will learn how to create different variations on the theme of the French “waterfall” braid with your own hands.
Don't be afraid to experiment, whether you have straight locks or wild curls. The result will always please you!
How to decorate a girl's head
Any hairstyle looks more elegant if it is additionally decorated with a variety of decor.
In the case of a waterfall spikelet, ribbons, all kinds of hairpins and fresh flowers are appropriate.
The waterfall on multi-colored strands looks very interesting. To do this, you can buy bright tresses and weave them into a braid, or take crayons of different colors, dye your hair, and then braid it.
The waterfall hairstyle is a universal option for a daytime walk or an evening event. There are quite a few options for creating, you can choose the one you like best and that is suitable for the occasion.
Hair rings
Prepare your hair for braiding; the entire hairstyle will take you no more than 90 seconds. You will need: wax and a product to prevent your hair from becoming frizzy and electrified.
- Comb your hair and part it evenly.
- Separate a section of hair from the parting to the ear. You should end up with a rectangle with one side parted.
- Separate a strand in the area above the ear. Then we treat the separated strand with wax or silk, lightly rubbing it on our fingers.
- Make a ring from the strand using 2 fingers, winding the strand around them. At the same time, hold it in the place where the loop meets the long end so that the ring does not fall apart. The curl is on the index and middle fingers, and the thumb holds the tip.
- I grab the next strand with 2 fingers that are in the loop. Don't forget to wax. Pull the loop through the resulting ring not all the way, but make sure that the end of the first link is under the rings on the inside.
A visual video on creating hair rings in the shape of a waterfall: