Types of arrows
You can decorate your eyes with arrows in different ways. The main goal is to highlight and emphasize the beauty of the eyes, and to disguise imperfections . The arrows must match the color design and style of the shadows, and the targeting of the makeup. What types of arrows are there:
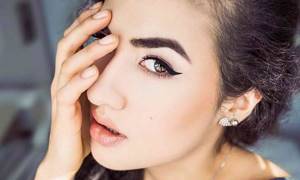
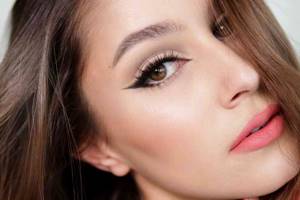
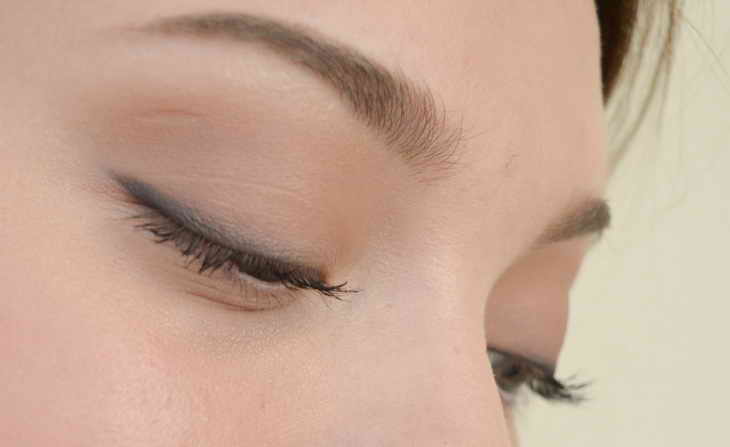
- classic arrows (regular) along the edge of the upper eyelid, going beyond the contours of the eye or ending the line in the corner. Often used when creating Korean makeup.
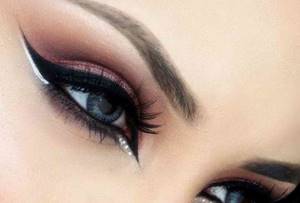
- Eastern (double) - draw on both eyelids at once, and apply the lower arrow separately from the upper one. Draw each of them from the inside of the eye to the outside. At the outer corner, do not connect the arrows with each other, but pull them with two parallel lines towards the temporal region, slightly lifting the lines upward.
- Egyptian arrows - applied along the edge of both eyelids. The arrow on the lower eyelid at the inner edge of the eye, one third short of the end of the eyelid line, deviates downward, forming an acute angle with the eyelid line. Visually increases the width of the eyes.
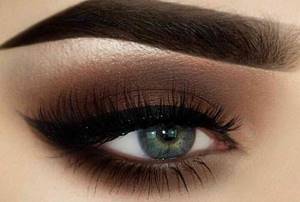
- An incomplete contour arrow running along the entire perimeter of the moving eyelid and from the middle of the lower one. Connect both arrows in the outer corner of the eye (draw with the continuation of the line beyond the contours of the eye socket or without continuation). Such arrows look good when creating smokey eye makeup.
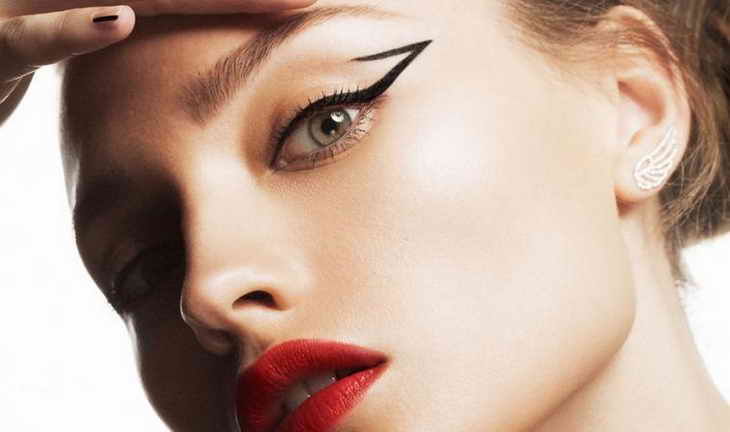
- “Wing” arrows are a very original version of a trivial eye accentuation. Using a dark or brown or blue liner (other means) on the upper eyelids, using separate strokes, draw arrows reminiscent of the open wing of a bird in flight, highlighting individual feathers. They look very unusual and are well suited for formal occasions, such as Hollywood makeup.
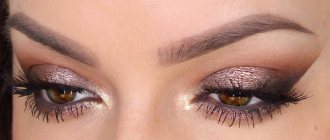
- a thick arrow in stages, from a thin arrow, gradually thicken the contours. Goes well with evening makeup.
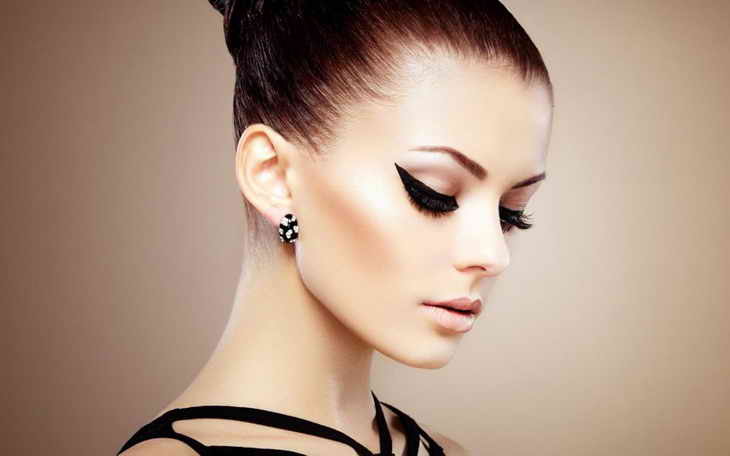
- Cat eye style - draw a line that thickens from the inner corner of the eye to the outer corner, slightly raising the line in an arc towards the temple. Pull the eyeliner of the lower eyelid along its entire length, connecting the outer corner with the upper stroke. Make the arrow thinner at the lacrimal glands and much wider at the outer corner of the eye. For this makeup, eyeliners of various colors are used: brown, blue, etc., although preference is still given to black eyeliner. This eye design goes well with oriental makeup.
- Shaded arrows are created, as you already understood, by blurring the clear contour of an ordinary thick arrow. When they give a look of mystery.
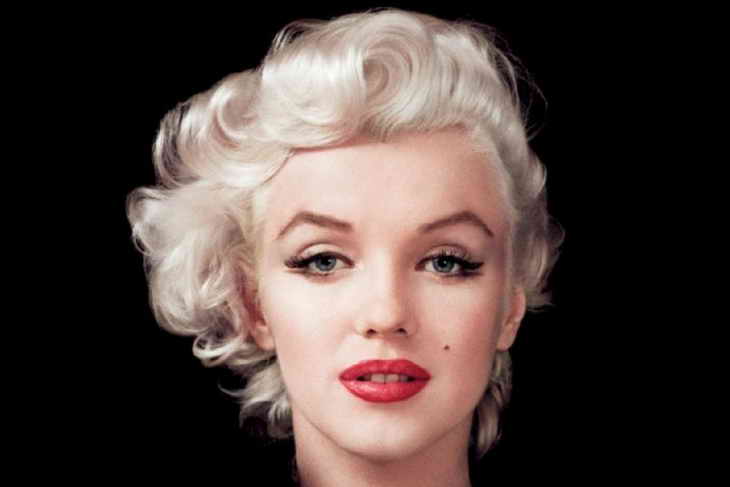
- In the “Marilyn Monroe” style - outline the moving eyelid, drawing the strip beyond the outer corner of the eye, slightly lift the tip of the arrow, making it thicker than the main contour.
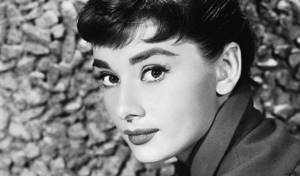
- “Audrey Hepburn” style - draw the arrow strip from the inner corner, making it thicker, starting from the highest point of the eyelid. Make the tip short, slightly raised towards the temporal region.
- “Creative” arrows - any shape, color and outline, make them using your imagination.
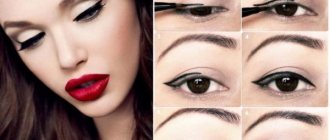
Arrows on the eyes for beginners
It is not easy to quickly learn to draw smooth contours of the correct shape. It will take patience and a little practice.
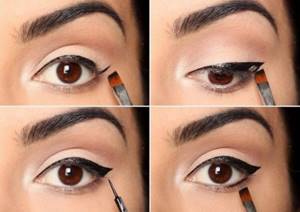
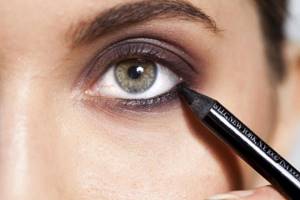
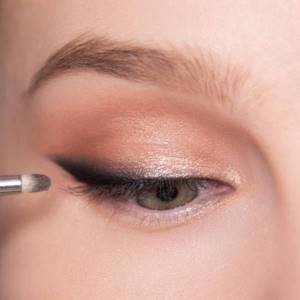
Drawing arrows with a pencil
A pencil is an excellent tool for inexperienced girls who are just beginning to learn the secrets of makeup. It is recommended to use a pencil with a soft lead for drawing broad lines, and with a hard lead for creating expressive, precise contours.
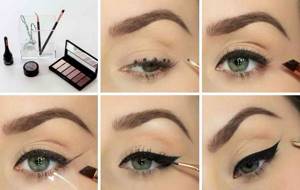
Step-by-step instruction:
- Clean your eyelid with micellar water and apply a special primer or powder. This creates conditions for good makeup fixation.
- Paint the space between the eyelashes with a hard pencil - the eyelashes will appear thicker and more voluminous.
- Make a baseline. It is carried out close to the eyelash contour, repeating the shape of the eyelid. The golden rule is that the line is drawn from the outer corner and becomes thinner towards the inner corner.
- Draw a tail. Using a jerky motion, draw a thin line from the outer corner slightly upward. It is important to maintain symmetry - to make the tips the same.
- Carefully connect the base line and the ponytail. For comfortable drawing, you can slightly stretch the skin of the eyelid.
You need to use a well-sharpened pencil.
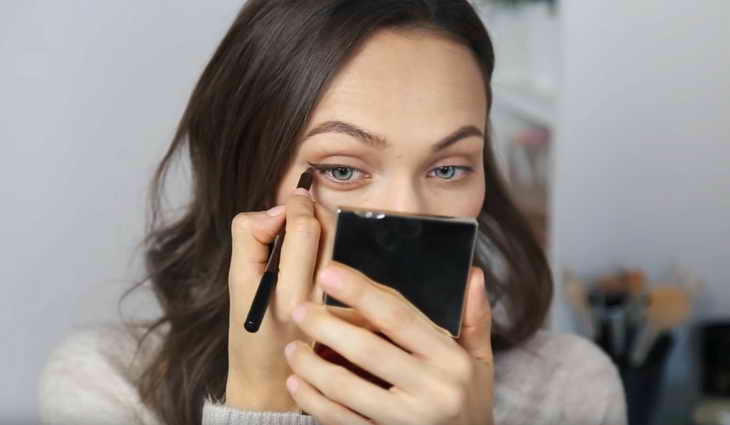
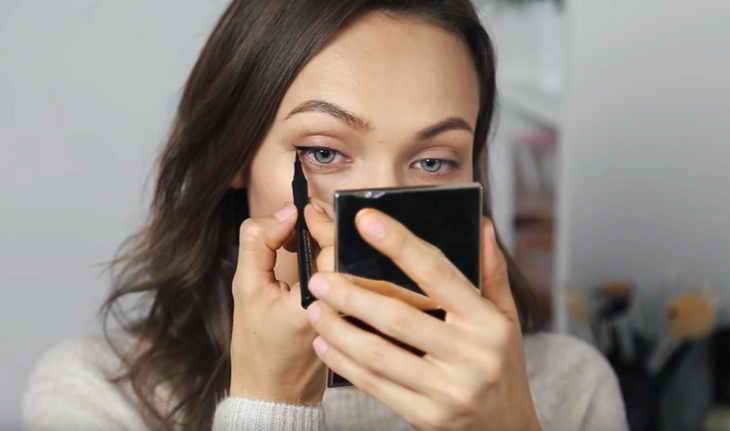
Eyeliner arrows
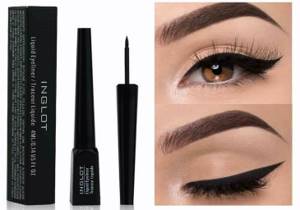
Liquid eyeliner is used to create thin, clear contours that make the eyes expressive and open.
Stages of creating eyeliner arrows:
- Choose a brush – a thin, angled, feather brush.
- Apply shadow to your eyelids.
- Carefully remove excess liquid from the brush, otherwise it will not apply evenly and will immediately spread.
- From the outer corner, draw a thin line of the eyelash contour.
- Make the ponytail with a light, smooth movement.
- Draw the main line - from the tail to the middle of the eyelid. For convenience, draw the contours with a pencil, and then simply fill in with eyeliner. You need to draw with a continuous movement, then smooth and uniform outlines will appear.
- Lighten the inner corner of the eye - the makeup becomes more voluminous.
Correct unevenness and inaccuracies with concealer.
Applying arrows with shadows
The smoky look created by shadows is mysterious, bewitching. This type of makeup eliminates the use of clear contours; small mistakes are easy to correct. Lines are drawn with a beveled natural bristle brush:
- Apply makeup base to your eyelid.
- Lightly dampen the brush with water or makeup fixative. This simplifies the application of arrows, the shadows do not fall off and lie in the required direction.
- Gently run the brush over your hand - you need to get rid of excess shadows, otherwise they will crumble onto your eyes.
- Draw the lines with light movements - from the middle of the eyelid to the outer corner, then from the middle to the inner. Carefully create a ponytail that matches the natural curve of the eyelid. Do not lower the tip to the level of the lower eyelid.
- Connect all the elements with a smooth line.
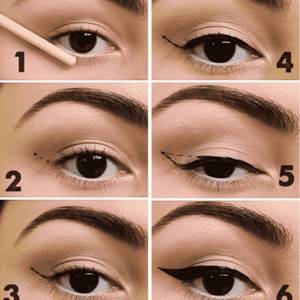
Arrows using a felt-tip pen
A felt-tip pen or liner is suitable for drawing clear contours, it is practical, even a beginner can use it. First you need to draw the space between the eyelashes, make a base line with a pencil, and draw the outline with a felt-tip pen:
- Apply primer to your eyelid.
- Draw a neat ponytail, without lifting it sharply up - the bends should be natural.
- Apply a base line, drawing the eyelash contour.
- Smoothly connect the outline and the ponytail, creating a classic arrow.
- Fill in the gap between the arrow and the eyelash contour with a pencil.
Minor mistakes and unevenness are corrected using a cotton swab moistened with makeup remover.
For convenience, the outline of the arrow is marked with several points and the desired line is drawn along them.
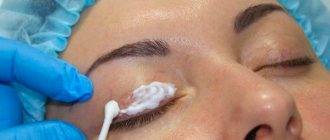
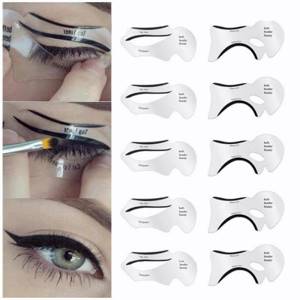
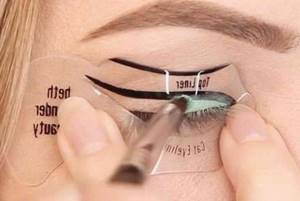
An interesting device for drawing complex-shaped arrows is a stencil. This is a ready-made template, cut out on an oilcloth base. The stencil is applied to the eye, the space is painted over.
Arrows on the eyes are a universal way to create a stylish, effective look. They help make the look expressive, deep, correct the shape of the eyes, and hide imperfections in appearance.
How to draw arrows
To create eyeliner, products with different textures are used. The brightness and saturation of the lines of the arrows and the visual impression of the design of the eyes depend on what types of eyeliner you used.
- Liquid eyeliner is the most common type of material for drawing arrows. The stripes are thin, clear, and clearly visible. The eyeliner lays down in a dense, bright layer with a well-defined border of lines. The material is resistant to rubbing and lasts for a long time. When choosing an eyeliner, pay attention to the brush; choose a brush with a pointed tip made of hard but elastic bristles. Liquid eyeliners include gel products, which are very durable and require special rinsing compounds.
- Dry eyeliner is compact, when applied it looks like thick shadows, and with its help you create blurry arrows. The main disadvantage is the poor durability of the coating; such arrows easily smudge and lose color.
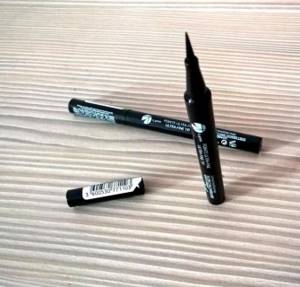
- Cosmetic marker for eyeliner - suitable for beginner makeup artists for independent use. It is convenient and easy to use. Using the product, clear, bright contours are drawn on the eyelids. The disadvantage of felt-tip eyeliner is that it dries quickly and the lines are insufficiently durable (they wear off quickly).

- The pencil is a solid type of eyeliner, easy to use, well suited for beginners in the field of makeup. It is easy to draw outlines, although the contours are not always clear. A big plus is the durability of the product. There are models in the form of ordinary pencils with a wooden body that require sharpening, with a retractable lead, and others.
- Arrow stencils are often used to help beginners . This additional tool is a piece of plastic, flexible cardboard, or a paper sticker with an existing shaped cutout. The stencil is applied to the eye and the outline of the arrow is outlined.
Benefits of different eyeliner products
Eyeliner
Liquid eyeliner is great for almost everyone and is one of the old classics for lining the eyes and drawing wings. Liquid eyeliners are usually not too expensive, which is also quite good. Liquid eyeliner makes it easy to create crisp, thin lines and create vibrant looks. But using this tool is quite problematic for drawing shaded arrows, especially without using shadows or anything else. Also, arrows made with liquid eyeliner are quite bright and may not suit everyone.
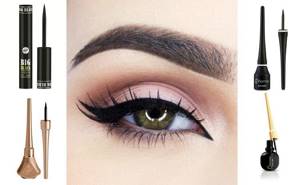
Liner or felt-tip pen
Liners are close relatives of eyeliners - they are compact and convenient. But they are fragile and tend to dry out. Although the arrows from such a device are no worse than from eyeliner (and sometimes even better), they have the same disadvantages as eyeliner.
Eyeliner
A fairly universal tool for drawing any type of arrows. With a pencil you can draw both bright and shaded arrows and they will look excellent. But the pencil will leave not very clear lines, like eyeliner or a felt-tip pen, and the arrows themselves will be a little faded - it’s up to you to decide whether it’s a minus or a plus.
Shadows
Arrows can also be drawn with shadows, but the lines will not be very clear, and if you choose low-quality shadows, the arrows can quickly crumble or be erased. And for any type of shadow, after using it for eyeliner, it is better to fix the makeup with special means. But the shadows are just perfect for shaded arrows that suit almost everyone.
Also, you shouldn’t give up all the means and use only one, because they can be combined and create new, more complex images.
How to draw arrows with a pencil
There are different ways to draw with a pencil:
- With one movement of the hand , without lifting the eyeliner strip from the eyelid. Requires experience and dexterity; usually this technique is mastered by experienced makeup artists.
- Arrows drawn according to a dot pattern - dots are placed on the eyelid along the contour of the future eyeliner at certain intervals, which are connected into a solid line.
- Drawing a line with strokes - draw contours with short strokes. The resulting thin line is painted over with a continuous layer of eyeliner.
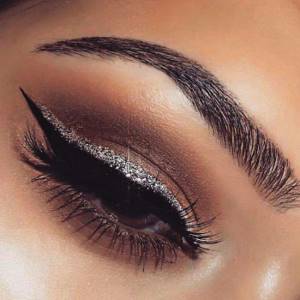
Shiny arrows
Eyeliner made with glitter or shiny pencils (especially colored pencils) will perfectly set you apart from the crowd and make your image brighter and more unusual, even if your eyeliner is just classic.
How to draw arrows with eyeliner
Typically, when using liquid eyeliner, several methods are used:
- From the opposite - first draw the tip of the arrow behind the outer corner of the eye, after which the edge of the eyelid is outlined.
- With the second layer, first draw an ideal arrow with a light-colored pencil (gray, light brown). The second step is to apply liquid eyeliner over the existing line. The line turns out neat and even.
- With sufficient experience, draw a line with one movement of the hand as a solid line.
Shaded arrows
Such arrows are drawn with shadows or a pencil and are not distinguished by their durability if they are not fixed and a primer is not used.
For shaded arrows, a thick line is enough, running from the point you want on the eye to the point you want outside the eye. You just have to immediately make a pointed end and lightly shade it with a brush with shadows of the same color as the pencil or shadows were used.
How to draw arrows with shadows
Making eyelids using eyeshadow is done in several stages:
- The eyelids are prepared by applying a base or powder.
- Wet the brush a little with water.
- Place shadows on a brush and shake off the excess a little.
- Draw a contour, as in the case of liquid eyeliner.
- Shade the strip of shadows.
- Shade the ponytail with a light concealer (underneath).
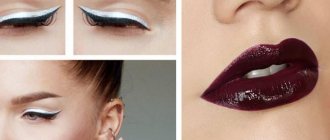
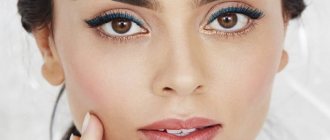
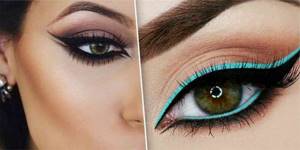
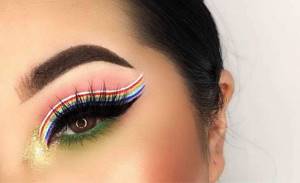
Colored arrows
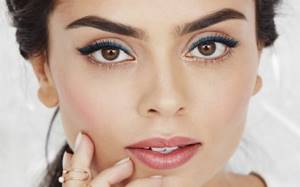
If you choose colored eyeliners or eyeshadows of unusual colors (pink, blue, green, etc.) for your arrows, then you risk becoming a trend. Two-color multi-layered arrows are also in fashion now. Typically, for such arrows, a black eyeliner is used as a base, and another arrow-stroke is drawn around it in any color (white, blue and red are most often used).
Eyeliners of different shapes
Eyeliner is an extremely convenient makeup tool, with the help of which the beauty of the eyes and their advantages are emphasized. Also, with the help of eyeliner design, their shape and cut are adjusted. With the right design, you can visually enlarge or reduce the desired parts of the face , in this case the eyes.
- In the case of a narrow eye shape, the best option is wide arrows, thickened in the middle area of the upper eyelid. Such lines are not drawn beyond the outer contour; mainly the upper eyelid is drawn, the lower eyelid is not drawn, and if necessary, the line is made small, about a third of the edge of the eyelid at the outer corner. Wide arrows visually make the eyes wider. They also resort to shading the contour using shadows. Also, it is not recommended to decorate the lower eyelid with bright shadows, so as not to focus attention on it.
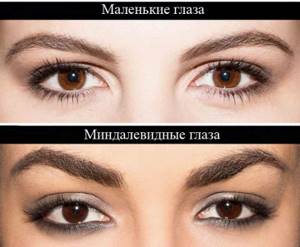
- Small eyes - it is not recommended to decorate the lower eyelid with arrows. It is better not to use black eyeliners, preferring light, light shades. With the help of light arrows, the look becomes more open, the size of the eyes visually increases. You can use beige, metallic eyeliner.
- All types of arrows suit almond-shaped eyes
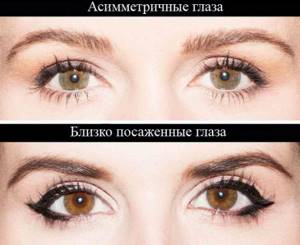
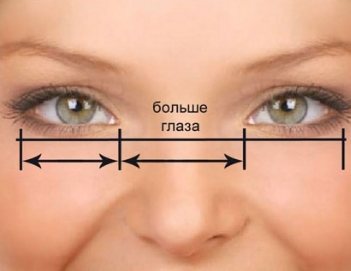
- When the eyes are placed close together, the goal is to visually distance them from each other. Drawing an arrow cannot begin from the inner corner of the eye; it is necessary to indent it. The line can be extended beyond the outer edge of the eye socket, but not too far; you can slightly round the “tail” of the arrow upward.
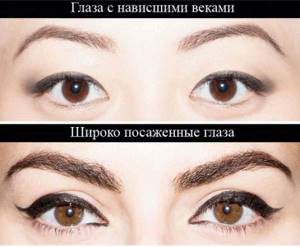
- If the eyes are wide apart , the best option is to draw an arrow along the entire length of the upper eyelid. The arrow line comes from the very corner near the lacrimal glands. The strip along the growth of eyelashes is especially clearly visible.
- For round eyes , draw the outline of the upper eyelid along the perimeter, draw the arrow beyond the outer edge of the eye, slightly raising it towards the temple. A thickened line on the upper eyelid in the corner of the eye will visually lengthen the shape of the eyes. They don’t make thin arrows, the drawn lines lead clearly along the growth of the eyelashes, they are shaded. The lower eyelid is not touched.
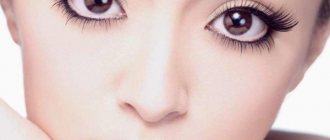
How to determine your eye shape
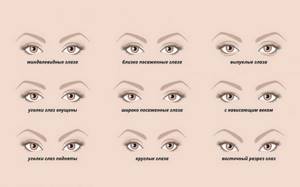
Eye shapes:
- Big eyes;
- almond-shaped eyes;
- eyes with drooping outer corners;
- eyes with a raised corner;
- drooping eyelid;
- small eyes;
- eyes that are close set;
- wide-set eyes;
- deep-set eyes.
If you want to determine your eye shape, then you need to ask yourself two questions. Do you have a crease (drooping eyelid) and can you see it?
1. Round eye shape (large)
Your eye shape is round (large) if you have a visible crease in your eyelid and there is a light coating surrounding your iris that separates it from your upper and lower eyelids.
These eyes often appear bulging, making them appear sad.
2. Almond-shaped eyes
If your eye shape is almond-shaped, you will see a crease in your eyelid.
Your iris will touch the top and bottom of your eyelid. This shape allows you to create perfect eye makeup. What a score!
3. Drooping outer corners of the eye
The eyes are shaped with a drooping outer corner, meaning the outer corners of your eyes turn downward. If you can't tell exactly, imagine drawing a straight line through the eye. Your outside corners are turned below the line, then you can guess what that means.
4. Eyes with a raised angle
An upturned eye shape is when the outer corners of your eyes lift up. Not sure about this? Use the same approach as when testing for drooping eyes. If your outside corners turn up above the line, then you have it.
5. Drooping eyelid
Eyes with drooping eyelids - with this shape, the moving eyelid is hidden and it becomes difficult to apply makeup.
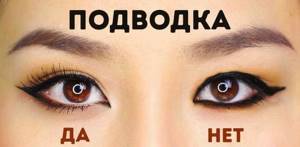
This shape visually makes your eyes appear smaller. For this eye shape, a theatrical arrow or “bat wing” is perfect.
6. Small eyes
Small eyes are often confused with drooping eyelids. Drooping eyelids take over the top corner of your eyes, causing your eyes to appear small. ( Also read: secrets and tips on how to make your eyes bigger with makeup).
7. Eyes set close to each other
Close-set eyes - These eyes are characterized by the fact that the space between the inner corners of the eyes is smaller than the eye itself.
This eye shape requires an arrow that will visually expand the distance between the inner corners.
8. Wide-set eyes
If the distance between the inner corners is greater than the eye itself, then these eyes are wide-set.
With this shape, you need to draw an arrow as close to the inner corner of the eye as possible.
9. Deep-set eyes
Let's get this out of the way once and for all - deep-set eyes have nothing to do with the shape of your eye; instead, it's all about position.
Let us explain. Round, protruding or almond-shaped eyes describe the shape of the eye. Usually by looking at the distance between the arch of the eyebrows and the eyelashes. However, with deep-set eyes the situation is different. Here's how to tell if your eyes are deep-set (or not).
The best way to find out if you have deep-set eyes is to examine your face from the side. Deep-set eyes, as the name suggests, are set further into the skull. This means that the forehead bone is more prominent and sometimes shadows the eyes, which can make them look small.
( Also read: 5 Eye Makeup Tricks).
Tips and secrets of makeup artists
Useful tips from makeup artists to help you create the perfect makeup:
- You should not draw arrows exclusively on the lower eyelid, this creates the impression of bulging eyes, which is not particularly beautiful.
- When drawing arrows, try to draw the contour at the very line of eyelash growth, this makes the eyes more expressive.
- Work with your eyes slightly closed, it’s more convenient.
- Make the arrows the same on both eyes, checking the creation of the arrows as you draw.
- When drawing an arrow, pull the eyelid a little to get an even strip of eyeliner.
- Always choose arrow styles that suit you.
Tips from professional makeup artists
To make high-quality makeup with double arrows at home, use the recommendations of professionals:
- do not make a completely closed contour of lines around the eyelids, as this visually makes the eyes smaller;
- to begin with, take hard pencils and only after mastering the technique of drawing contours, use liquid eyeliner and other means;
- to get a natural effect, use gray and brown shades;
- To increase the size of your eyes, apply light liners to the lower eyelids;
- to achieve a straight line, first make several points with a pencil in the places where the arrows are drawn or stick special devices on top (you can take tape, a stencil, cardboard);
- raise the ends of the arrows, otherwise your facial expression will seem sad;
- draw lines only with your eyes open;
- do not turn your head while applying makeup in front of the mirror - both eyes should be on the same parallel (so the arrows will be the same);
- use transparent powder as a base;
- pay special attention to the eyelash contour - it catches the eye the most;
- lean on your elbows when drawing lines to keep your arms stationary.
Every girl can learn to draw double arrows on her eyes. Therefore, try, experiment and learn how to do high-quality makeup. The main thing is to strictly follow the rules and proportions of shades.
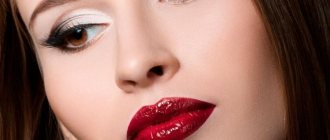
Who should wear brown eyeliner?
The choice of eyeliner depends on many factors: type of makeup, skin color and, of course, hair. For the case when you need brown eyeliner or shades of it, you should remember that dark brown eyeliner is best suited for those with red, chestnut, dark brown, as well as blond, light brown hair. For those with dark skin color, a red-brown shade is ideal for those ladies, while fair-haired girls should give preference to a light brown contour. Brown eyeliner and all its shades are very practical and beautiful, so they are ideal for everyday makeup.
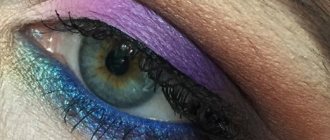
How to highlight blue eyes
The blue shade of the pencil looks least advantageous with blue eyes. Because it, like blue shadows, merges with the color of the eyes and makes the look blurry, rather than clear and expressive. Although there are exceptions here, sometimes even the most unexpected combinations give great results. If you don't want to risk it, you can use a darker blue instead, like the Slide & Stay pencil in Cobalt. It harmonizes well with the dark contour of blue eyes.
Another pencil color that owners of blue eyes should be wary of is jet black. It may turn out to be too rich, and this will make the look heavier or even add age. Try replacing it with a dark brown, like our shade Loon, or, for example, olive. They will add expressiveness to the look, but at the same time maintain softness.
And if you want even more daring experiments, then you can try pink or golden shades of the pencil. They will perfectly highlight the blue color of your eyes and make it even brighter.
Which pencil is suitable for green eyes?
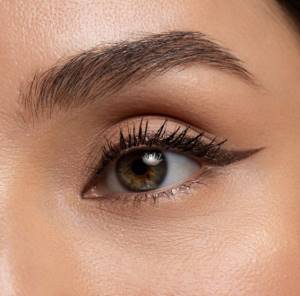
The most suitable pencil color for green eyes is brown. It harmonizes with the shade of the iris, complements it and makes the look deep and expressive. At the same time, the brown shade will not make the look too sharp, even if you draw clear arrows, and in the shaded version it is suitable for even the most natural makeup.
A gray or taupe pencil, such as the Robin shade of the Slide & Stay pencil from the Color Salute line, is also suitable for bright green eyes and will not draw attention to itself.
And to create a bolder look, you should pay attention to a purple or golden shade; they will add a bright accent to your makeup and highlight the color of your eyes.
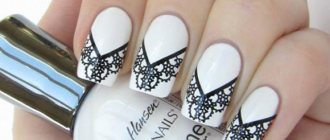
Unusual arrows
Arrows with unusual shapes or with decorative elements are perfect for festive events or unusual photo shoots. If you look at the shape, you can make lightning arrows, or add a heart or flower to the end of the arrow. You can also decorate the arrows with rhinestones, sparkles, flowers (both dried and artificial) - there are many options and they are limited only by your imagination.
This is how you can diversify your image with seemingly ordinary arrows. Or learn how to easily and without problems draw arrows that suit you and create new, unusual, interesting images.