Moon manicure - a fashion trend or an echo of the past? Read the article on how to make a stylish moon manicure.
The fashion world does not stand still, but is rapidly moving forward in big and small steps. Fashion for clothes, hairstyles, and hair coloring is changing rapidly. Even manicure fashion changes almost every day.
Unusual fashionable manicure
Today an elegant French manicure is in fashion, tomorrow a contrasting gradient on nails is in fashion, the day after tomorrow something else will be in fashion. And these trends need to be taken into account not only by manicurists, but also by their clients. Firstly, in order not to look old-fashioned, and secondly, it’s always nice to be one of the first to try something new.
A very unusual manicure is a fashion trend
What is a manicure with a hole called?
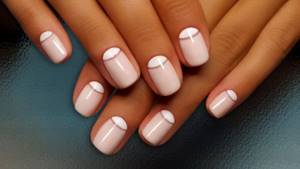
In fact, a lunar manicure or a manicure with holes is some kind of alternative version of the familiar French manicure (French). French is when the top of the nail is highlighted with a different color of polish from the main color of the nail.
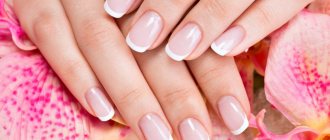
The traditional version uses flesh-colored varnish, white and transparent.
Traditional French manicure
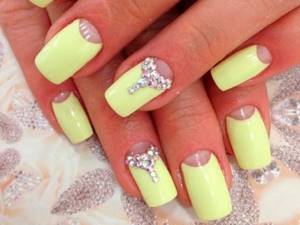
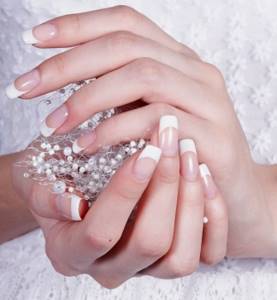
A more modern option involves the presence of more contrasting colors, additional patterns, gradients, rhinestones, and sparkles.
French manicure with rhinestones
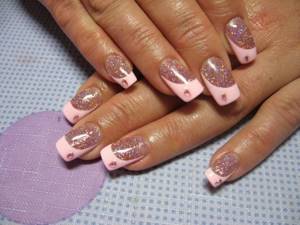
French jacket with glitter and patterns, asymmetrical
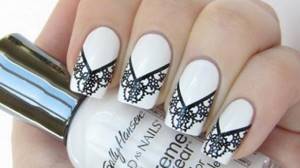
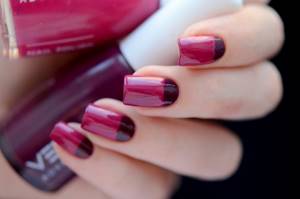
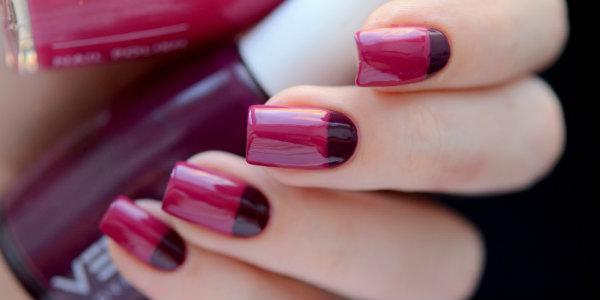
Manicure with holes - highlighting the hole of the nail from below with a different color, rhinestones, sparkles, whatever.
So, the main difference between a real French manicure and a lunar manicure is that a French manicure involves highlighting the nail from above, and a lunar manicure from below.
traditional moon manicure

Moon manicure with additional elements
Sometimes masters use not semicircular holes, but triangular ones. The manicure turns out stylish and unusual.
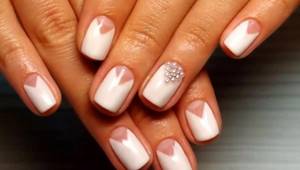
Manicure with triangular holes
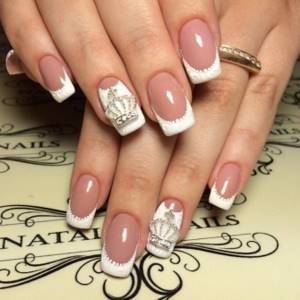
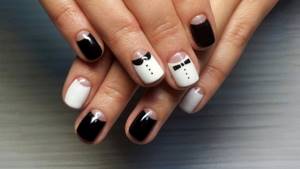
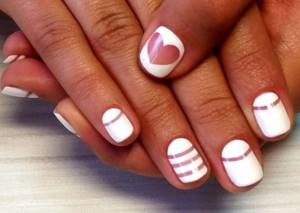
Some masters, at the request of clients, can combine moon manicure and French manicure. Then a very beautiful, fashionable, combined manicure is born. You can add rhinestones, patterns and sparkles to this manicure. But you need to know when to stop, since the abundance of small details greatly distracts attention.
Combined moon manicure and French manicure
Water Marble manicure at home Water Marble manicure >>>
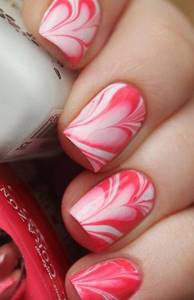
By visiting the section “water manicure at home” you can get acquainted with this amazing technique, look at the step-by-step photos
with a detailed description and learn all the subtleties of implementation. After watching a video on water manicure, you will get new ideas that you can then implement on your nails. Water manicure at home - view photos, videos >>>
How to do a moon manicure at home: step-by-step instructions
Making a lunar manicure “like on the cover of a magazine” is not at all difficult. But such a manicure will require some accuracy and understanding of the basic principles of creating a spectacular manicure.
Even if you are a complete beginner, creating such a manicure will not be difficult if you follow all the tips below.
So, what is needed to create a manicure with holes?
- nail file
- several cotton sponges
- orange nail stick
- nail polish remover
- a product to treat your finger before a manicure or something greasy so that the polish can be easily wiped off your finger
- two colored varnishes and a clear varnish to fix the work
- special stencil (circle with a hole inside)
- patience
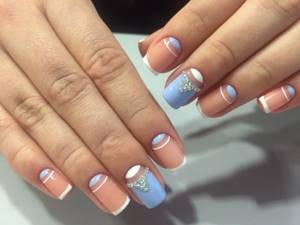
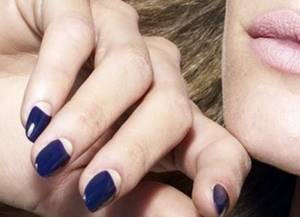
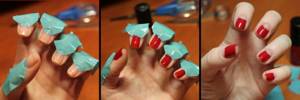
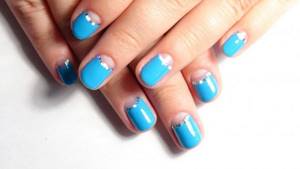
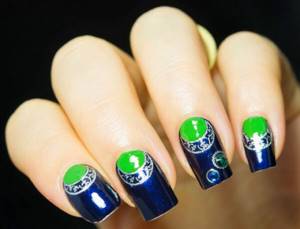
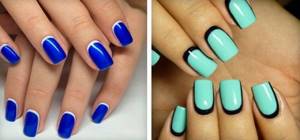
If you do everything correctly, you will end up with a manicure like this.
Blue manicure with holes
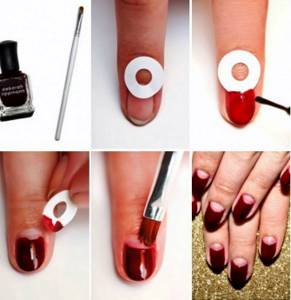
Now the technology for creating a blue moon manicure:
- Treat the nail. Using a nail file, make the perfect shape of your nail, and using an orange stick, push back the cuticle, degrease the nail plate and apply a base coat. Treat the finger itself near the nail with a special mixture so that any varnish that accidentally gets on the skin can be easily removed
- Apply an even layer of base varnish to the prepared nail. In our case it is white varnish
- Now you need to apply a stencil, slightly extending beyond the base of the nail, to create a crescent
- Apply a varnish of a different color (in our case, blue) to the remaining part of the nail without a stencil.
- Secure the resulting manicure with a layer of colorless varnish.
Advice! Apply a new coat of varnish only after the previous layer of varnish has completely dried. Otherwise, the varnish will become covered with bubbles or simply will not dry, and your efforts will be in vain.
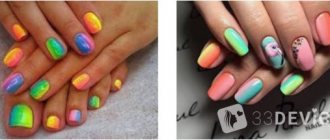
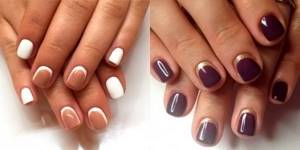
This is the simplest version of the moon manicure. If desired, you can use other colors of varnish.

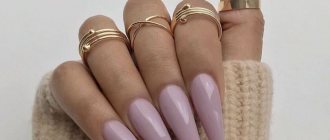
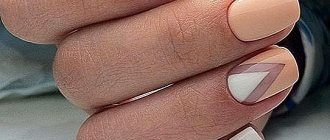
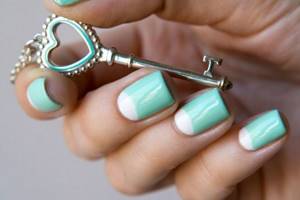
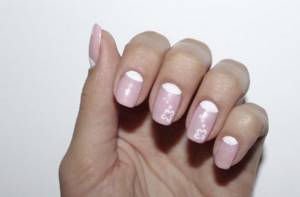
Lunar manicure in pastel colors
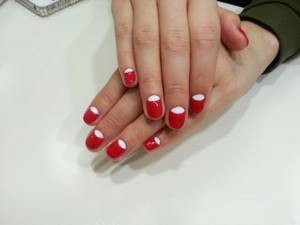
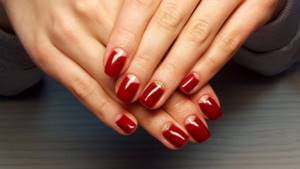
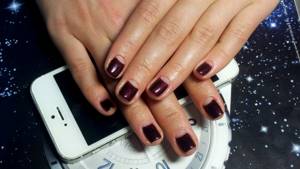
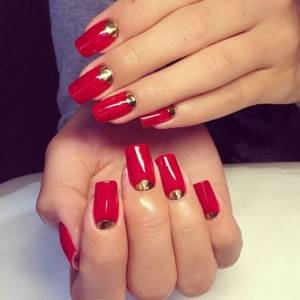
Red moon manicure
Lunar manicure with blue polish
How to evenly draw holes on nails with gel polish or shellac?
Drawing an even pattern on nails is an entire art that requires maximum concentration from the artist. The exception is if a stencil is used. There's enough precision there.
But the hole on the nails must have an ideal shape, otherwise the manicure will look cheap and sloppy. If you don't need this effect, arm yourself with a brush, gel polish and a lamp and go!
To ensure that a manicure with holes using gel polish and shellac comes out “as it should”, prepare:
- two gel polishes, contrasting in color
- base for gel polish
- thin brush
- UV lamp
- stencils for French manicure
Lunar manicure on nails with gel polish
Now the most interesting thing is - what are the ways to draw the perfect hole on the nail?
Method 1:
- Apply the outline of the future hole with a very thin brush.
- Paint the hole in 2 layers, drying each layer for 2-3 minutes.
- Then apply a colored coating above the hole, reaching the border with it, and do the same with it
- Finish the manicure with gel polish and seal the coating.
Method 2:
- Apply colored gel polish to the entire nail and dry well.
- Draw a hole on the dried layer of gel polish with a brush, fill the boundaries of the hole at the base with a varnish of a different color, dry
- Finish the manicure with gel polish and seal the coating.
Method 3:
- Mark the location for the future hole
- Apply colored gel polish to the entire nail and let it dry. It is advisable to do two layers
- Apply varnish of a different color into the hole and dry. Make two layers
- Finish the manicure with gel polish and seal the coating.
Bright manicure with gel polish with holes
These were the main ways to create a perfectly smooth hole using gel polish and shellac. Above was a method for creating a lunar manicure using a stencil. This method is also suitable for any type of varnish, not just regular one.
Technology for creating moon manicure with gel polish
In 2010, the holes were painted over on all nails. But today such manicure is done more sophisticatedly. The hole is painted on only one of the fingers. Thus, the design draws more attention to the hands of its owner.
To create a design you will need:
- Base and top for gel polish
- Stickers, stencils or a thin brush for design #1 if you are confident that you will draw the holes evenly.
- Two great gel polish colors. The classic choice: white dense gel polish for a French jacket and classic dense red, pink or pastel. But don’t be afraid to fantasize and play with contrasts.
IMPORTANT!
Use only dense shades of gel polishes. When choosing, carefully read the color descriptions on our website.
- Decorations for design as desired. Usually necessary if you have chosen soft pastel colors. If you like brighter colors, then using them is not recommended. The design will be too overloaded.
How to evenly draw a hole on your nails with acrylic paint?
The technique of applying a hole with acrylic paints is no different from the technique of applying a pattern with gel polish or regular varnish.
To bring the idea of creating a lunar acrylic manicure to life, prepare:
- brush
- base varnish, varnish base, clear varnish
- dots (or a regular needle), perhaps a toothpick
- cotton pads
- nail polish remover
- acrylic paints
Moon manicure with additional elements using acrylic paints
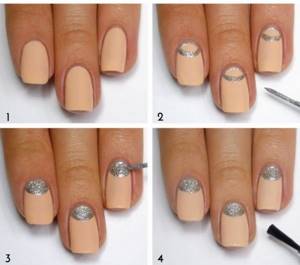
To make a moon manicure with acrylic paints, follow the instructions:
- Prepare your nails: shape them, push back the cuticles, degrease the nail plate.
- Apply a coat of base coat and base color and let it dry.
- Now, using a thin brush, pick up acrylic paint of the desired color, mark the boundaries of the future hole, and fill the hole with paint.
- Now an optional step: using a dot or a needle, you can make absolutely any design on your nails, in addition to the holes - monograms, flowers, butterflies.
- After the paint has dried, apply a coat of clear varnish to seal the work. This step is required.

Fashionable moon manicure using acrylic paints
That's all.
Manicure with holes using acrylic paints is ready! This manicure won't last as long as gel polish, but it's still worth a try.
How to evenly paint a moon manicure with regular varnish?
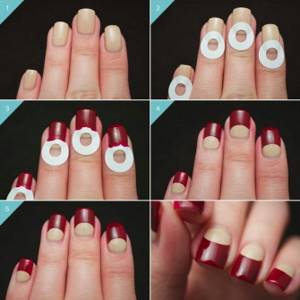
The easiest way to draw holes using regular varnish is a stencil. This method was described in detail above, so there is no point in writing about it again.
Advice! If you don't have a special French manicure stencil, you can make your own from cardboard and tape, or use regular duct tape, masking tape, or plastic-coated adhesive tape.
Creating a lunar manicure using a special stencil for a French manicure.
Lunar manicure using homemade stickers with regular varnish.
Lunar manicure with regular red varnish
Moon manicure step by step
Lunar manicure with shellac using a stencil
Shellac is a type of gel polish that combines the properties of gel and regular polish. Shellac is as easy to apply and remove as regular polish.
Shellac moon manicure idea
Unfortunately, there are no special secrets or mysteries for creating a lunar manicure with shellac. There is a proven scheme for applying shellac, which you need to take as a basis and stick to it throughout the entire creation of a manicure with holes.
- Give the nail the required shape, prepare it for applying shellac, having previously degreased it
- Apply shellac to the nail plate
- Apply a layer of shellac
- Manicure is ready
In just 5 steps you can create a moon manicure with shellac. This is much faster than using gel polish, because the latter needs to be dried after each applied layer. Shellac does not require such an attitude.
A stencil method for creating a manicure with holes using shellac
Learning to use shellac
The advantages of gel polishes are obvious, and therefore more and more girls give preference to it.
Many have already acquired everything necessary to perform such a coating at home. If you also want to understand how to make a lunar manicure with shellac, be sure to go to a cosmetics store and buy everything you need:
- UV lamp (there are miniature USB models that can dry nails within 10-15 seconds)
- The basis
- Varnish of the color you need
- Degreaser
- Stencils
- Fixer
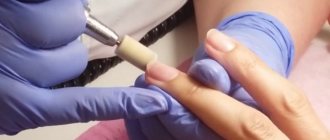
The technology for applying shellac is not much different from conventional nail coating. But when using gel polishes, it is necessary not only to perform a manicure, but also to polish the entire surface of the nail using a buff. There is no need to overdo it - just remove the shiny layer.
After this, apply the base and send the nails into the lamp for a few seconds (you need to look at the box of your UV lamp for the exact time, since this indicator varies among different manufacturers).
Considering that shellacs are easy to work with and do not reprint, you can try to make a “moon” in the Dior style. To do this, you should carefully cut the French stencils (so that they turn out thin) and glue them where you want to see the hole.
Colored varnish is applied to the growth area of the nail (at the base it is better not to use too dark colors - it will give the impression that you are sick or have pinched the nail). From the other edge of the stencil, apply any varnish that you like.
After waiting for the colored layer to dry completely, you can carefully remove the stencils: an intricate manicure with a small transparent hole will appear on your nails. Next, the entire surface of the nail should be covered with a fixative (several layers are possible) and sent back to the lamp.
At the final stage, the nails must be wiped with a degreaser to remove the sticky layer of shellac. When the manicure is completely ready, it is recommended to lubricate the cuticles with nourishing oil and enjoy the spectacular design for 2-3 weeks.
- Using a lip scrub at home will immediately affect their condition: the surface will become smooth and velvety.
- You can diversify your French manicure with the help of drawings, stones, broths and other accessories; examples can be found in our article.
How to do a manicure with triangular holes?
A manicure with triangular holes is done slightly differently than a manicure with crescent-shaped holes. Nevertheless, even in this design, lunar manicure is quite simple and almost anyone can do it.
Stylish moon triangular manicure
So, to create a lunar triangular manicure you will need:
- Two varnishes of different colors and one clear varnish
- Nail polish remover, cotton swab
- Two strips of adhesive tape, adhesive tape, adhesive tape, electrical tape (optional)
- File and orange stick to shape the nail
- Time and patience
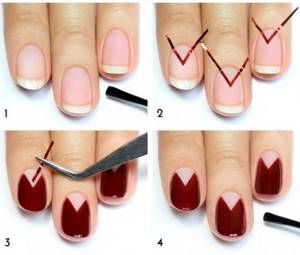
Step-by-step description of the process itself:
- Prepare the nail for applying polish: treat the nail plate with a nail file, remove or push back the cuticle using an orange or cotton swab for this procedure, degrease the nail using a primer or regular nail polish remover.
- Apply a base coat of the color you would like to see in the socket area.
- Now cut out thin strips of adhesive tape and glue them in a triangle, as shown in the diagram below
- Paint over the part of the nail that is not covered with stripes with a different color of varnish. Let the varnish dry. After this, remove the adhesive tape.
- Secure the manicure with a small layer of clear varnish.
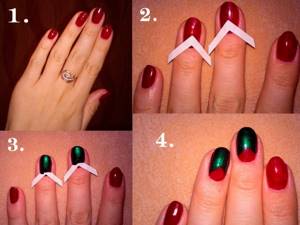
Creating a manicure with triangular holes step by step
How to evenly draw a moon manicure with a transparent hole on short nails?
The very first version of the lunar manicure was with a transparent hole. Later, women began to come up with ways to make holes of different colors, because it looked new.
Let's return to the very first option - a lunar manicure with a colorless (transparent) hole. To create such a perfectly even manicure, you will need:
- stencil
- nail polish remover, cotton wool or cotton pads
- clear varnish and colored varnish (one bottle each)
- nail file and orange stick
Process:
- Prepare your nails: shape them, degrease and remove cuticles.
- Apply a coat of clear varnish and let it dry completely.
- Now attach a stencil to the base of the nail; this is the future hole. Paint over everything above the stencil with colored varnish. Let the varnish dry completely.
- Now apply another layer of clear varnish.
- Ready! A classic moon manicure with a transparent hole will delight you for a long time!
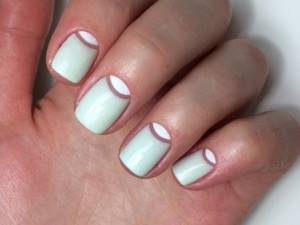
Moon manicure with a transparent hole
Another interesting idea for a lunar manicure with a transparent hole
Moon manicure with glitter (moon manicure) Photo and idea from Yagala
If you want to diversify the classic moon manicure,
then you can use dots and put down dots that form flower arrangements, as in this
photo.
Flower cores are complemented with nail glitter.
If you do a manicure at home, then to accurately draw the hole area, you can use a nail stencil, for example a vinyl one, as in this master class. With just two contrasting colors of nail polishes and glitter, you can create a stylish and original moon manicure
that will not go unnoticed on your hands if you use this idea.
The site contains interesting sections on nail design at home:
How to draw double holes in a moon manicure with a transparent stripe?
A lunar manicure with a transparent strip is a closer option to the classic of all existing types of lunar manicure.
This manicure will require significantly more time than a standard one, because the hole will have to be drawn as many as two times.
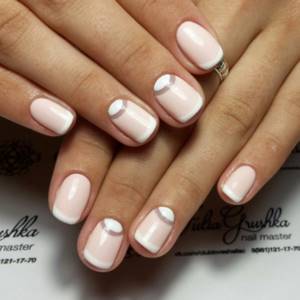
Lunar manicure with a transparent strip and double holes
The set of materials you will need to create a moon manicure with a transparent stripe includes:
- orange stick, cotton pad, nail file
- nail polish remover, sponge
- two colored varnishes and one clear varnish
- stencils for French manicure with thin internal borders, the more stencils the better
Now about how to create a manicure with transparent holes:
- Give the nail plate the desired shape using a nail file and remove the cuticle.
- Now degrease the nail using a special product or nail polish remover.
- Apply clear polish to the entire nail and let it dry.
- Now place the stencil so that it ends where the hole will begin.
- Paint the top area (where the edge of the nail) with the first colored polish.
- Paint the hole area with the second varnish (you can use just one varnish if desired).
- Now let each varnish dry and seal the finish with a thin layer of clear varnish.
Moon manicure with a transparent stripe
Take note! Very often there are manicure options in which a transparent strip is filled with rhinestones or sparkles. In such a case, it is not necessary to use the method just described above. You can do a regular manicure with holes, and apply rhinestones or sparkles to the border of the hole.
Lunar manicure ideas: photos
The article does not describe all options for lunar manicure, but only the simplest ones. More complex manicure options with holes are shown below.
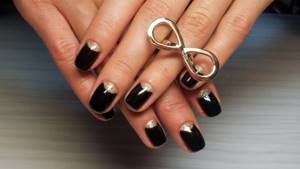
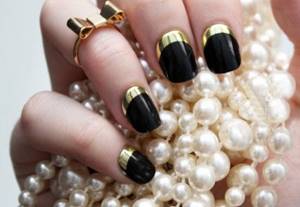
Black and gold are a great holiday or weekend combination. The black color is strict, it is perfectly complemented by the golden tints of sparkles.
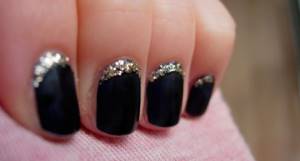
Reverse moon manicure with glitter
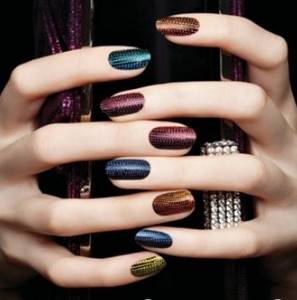
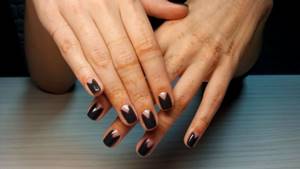
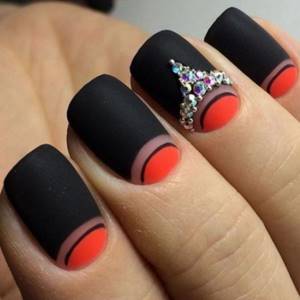
A few years ago, a trend emerged - a combination of matte varnish with metallic elements, which were used as foil or a special varnish with a metallic effect.
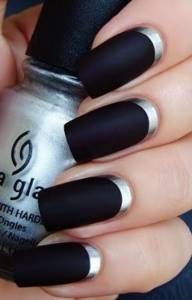
Matte varnish with metallic holes
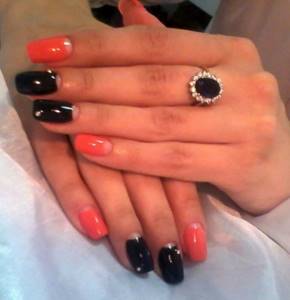
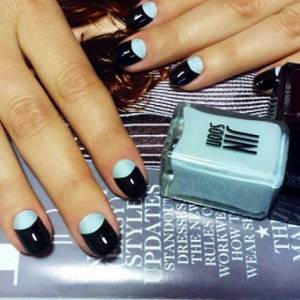
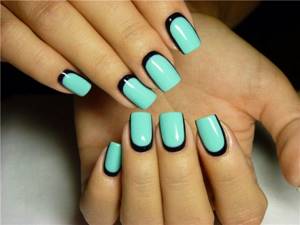
Black nails with colored holes are still in fashion.
Black nails with blue holes
Black nails with gold holes
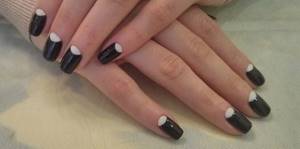
Black nails with white holes
Original black jacket
A gentle moon manicure with sparkles or a reverse French manicure is a solution for a manicure for every day.
Reverse French with gold glitter
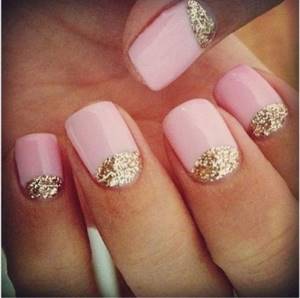
Delicate moon manicure
If you definitely want variety, pay attention to the moon manicure with polka dots.
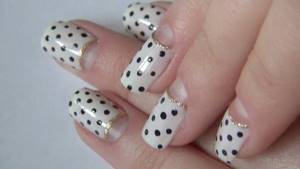
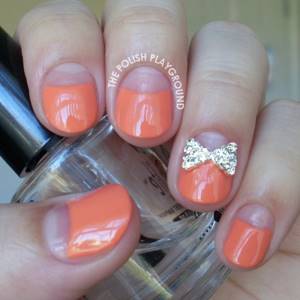
Stylish moon manicure with polka dots
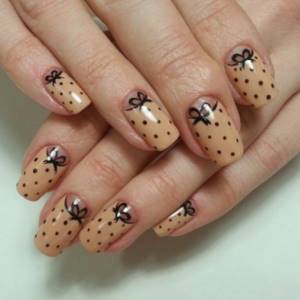
Lunar manicure with polka dots and bows
A bright solution - a manicure with holes in blue, pink, green and yellow colors will definitely attract attention to you.
Bright blue moon manicure
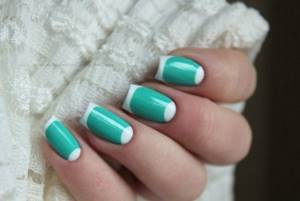
Reverse moon manicure with turquoise polish
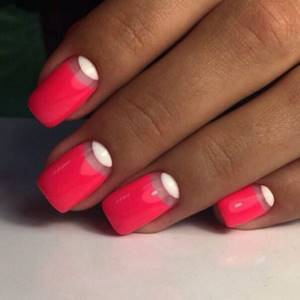
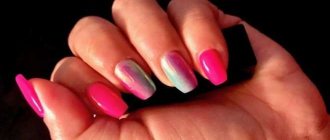
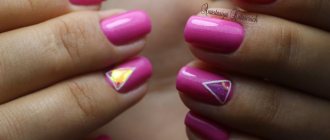
Bright pink moon manicure
Green moon manicure
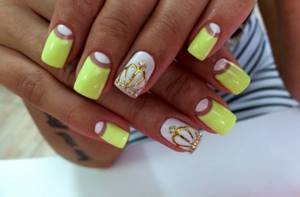
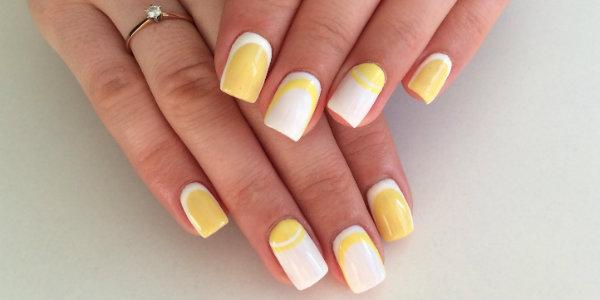
Yellow moon manicure
A very unusual and stylish moon manicure
Moon manicure design options and ideas
An unvarnished lunula looks advantageous in combination with a bright nail surface. This painting is carried out in only three stages: preparation, application of a transparent base and a color base. The stencil must be attached directly to the base; the lunula is not covered with color. The free end of the nail is highlighted with an accent color.
Moon manicure with a transparent hole
A manicure done at home according to all the rules looks no worse than a salon one. To perform a lunar manicure with foil, you need to acquire special foil in advance, since food foil will not look good with all types of varnish. It is also worth choosing a color scheme for your manicure in advance; gold or silver foil with black, dark red or purple varnish is at the peak of popularity now.
Fashionable moon manicure
The lunula can be bent in both directions and both options will be correct. To get the desired result in the salon, you should explain to the specialist what should be the result.
Reverse moon manicure
In addition, you can make the lunula not round, but triangular or straight, and you can also draw it with a brush; such options will make the moon manicure beautiful and unusual.
Beautiful moon manicure
Reverse French manicure is popular among celebrities, which is why it is called Hollywood French all over the world. Only the Russians gave it the name lunar manicure. A subtype of this manicure is the image of several crescents on the nails. They are located at the base of the nail, at the tip and in the middle. The technology is the same as for classic anti-french, except that the stencils are glued not in one, but in several places.
Moon manicure with stripes
Decorate already decorated nails with a lunar manicure with various designs on the nails, rhinestones, stickers, and decorative elements. Moon manicure on short nails looks just as elegant as on long nails.
Moon manicure with a pattern
Moon manicure with rhinestones