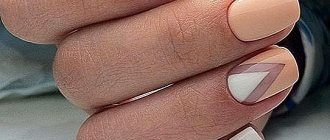
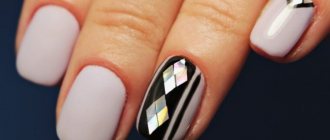
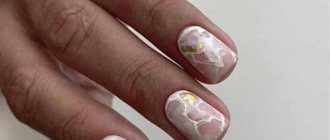
Features of marble nail design
A method of decorating nails that involves creating stains that imitate the pattern of marble or other natural stones is the main feature of such a manicure. Such ornaments are applied to gel polish or a regular varnish base.
This design can be created using several shades at once, since the design requires a background that includes different colors. Now and in the next season, marble nail art will remain at the peak of popularity. In addition, it has many design options.
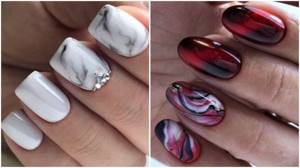
A manicure with a marble design is universal and suitable for both holidays and every day.
For fans of the classics, a French jacket designed in a simple style will suit you. Bright, extraordinary girls can additionally decorate their nails with sparkles and rhinestones. Stylists also recommend actively using rich, rich colors that will highlight the beautiful shapes of your nails.
The most successful color combinations:
- Black or gray blotches on a white background. This classic design is most often used to decorate marble nails.
- A yellow tone combined with orange gives an amber color.
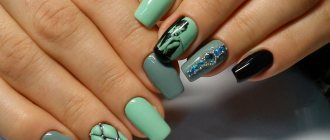
- Green tones and gray or black paints. They create a malachite color.
- Violet shades cleverly mixed with other tones recreate amethyst colors.
- Turquoise, blue colors including black streaks or inclusions. They emphasize the extraordinary beauty of the sky-colored stone.
- Using a dark red tone will give your nails a jasper tint, while a rich blue will make them look lapis lazuli.
Craftsmen also prefer matte, iridescent, and pearlescent compositions. Or they use coloring agents that have a holographic effect. In addition to them, “metallic” colors are used, which makes it possible to obtain an image of the stone using 3D technology.
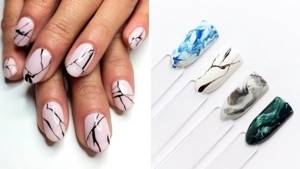
A discreet classic bow in delicate pastel colors is most suitable for owners of short nails. Therefore, it is better for them to choose a discreet design with a small pattern or trim from microscopic rhinestones, and it is advisable to add sparkling details in a single copy.
Girls with long nails have much more opportunities. They can easily experiment with different design ideas.
For example, decorate the nail plates with such decorative details as:
- Rhinestones are abundantly decorated with all fingers, applied completely or partially to the nails.
- glitter, they are placed on one or all nail plates.
- lace prints, floral patterns.
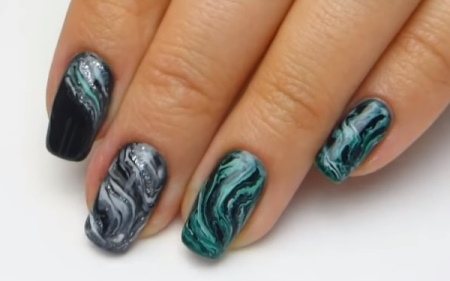
There are also other decor variations recommended by stylists:
- matte, glossy coatings;
- French;
- stylization of a marble surface with a transparent base;
- lunar design;
- combinations of lines with golden and silver elements;
- combination of decor and colored chips;
- pearl rub.
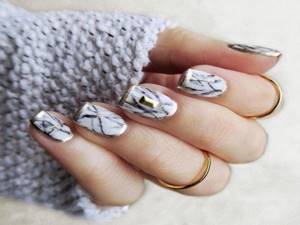
A manicure with a marble design is decorated using various means:
- acrylic paints;
- varnishing compositions imitating marble inclusions;
- stamping dies;
- sticker sliders with a marble pattern;
- gel polishes and thin brushes;
- polyethylene;
- alcohol;
- water.
Ideas for a monochromatic manicure
Manicures with marble designs are very popular today, especially monochromatic ones. The white type of nail art is considered the most popular. It looks elegant, discreet, sophisticated. This style is suitable for home, study, and office. It can be worn every day and in festive looks.
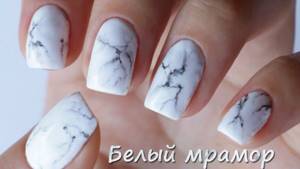
A monochromatic design is very easy to do:
- First, the nails are covered with a white base. They are dried using a lamp.
- Then the marble strips are painted with black varnish.
The nail plates can be additionally decorated with rhinestones, gold and silver stripes, and rubs with various effects. Black marble is another trendy manicure. It is called classic, like the white version. This design is carried out similarly to the previous one. It is also suitable for everyday, business and holiday looks.
Fashionable news: marble manicure with gel polish
2021 fashion trends suggest doing amazing things with your nails. Magnetic particles mysteriously transform your nails into a chic cat-eye design. Outwardly, it is impossible to take your eyes off the stunning sparkle of the curved center line located diagonally.
When the base is prepared in advance and a rub is added, this helps create a magnificent aristocratic monument with a mirror effect, reflecting everything around, from an ordinary nail. If you cut out pieces with sharp corners from foil and randomly scatter them over the base pigment coating, you achieve the “broken glass” effect.
And if you apply strange stripes to a base painted with a top color with a thin brush, you can achieve an imitation of a “natural stone” manicure.
Already, many fashionistas prefer marble manicure. On the Internet, the number of views of photographs and videos is in the millions.
This manicure is popular with those ladies who love experiments and new items. What is the appeal of this nail design? What interesting ideas for mercurial manicure on nails does this year bring?
The following nail art tandems are often used when creating an imitation of natural stone:
- Snow-white “classic” is considered the most optimal method of covering the nail. It is often chosen by fashionistas, as this design looks calm, elegant, and dignified. Restrained, in an aristocratic style. The implementation involves the following: the surface is made white, and black uneven stripes of marble are applied to it. A good option for a business lady, or for a student, whichever you can choose. And this design looks flawless;
- Creating a dusty gray abstraction may seem like a gloomy design at first. Only a manicure when using shades of asphalt does not look like a boring nail decor. When on a nail you can see an abstract grayish painting of ornate lines, with branches in the design, it makes you involuntarily look at the nail and admire it;
- Pinkish-pale matte glaze tends to modify the manicure simply by adding rosy dye to the gloomy gray color. So, if it looked strict and rooted, then after adding pink it became a neat, romantic nail design;
- Lunar imitation of marble is a tandem of two equally popular options. Two effects are combined here: charisma and unsurpassed aesthetics. The lunulae are left unvarnished and natural. The base coating is marble, which outwardly appears unobtrusive and stylish. This option is appropriate for both those with short nails and those with long nails, regardless of shape.
- If we consider the visualized jacket, this is an unusual combination. When a marble effect coating is used, a French line separates the smile area. This is a shiny ribbon that creates magic. It turns out that the effect of a classic French coat is absent, since there is no color distinction between the smile area and the base coat. It's solid. But the dividing line (it can be made in “gold” or “silver”) adds amazing charm to the nail design.
Options in different shades
There are a large number of different shades to create a marble manicure. Here are just some of the most current colors.
Rose quartz
The pink shade harmonizes perfectly with marble nail art. It gives the nail design softness and romanticism. This stylistic solution looks great on short as well as long nails of various shapes, making the images elegant and graceful.
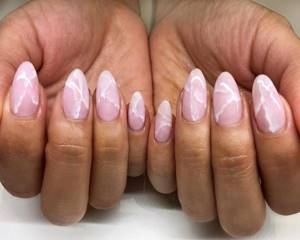
Sequins scattered along the lines of streaks, stripes and the amber technique give the nails an extraordinary chic. Individual fingers are decorated with similar elements. Bright polishes also add accents. A design in this shade is very suitable for special occasions, although it can also be used for everyday wear.
The technique for creating such a manicure is quite simple:
- First, the nail plates are covered with a light pink base.
- Then grayish or silvery lines are applied over it.
Another option: bright pink stains are depicted on a black, gray or beige background. This manicure is complemented with small sparkles or a scattering of rhinestones.
Dark sapphire
The dark sapphire shade looks mesmerizing. It will decorate long and short nails. It can be worn daily, as well as on special occasions.
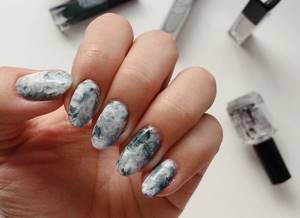
This design is created using standard technology:
- First, the nail plates are covered with a white base.
- Then dark blue lines intertwining with each other are chaotically applied. Their boundaries are made slightly blurred.
Lapis lazuli
The azure color is associated with a marine theme. This is an original design for summer nail art. This shade looks very cute on short nails and gives an elegant look to long nails. It is suitable for festive outfits, and is also appropriate in everyday life.
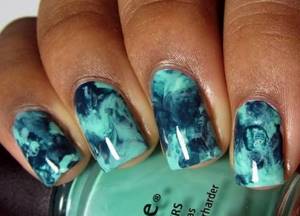
Such a design is made in one of the standard ways:
- First, a mint base is formed.
- Then dark blue stains are depicted on top of it.
Burgundy
The burgundy shade looks very attractive even in the design of short nails. It goes perfectly with gray tones without needing any additional decorations.
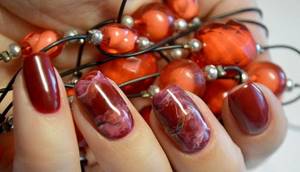
It is performed using one of the standard schemes. This manicure is appropriate for everyday and business looks.
Red
Scarlet color is most suitable for active, self-confident women. This shade is complemented with black and white streaks, which looks very impressive on elongated, almond-shaped nails.
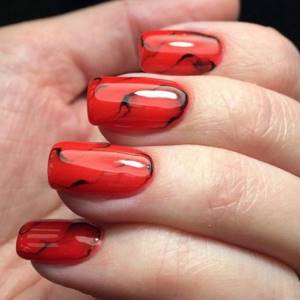
Fiery, bright nail art is very suitable for special occasions and evening events. A manicure in red shades is done using one of the methods presented above.
Blue
Blue tones look great on girls, women with a multifaceted, subtle nature. Such paints complement blue and snow-white shades, creating graceful veining.
Nude
This design looks good on long and short nails. It is best suited for a casual, business look.
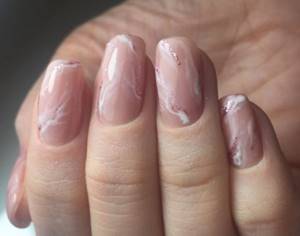
This shade is complemented with white and gray undertones. It is also decorated with gold and silver stripes.
Green
The green shade makes the look stylish and fresh thanks to its mixture with black and white varnishes. The manicure is formed based on the intended purpose.
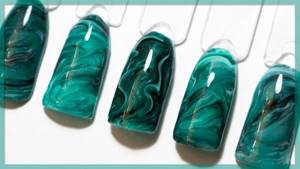
For example, nail plates are decorated with sparkles, glitter, rhinestones for special occasions, or created without any additional decor if used for everyday wear.
Grey
This color is best combined with white shades. It can be complemented with silver stripes, rhinestones, and other decorative elements. This design is appropriate for everyday, business, and festive looks. It will perfectly decorate short and long nails.
Gel polish coating: how to make a beautiful pattern at home
Whatever method of creating a marble surface is chosen, in any case you will need:
- drying lamp;
- buff;
- liquid for degreasing and removing the sticky layer;
- base;
- top;
- gel polish of primary color;
- one or more gel polishes for the pattern.
These are the main items that a manicure cannot be done without. The list of additional items depends on the chosen type of marble coating.
Marble nails using oilcloth
In addition to the main list, you will need pieces of oilcloth or a plastic bag.
- Using a buff, the natural gloss is removed from the nails.
- Then they are degreased, a base coat is applied and dried in a lamp.
- The main color is painted and dried in the same way. Since the base color is often lighter than the others, one coat may not give an even tone. But it's okay if the varnish shows through a little.
- After applying the base color, the nails are dried.
- Then another shade is applied and a piece of oilcloth is applied, several times if necessary. This process will cause cracks and stains to appear on the undried varnish, reminiscent of the texture of marble.
- After receiving the pattern, the nail plate is dried. If more than two colors are involved in the work, the procedure is repeated with other varnishes. Each layer is dried.
- After this, the finishing coat is applied and dried. Remove the sticky layer if necessary.
Water marble manicure
For aqua manicure, use a bath with warm water, but not hotter than 40 degrees.
- Varnishes of different colors are added to the surface of the water in small quantities and mixed with a toothpick in a chaotic manner, but not until the color is uniform, but until streaks are obtained. This should be done as quickly as possible, before the water cools down. Otherwise, the film will dry out and you won’t be able to work with it.
- The surrounding skin should be treated with a rich cream, but the cream should not get on the nail itself.
- A base layer is applied to a grease-free nail and dried.
- After this, the finger is dipped into the container parallel to the surface so that the film adheres to the nail plate. There will be weird stains on it.
- Then the nail is dried and covered with top coat, and the excess is removed from the skin along with the cream.
Using a needle or toothpick
To make a marble pattern using a needle or toothpick, you need:
- Apply base and main color.
- Then apply drops of varnishes of other colors. You can add a base color or even a top color to create a washed out effect.
- Using a needle or toothpick, the colors are mixed and streaks are created.
- The coating is dried and secured with a finish.
Video: marble drawing using a toothpick
Using a fine brush
- First, the base and main color are painted.
- Using a thin brush, designs are applied that imitate patterns on marble.
- To make the polish less bright, you can mix it with topcoat.
- Another option is to apply a topcoat over the base color, but do not dry it. Draw on it with a brush, picking up different colors. This will create a more diffuse pattern.
- It is better to make different patterns on your nails to make the design look more natural.
- At the end, a top coat is always applied and dried.
Video: marble manicure with gel polish using a thin brush
https://youtube.com/watch?v=aSsqX4D4kW8
Using marble varnish
Now many manufacturers offer a special varnish that gives a marble effect. It can be purchased at a specialized store, but you should choose a material with a thick consistency to work with in order for the design to work out. It is painted in one layer on a previously applied base and secured with a top coat.
Slider design
Such stickers provide a ready-made design, but at the same time, the options are limited. You can look for such stickers in a store or order them online. Working with them is quite simple.
- You must first apply the base to your nails. Most likely, such a sticker will occupy the entire surface and the main color will not be visible, but it is still better to cover the surface with gel polish in the color of the slider.
- After this, the sticker is placed in a container with warm water, where its adhesive layer comes off from the paper.
- Use tweezers to catch the part with the pattern, apply it to the nail and straighten it out. Everything must be done quickly, but do not overdo it, so as not to damage the sticker.
- Then the excess is cut off, a top coat is applied and dried in a lamp.
Matte manicure
The matte finish looks elegant in everyday, office, and holiday nail art of nail plates of various lengths and shapes. Delicate peach and grayish tones give them an irresistible effect.
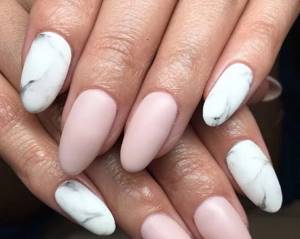
Two fingers decorated in a marble design, and the rest with a velvet finish, look incredibly stylish. If desired, this manicure can be finished with glitter, strips of foil, or sparkles.
Options with patterns and designs
Manicures with marble designs are also complemented with various designs and patterns. Moreover, they can choose any palette of varnishes. So, these can be all kinds of flowers, floral patterns, or various butterflies and bees.
Insects or laconic floral prints on a white background look especially beautiful. They make your nails look elegant. This style is very suitable for creating romantic summer looks.
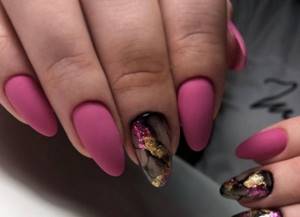
In spring or autumn, you can also use a floristry theme in the design of your nail plates, for example, images of various leaves and twigs. All kinds of abstractions are considered trendy designs. They add unusualness and mystery to the nails. Geometric shapes and straight lines are no less popular. Such elements help to create a discreet style for them.
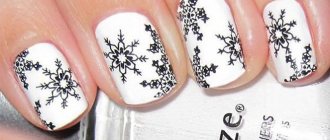
In winter, nail art with frosty patterns looks interesting. It is also decorated with sparkles to enhance the effect. The design is applied like snowflakes, frost on glass, or a starry sky.
In addition to the seasons, all kinds of curls, uneven lines and other prints are drawn. Ornaments are made on nails of various lengths, regardless of their shape. They are worn in everyday life and created for special occasions.
Gel polish and brush
Perhaps the most obvious way to create a stone effect is to paint with a brush. In order for the design to be successful, basic artistic skills will be required.
For work, prepare:
- gel polish in two shades. It is better if the funds are from the same company. To create a classic marble design, use white and black;
- base and top;
- thin brush. Such brushes are available in almost all brands of manicure products – ruNail, TNL, Irisk. The photo below shows a Runail Nail Art Nylon brand brush No. 000/3, 12 mm.
Prepare the background
- Wipe the nail plate with degreaser and after it evaporates, apply base;
- Dry the base layer in a lamp for 30-120 seconds. depending on the type and power of the device;
- Cover the nail with white gel polish and then dry it. If necessary, reapply the background color to ensure an even coverage;
Creating a drawing
- Apply a thin layer of top coat over the dried gel polish;
- With a thin brush dipped in black gel polish, begin to draw barely noticeable thin lines. With a damp top the lines will blur – this is normal, as it should be;
- Draw stripes randomly, differently on each nail, until their number is sufficient for your idea. The lines do not have to be clear, so some tips can be deliberately shaded.
If you are not satisfied with the result, remove the pattern using a disk soaked in cleaner and lightly buff the surface with a 180-240 grit file. Wipe with degreaser, apply topcoat again and start over.
The final stage
- Dry the pattern in a lamp. In ICE this will take 60 seconds, in UV – 120;
- Apply the finish to your nails and dry again.
Before applying the finish, the design can be supplemented with rhinestones, sparkles or other decorative elements. In this case, it is better that the top applied to create the pattern has a sticky layer.
Decor ideas
Various types of nail plate finishes are used for marble manicure to make them even more attractive. Such decorations are used to create daily, business, and festive looks. They decorate long and short nails.
With rhinestones
In a “stone” manicure, it is important not to overload the overall nail design with decor and it is advisable to use rhinestones as small accents. Therefore, it is preferable to choose them small, not too bright colors. They should fit harmoniously into the color scheme of the nail art without contrasting with it.
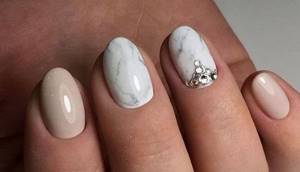
Most often they are laid out along one line or several stripes are highlighted simultaneously with single dots like sparkling drops.
With foil
Last year's fall-winter hit with a metallic gold background is still relevant this season.
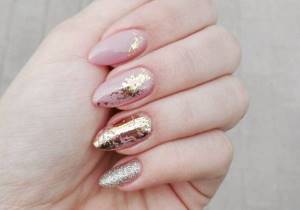
They are used to decorate one or two nails if the manicure is intended for everyday wear or to decorate all fingers in the event of special occasions. Moreover, the marble stains themselves can have different shades.
With rubbing
The pearl coating combines perfectly with the marble texture of the nail plates, creating a delicate feminine manicure.
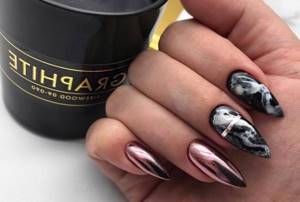
Stylists do not recommend oversaturating it with a bright palette of colors, preferring pastel colors.
With glitter
This is an incredibly impressive combination that combines marble patterns with sparkles.
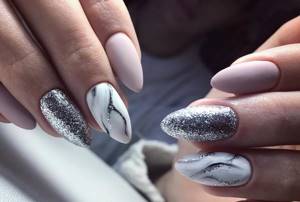
But most often, craftsmen decorate one finger on each hand with similar decor. The rest are covered with a light base. Or glitter is placed along one of the lines of the print.
Fashion trends in 2021
Marble manicure or design in the marble stone style appeared relatively recently and has already gained popularity among women of all ages. It consists of original stains on the nail plates that imitate the surface and pattern of natural stones.
Fashionable colors of this season are gray, white, beige tones. And also black and pale pink shades. This traditional palette of colors will appeal to girls who prefer discreet nail art. No less popular are rich blue, green, and red colors. They are also used as a base or addition.
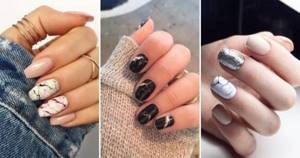
The marbled design is created on all fingers at the same time or one or two are selected as desired. Also, individual nails are complemented with a mirror polish. In addition, they are trimmed with gold or silver stripes, threads, or decorated with elegant rivets.
Today, sharp, rounded, trapezoidal nail shapes are most relevant, and they can be both long and short. Marble manicure goes well with any type of nail art, for example, French manicure.
Asymmetry has become widespread. This is when two nails are covered with marble, and the rest are decorated using a different technique. Often, the marble stone design is combined with various types of coatings, creating simply incredible patterns on the nails of both hands. They are also treated with a special composition that has a matte and sugary effect.
A stone-inspired manicure has a huge variety of different shades and textures with a marble design. The most common methods of decorating nails are presented here, but this does not stop you from experimenting and coming up with new variations of fashionable nail art.
Palette for marble manicure
In this case, of course, there are no restrictions, but the combinations provide the closest proximity to natural stone:
- white and pink;
- white and black or gray;
- blue and blue. In this case, you will get an imitation of turquoise;
- different shades of green will give the feeling of malachite;
- beige color and its derivatives will help create an extravagant but discreet manicure, suitable for everyday wear;
- black with metallic shades - gold and silver.
Tips for creating a marble manicure:
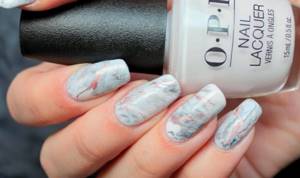
- choose medium density varnish . A varnish that is too thin will not spread, and a thick varnish does not mix well and does not give smooth streaks. All products for marble manicure must be of high quality, otherwise the coating will quickly peel off. Consider professional brands - OPI, Essie, Sophin, Rio Profi;
- be patient . Like any technique, marble cannot be rushed. If you don’t want to sit over the drawing of each nail, choose several nail plates that will be accent and work on them properly;
- marble manicure requires some skills, so be prepared that the design will not turn out perfect the first time . At first, practice on tips to get better at it.
