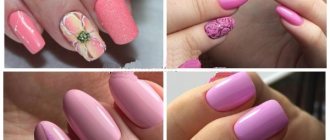
Looks trendy on fingers at any time of the year, fits with any outfit, harmonizes with any mood
By skillfully choosing colors, you can create soft, romantic looks, or bright and impulsive ones.
This design is easy to make yourself
What does it look like
The technique is no longer new, but it does not become obsolete. With each season, nail artists come up with interesting options for presenting ombre, mixing it with other genres, creating unusual color schemes.
At first glance, the design resembles a smooth flow of one shade into another. At the same time, it is almost impossible to discern a clear boundary between the color changes.
Advice! Sometimes, to achieve a softer and more delicate stretch of tones, use not two, but three or even four colors. Be sure to follow their order from light to dark or vice versa. This way you will create a classic ombre.
Translated from French, the verb “ombrer” means “to darken,” and the adjective “ombre” means “shaded.” In essence, the method actually darkens the presented undertones, blurring the transitions between them.
The technique is no longer new, but it does not become obsolete
With each season, nail artists come up with interesting options for presenting ombre, mixing it with other genres, creating unusual color schemes
Smooth flow of one shade into another
Vertical ombre
The effect is formed separately on each nail bed, while the lightening is performed by a smooth color transition from one side of the working surface to the other. This technique visually lengthens the nail.

Two or more varieties of varnish are used, sometimes with different textures. This method of coating looks original not on all fingers, but on two, for example, and the rest will be painted in harmonious shades.
The gradual transition of colors from the little finger to the thumb looks beautiful.
Similar names and their differences
Surely you know that in addition to the nail industry, technology under the same name is found in hairdressing, clothing, shoes, accessories, and even in construction when painting walls. Are you aware that there are similar, almost identical techniques that are even called synonyms for ombre?
- Degrade. An ultra-fashionable word, popular in beauty salons with colorists, as well as in manicure salons. It is translated from French as a softening of color, actually its transition from one halftone to another. Its difference from ombre is almost imperceptible. If you look at the detailed meanings, it becomes clear: ombre requires the use of colors from the same palette, one of which is a more natural tone. This is more obvious on the hair: there is a gradient from the natural shade to its lighter variation. And degradation is the very stretching of flowers, without recommendations for their selection.
- Color coloring. In fact, the procedure in question belongs to this group, because the master plays with colors. It’s just that this concept is broader, like the upper subspecies. You can color it in dozens of different ways.
- Dip Dye. This is a multi-colored coloring of the tips of the nails with an imperceptible gradient. That is, the colors flow into one another closer to the end of the plate, which resembles a French painting without a clear boundary.
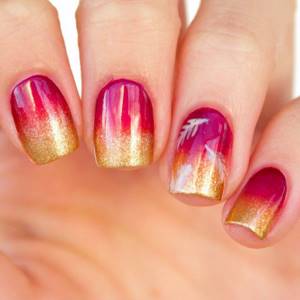
From crimson to gold
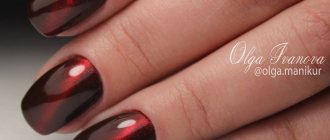
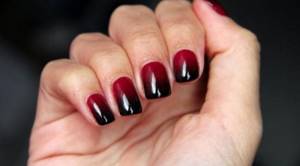
Dark base, light ends
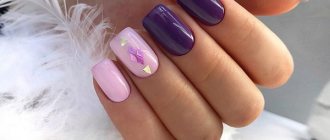
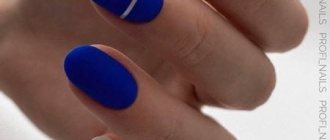
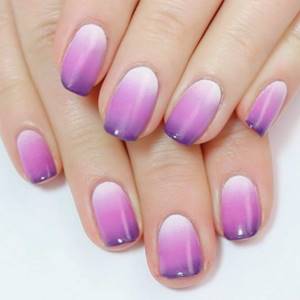
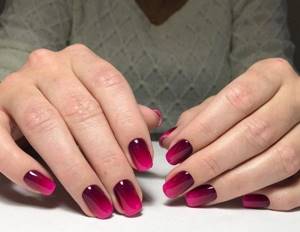
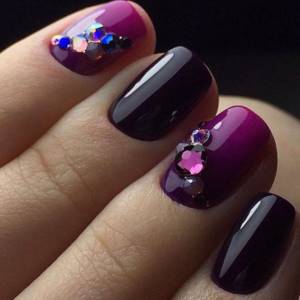
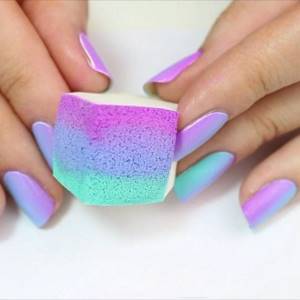
A subtle stretch of violet tones
Horizontal ombre
Horizontal ombre is characterized by applying varnish both from the base to the free end of the nail plate, and vice versa. There is a simple way - to make all the nails the same, or you can use different variations.
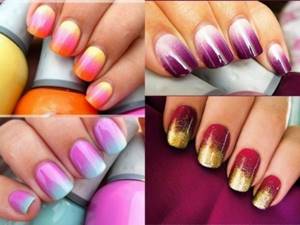
White ombre on nails: horizontal option.
For example, on three fingers, make a transition from a milky tone to a rich white from bottom to top, and on the rest, vice versa. Or perform a color stretch on three nails of one hand, and for the other two apply any shade from those used.
Combined decor
When used alone, a gradient manicure looks chic, subtle and graceful. For variety, it is often combined with popular techniques. Fortunately, it perfectly harmonizes or absorbs most of them.
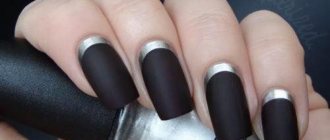
Matte coating
Matte manicure looks very beautiful and unusual. Its appearance completely eliminates glare or glossy surfaces. The plate does not reflect light, it looks like suede. The decor is also called plush. The option with a gradient transition of undertones on a velvety nail turns out to be very expressive and catchy.
Matte manicure looks very beautiful and unusual
With French
Lunar, traditional or reverse French is a permanent classic in the nail industry. They resort to it when style, romance, conservatism, tenderness, purity, and grace are required. A light or bright tip emphasizes the beauty of the fingers and the well-groomed appearance of the plates. It attracts attention with its gracefulness, which is why it is so popular. Stretching is also performed on the main nail, or the tip itself is graded along an arc. By the way, this is a super fashionable trend of the last season.
French stretch
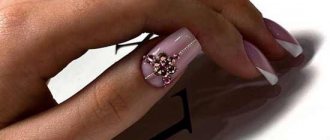
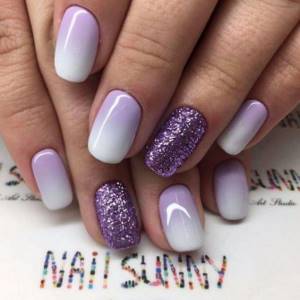
With rhinestones
Shiny stones will decorate any design. They are able to turn an everyday manicure into a work of art. They come in different sizes, colors, and are laid out according to the client’s wishes and the artist’s imagination. They perfectly highlight ombre, focusing attention on beautiful hands.
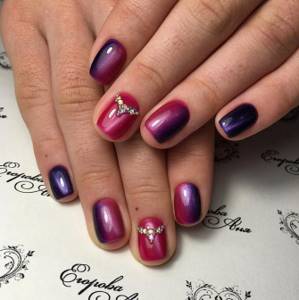
Shiny pebbles will decorate any design
Coating with natural texture
Have you seen nails painted to match the texture of natural stone? For example, marble, with its curls and relief. Malachite, granite, and also wood are popular. Now imagine that this art is also flavored with a soft, barely noticeable gradient!
Ombre marble
Note! In order not to overload the design, you can highlight just one or two nails. The rest can be done without complex design. This way the image will be more appropriate for everyday life.
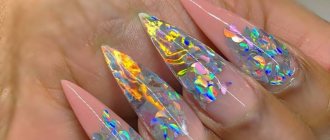
With rubbing
It is performed in dozens of ways, using a variety of compositions, from sand to glitter and acrylic powder. The nail shines like a mirror and shimmers with a rainbow, which is very bright and impressive. Rubbing can also be combined with the technique in question. Just apply different powders to the sponge in strips and walk over the plate.
Ombre rub
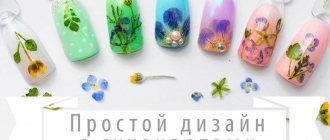
With drawings
Geometry, flowers, ornament, artistic pictures. The pictures are varied. There are thousands of options for artistic themes on the Internet, which are selected depending on the time of year and a specific event. Meaningless abstraction, geometry, flowers, ornaments, hieroglyphs and much more are in fashion. Transitions are especially effective when combined with geometric shapes such as rhombuses, spirals, and ovals.
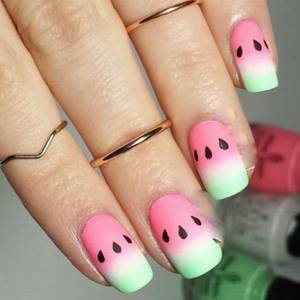
Watermelons
With voluminous patterns
This is a festive theme that is addressed before a celebration, wedding, or anniversary. Three-dimensional figures are sculpted from acrylic powder, various elements are glued to the nails, and the surface is decorated in any way.
With voluminous stones
New Year's pedicure 2021
How to decorate a New Year's pedicure? The holiday opens up enormous scope for imagination. To help you find the most fashionable cover colors, feel free to mix prints and styles. And also “dilute” your nail design with contrasting shiny decor and New Year-themed designs.
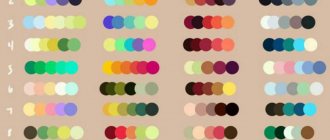
Choosing good color combinations
When making a choice, you need to be guided by your own feelings.
- Someone is guided by the time of year outside the window. For example, bright spring and summer colors differ from warm autumn or calm winter colors.
- Before going on vacation, I want a nautical theme.
- Before a hike or picnic - greenery, nature, naturalism.
- Many girls like to change colors depending on their mood. There are lovers of pastels, and their opposites are extravagant adherents of catchy colors.
Advice! The ideal base for any color scheme is plain white. But if you took two varnishes from the same line, and one is lighter than the other, it can be used as a base.

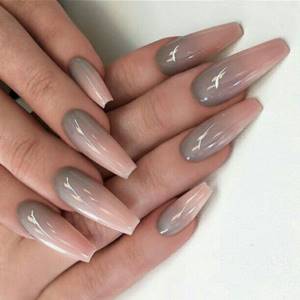
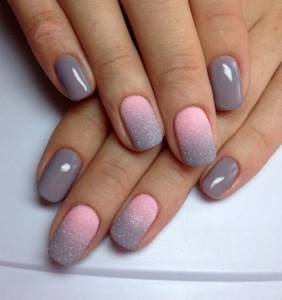
From gray to white
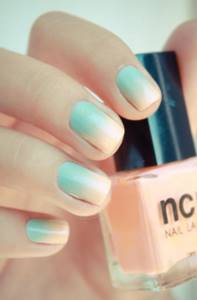
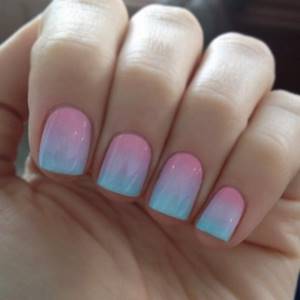
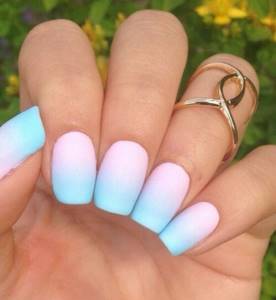
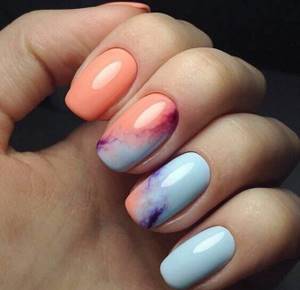
From mint to peach
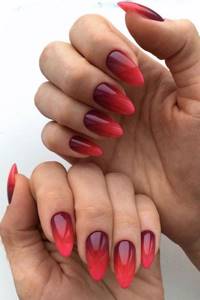
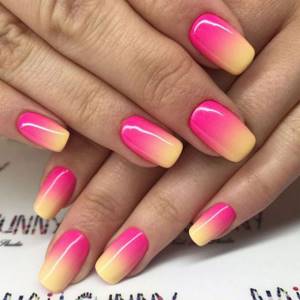
Stretching shades of red
We suggest looking at the most interesting options that are most in demand lately:
- The spring theme involves combining white with all the options of pink, blue, soft green;
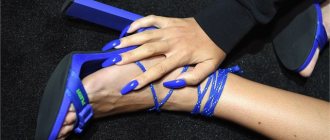
- Blue harmonizes well with pale pink, light yellow, lilac, black, light green;
- The trend is black and red or black and silver. The latter is ideal paired with a trouser suit or a fitted dark dress;
- A rainbow looks stylish and fun;
- The autumn palette includes all types of yellow, brown, purple, red, green;
- Traditionally, blue, blue, white, silver, metallic, gray are considered winter.

Beige + orange
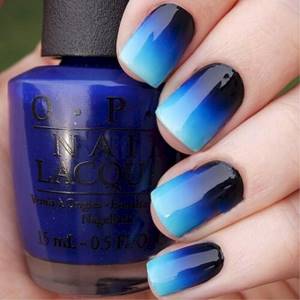
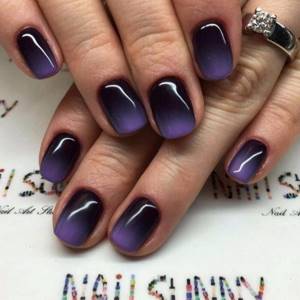
From black to blue
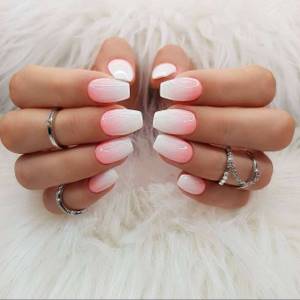
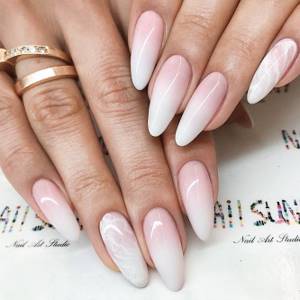
Pink and white
Don't be afraid to experiment. Sometimes two opposite colors intertwine surprisingly harmoniously on a nail. Especially if you are wearing matching clothes or accessories.
What you will need for the procedure
The usual set, as for standard nail coloring. Add a simple makeup sponge or, if desired, a special brush to create an ombre nail design. The photo of the brush shows soft toothed bristles that allow you to smoothly blend both undertones.
The advantage of a brush is the cleanliness and accuracy of the process. You don't have to worry about the skin of your fingers around the nail, which gets very dirty when using a sponge.
Here is a list of necessary things to perform such a manicure:
- Sponge or brush;
- Base (white varnish is possible);
- Top or finish (transparent varnish for a simple, non-gel manicure);
- UV lamp (for drying gel polish);
- Gel polishes or tubes with the usual composition;
- Coating remover, rich cream or special latex base for varnishes with glitter. It is applied to the finger around the nail. When it dries, it turns into a film that is easily removed from the skin along with traces of coloring agents;
- Buff;
- Cotton swabs, discs.
On a note. The finger around the nail can be sealed with simple tape. Take three 1cm wide strips and glue them to the sides and under the plate. Or generously lubricate the skin with rich cream.
Pedicure 2021 fashion trends
Today, the legs of a well-groomed woman seem to be decorated with precious stones, so varied are the artistic techniques in pedicure. Few of us can resist the temptation to show off painted marigolds in open shoes. Moreover, pedicure has the same fashion trends as manicure. And they change from year to year. Today we will talk about the trends of 2021.
Execution steps
So, we smoothly approached the procedure for performing gradient decor. The technology is slightly different, depending on whether you use gel or plain polish.
Using gel polish
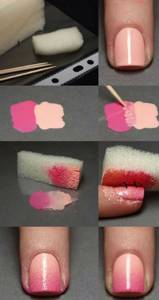
Easiest to do with a sponge
- Go over your nails with a wide buff. Polish the surface, make it smooth and even. Degrease with manicure remover.
- Glue tape and spread heavy cream or latex base around the plates.
- Paint each nail with a base coat. Fasten it for 1 minute. in the lamp.
- Take a cosmetic sponge and prepared colored polishes. On the sponge, draw stripes that step on top of each other.
Advice! The new sponge may have traces of dust or dirt, even if it was in a film case. Traces of dirt will be visible on the coating, so they need to be cleaned. Wide tape will be a great help here.
- Blot the nail with gentle patting movements.
- Update the layer before painting each plate.
- If you have a brush, paint the nail first with one color, then up to the middle of the surface with another. Using the bristles, carefully blend the compositions, achieving the perfect transition.
- Dry each finger separately for 30 seconds in a UV lamp.
- Next comes the finish line. Dry again for 2 minutes under ultraviolet rays.
- Cleaning your fingers.
We use regular varnish
Step-by-step instruction
- The beginning is identical: buff, degreasing, skin protection.
- Paint your nails with base.
- Wait until it dries well. Minimum 15-20 minutes. You can soak your fingers in cold water.
- Next, take a sponge or brush. We work the same way as described above.
- We complete the decor with a finishing transparent varnish.
To make your ombre look rich and intense, do not try to paint your nails the first time. Add a layer of varnish to the sponge and blot the surface with it again. Until the brightness becomes desired.