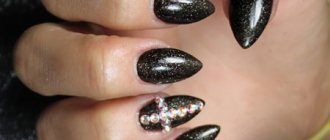
Red and black ombre nail designs 2020–2021
The current colors in nail design in 2021 will be both pastel shades of varying degrees of brightness, as well as brighter and more saturated tones.

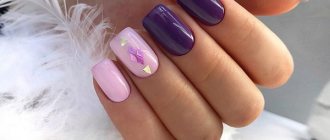
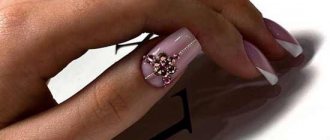
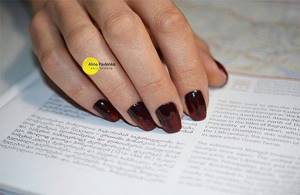
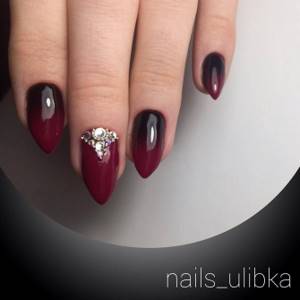
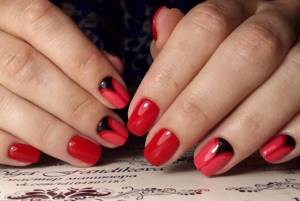
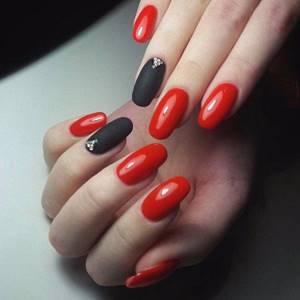
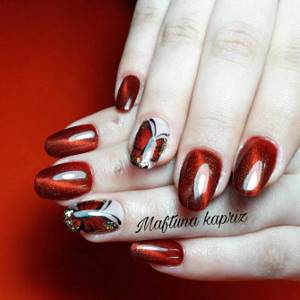
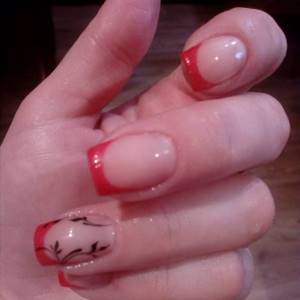
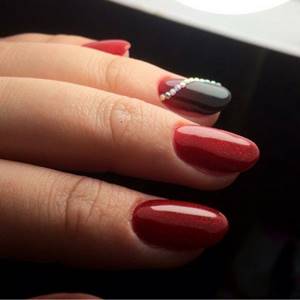
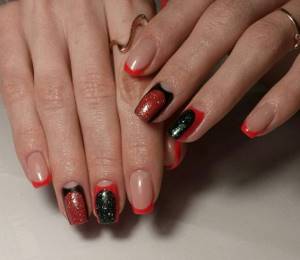
ombre nail design red with black and pearl
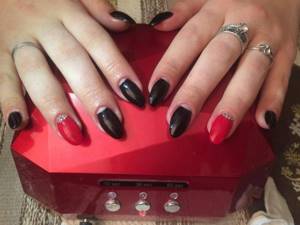
A combination of two basic colors, black and red, with a gradient smooth transition from one to the other can be used in the following nail coating options:
- as a basis for painting nails;
- as an independent decor;
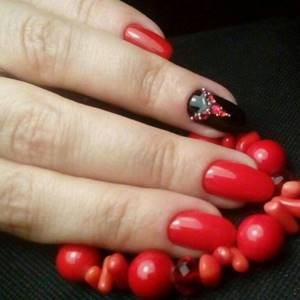
- the basis for subsequent addition of decorative elements (rhinestones, stones, sequins, etc.).
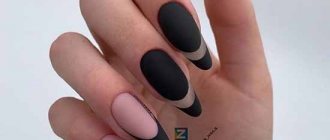
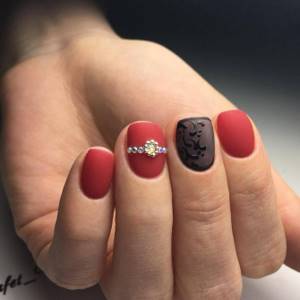
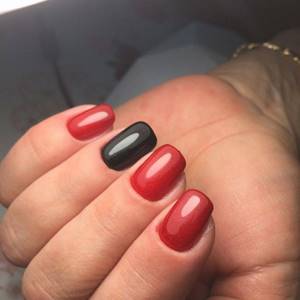
black and red ombre nail design short nails
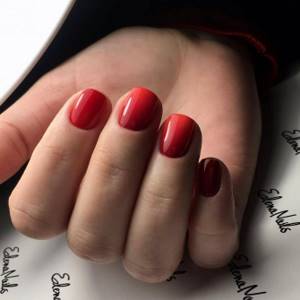
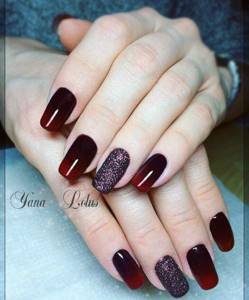
Due to the popularity of the long-lasting coating, red and black gel nail design is used. Shellac coating or gel polish can be used to create an ombre effect, while gloss or matte - you need to decide individually.
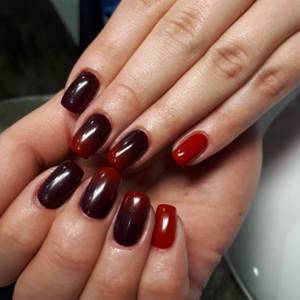
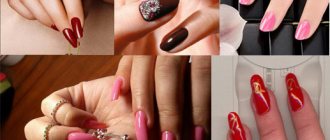
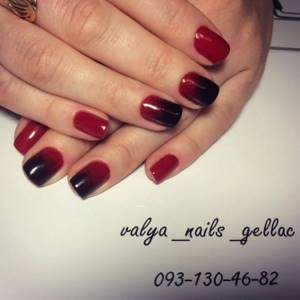
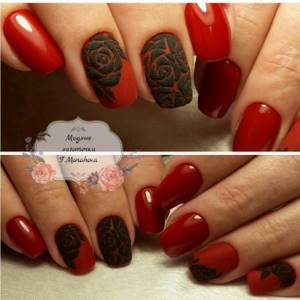
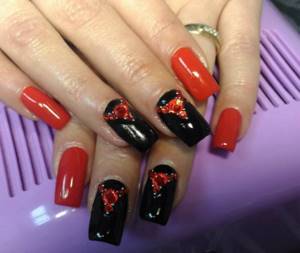
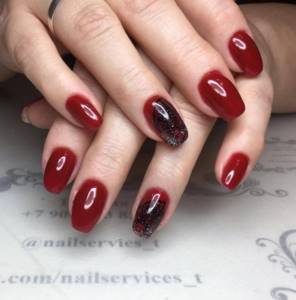
red and black ombre nail designs
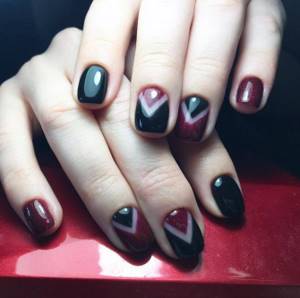
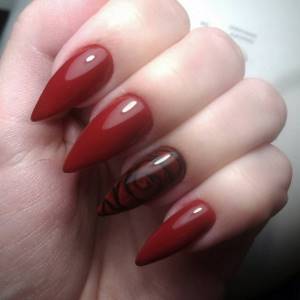
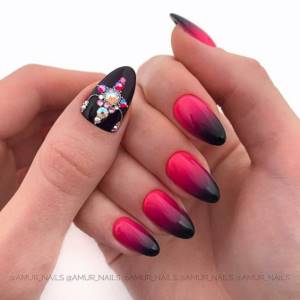
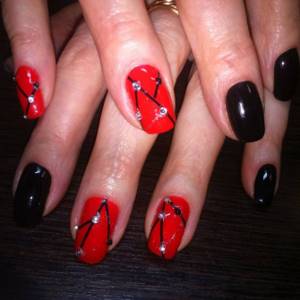
red and black ombre nail design with arrow
The classic colors that are fashionable this year are black and red and are used in a variety of interpretations. The ombre design style, which has entered all areas of the beauty industry, has not escaped nail design.

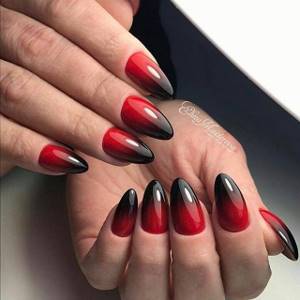
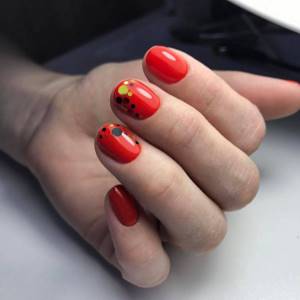
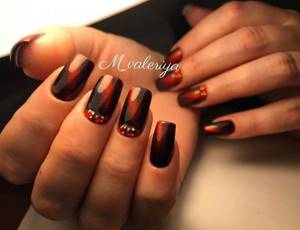
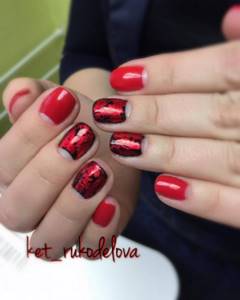
nail design red black ombre with spraying
A fashionable trend is to use a gradient not on all nails, but usually on the ring and middle nails, the edges are defined by a single color.
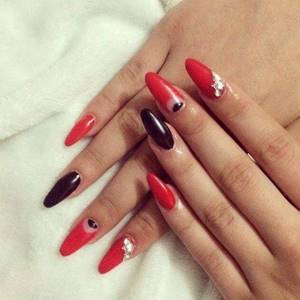
ombre nail design in red and black color
The direction of the color transition can be located in different directions:
- horizontally – one color at the top, another at the bottom (black or red);
- vertically – the colors for stretching will be on the left and right;
- diagonally - the direction of color stretching starts from the upper corner of the nail to the opposite lower corner.
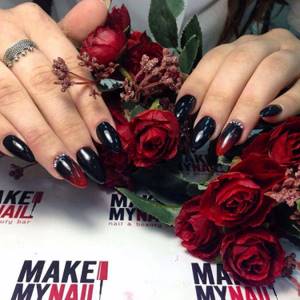
ombre nail design 2020–2021 red with black
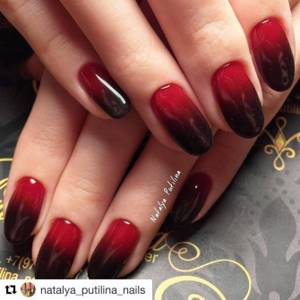
ombre nail design red and black new
ombre nail design black and red
Nail design attracts with its variety in the 2020–2021 seasons and involves the use of ombre in black and red for a stylish and trendy look.
How to make ombre nails with gel polish
We are sure that we were able to not only interest you in such an original way of transforming a manicure, but also convince you of the need to immediately try to translate the chosen design into reality. If this is the case, then hurry up and read the instructions below and prepare everything you need for such an exciting process.
Tools:
- nail file Used to correct the length and shape of natural or extended nails. Remember that the lower the degree of abrasiveness of the tool, the harder the working edge it has;
- metal pusher. With the flat side of the pusher you free the nail bed from overgrown skin, and with the sharp edge you carefully move the side ridges away;
- scissors or tweezers. They have super-sharp, sharpened edges, which need to be used to evenly cut off the cuticles with the trimmed method of manicure, and with the untrimmed method, simply push back the epidermis with an orange stick;
- polishing buffs. Due to their rapid wear, it is recommended to buy several pieces at once. Using elastic, soft, textured fabric, the buff removes roughness and smoothes out unevenness of the nail plates;
- dots. A metal or plastic stick with round ends that is used for basic nail art techniques. Especially for painting polka dots on your nails;
- a synthetic, moderately porous sponge or a set of standard brushes, which includes a flat brush, a hair brush, a petal brush and a fan brush.
Materials:
- remover. To eliminate previous manicure delights on your nails;
- nourishing, natural oil or special softening gel for cuticles;
- varnish base with a self-leveling effect;
- acid-free primer if your nail plates need to be degreased first;
- several gel polishes in the shades you like;
- acrylic paint for nail art or colored stains;
- glossy or matte topcoat to consolidate the result of your efforts.
As you can see, you don’t need much to do a stylish manicure at home. The main thing is to stock up on endurance and patience, “set your hand” on the training cards and carefully read our step-by-step instructions.
Ombre nails with a sponge
Step 1. It is necessary to cover the nail plate with a base and dry it. Step 2. The next step is to apply the background gel polish. It can be white, pink or any other suitable color. Step 3. Now that the background is done, you need to apply strips of varnish very close to each other on the foil plate. The shades can be any, depending on what style you choose. Then you need to shade the borders. Dip a damp sponge into the resulting palette. It may be noted that the use of foil is not necessary. With the right approach and the necessary experience, varnishes can be applied directly to the sponge. Step 4. After this, you need to apply the polish to your nails with a patting motion. Carefully wipe off any remaining residue with a napkin. Dry in a lamp and repeat this step as necessary. Step 5. The culmination of the manicure will be covering with a transparent top.
This method is the most common. At the same time, the transitions are quite smooth and neat.
Ombre nails with a brush
Next, we’ll look at how to make ombre nails without a sponge. To do this we need a special flat brush, as in this photo:
The preparatory steps will be the same as in the previous paragraph, only the gel polish needs to be applied directly to the nail, and then with a slight movement of the brush from side to side, shade the gel polish. Repeat this action as long as necessary, each time drying a new layer in the lamp, and at the end fix the gel polish with top coat.
Ombre nails with airbrush
An ombre airbrush is one of the new inventions that makes the work of nail artists easier. The principle of its effect is similar to airbrushes for cars - shellac is poured into the device’s reservoir, after which it is sprayed onto the nails in the form of a spray. This manicure is very simple to perform, especially in comparison with the two previous methods. With this tool you can realize even the most vivid fantasies and incredible color schemes. It is very easy to use, you just need to practice on paper and learn how to regulate the pressure. After this, you can start manicure. Drying and coating occur in a standard manner.
How to make a gradient with regular varnish
An ombre manicure at home can be easily done with regular polish. To do this you need to use the above methods, the technique remains the same. The only caveat is that everything needs to be done quickly, before the polish dries, otherwise you risk getting a very sloppy manicure.
Nuances to consider
Any path to the desired result is thorny and full of obstacles. Didn't manage to create the cutest gradient on your nails the first time? Don't despair and rush to try your hand at the second attempt. And tips and life hacks collected from practicing masters will help you avoid mistakes in the future and reach the pinnacle of nail art:
- It is not advisable to use chameleon varnishes, since it is impossible to predict their behavior when they come into contact with the nail. And the result may differ significantly from what was planned;
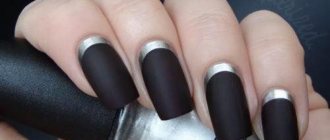
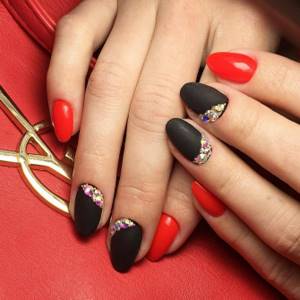
- for matte shades, only application with a sponge and mixing on the palette is used, otherwise the coating will look unaesthetic;
- for glossy varnishes it is recommended to use 2-3 layers of fixative - in this case they will not fade over time;
- if you have short nails, then replace the standard horizontal gradient with a vertical stretch, visually adding length to the free edge;
- remember that the transition from dark to light in the direction from the nail bed to the free edge is more suitable for long or extended nails;
- if you create a really bright transition by combining contrasting shades in a color block style, then do not forget to carefully blur the boundaries, otherwise you risk getting a “dirty” effect;
- If you don’t have a brush or sponge at hand to create a trendy ombre, then use a regular eyeshadow applicator as a decorating tool.
Many of these methods, as well as simple but effective tips, help you adjust your work and achieve a truly stunning result of your efforts. Find more life hacks in the video below:
Red and Black Pointed Nail Designs 2020–2021
Pointed nails can add elegance to almost all finger and hand shapes. Trendy colors for nail design - red and black - will only add a special chic to your nails.
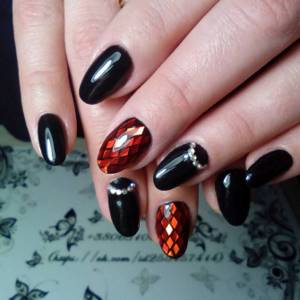
red and black pointed nail designs
edgy nail design red and black
black and red sharp nail design photo
Red and black nail designs can be used on different nail shapes. The sharp shape is back in fashion after some time off. Only now having this shape is in trend not as extended gel or acrylic nails, but as actually grown nails.
design of red and black sharp nails photo 2020–2021
Using fashionable traditional colors of red and black on edgy nail shapes can be for the following purposes:
- paintings (geometry, floristry, a la “French manicure” with different styles of decorating the regrown nail);
- ombre (in all its manifestations);
- alternating colors on different nails.
red and black design of sharp nails gel
When designing sharp nails using black and red colors, you can choose one of them as the main one, and the second to complement the overall image. In the 2020–2021 seasons, the active use of geometric shapes, floral motifs, and zoological patterns is fashionable.
Fashionable gradient transition at home
It happens that you just need to get a luxurious and sophisticated manicure, but there is absolutely no time for a salon. This is not a problem at all, since you can create a stylish and popular manicure yourself at home. Below we will describe the step-by-step technology for performing a smooth transition. Now let’s take a closer look at what is needed to create a vibrant design:
- base coat for nails;
- fixing agent (top);
- gel polishes of selected colors;
- nail polish remover to easily remove polish residue from cuticles.
Using these elements, you can easily create a beautiful color transition at home. Therefore, there is no need to visit a beauty salon and spend a lot of time on it.
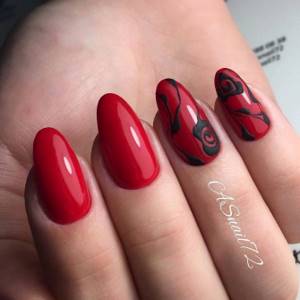
Design of red and black nails with drawings 2020–2021
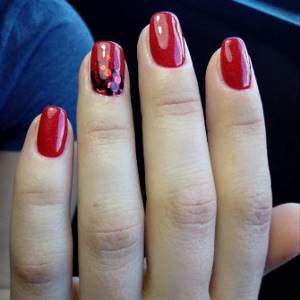
The red and black nail design is perfect for special occasions, and the presence of drawings will “smooth out” such decisiveness a little and give the image versatility.
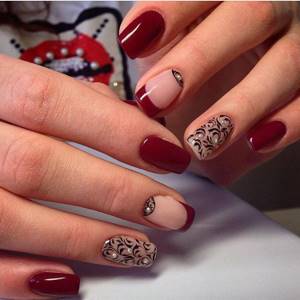
red and black nail design with pattern
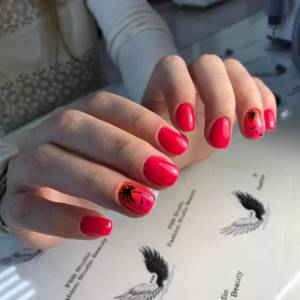
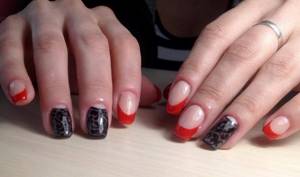
The decoration of some nails on a varnish base or other coating is used in various combinations of geometric motifs, as well as floristry and animalistic motifs. Abstract drawing is practically not supported this year as a priority type of painting.
nail design red with black and pattern
black and red nail design with pattern photo
design of red and black nails with a pattern photo
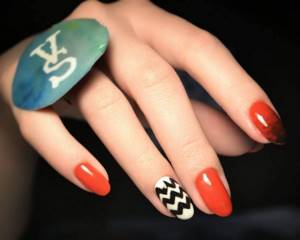
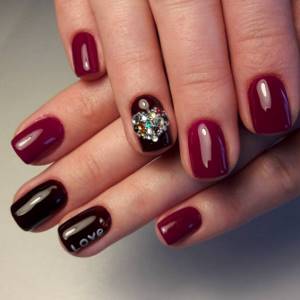
Logomania can be identified as a separate trend in the nail industry. Nail designs using red and black colors can depict logos of famous brands, as well as their names. Red and black nail design in 2020–2021 is a sign of having good taste and following fashion trends.
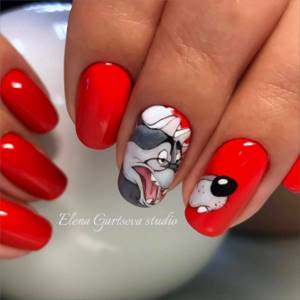
red and black nail design with wolf pattern
nail design red black pattern
Based on black and red colors, you can also use a slider design. Three-dimensional pictures using the method of overlaying and fixing on the nail plate can give a unique individuality. These are the drawings:
- geometric;
- textures;
- cartoons;
- animal art and insects;
- patterns;
- skulls;
- pop Art;
- vintage and lace;
- seasons and so on.
nail design in red and black with glitter
Combining such designs should be careful, as there is a risk of getting a result that is distinguished by its “anti-style” and bad taste.
nail design 2020–2021 red with black pattern
nail design red with black pattern photo new
To make an original design on nails with different shapes, drawings are used, which are considered bad form to apply to each finger.
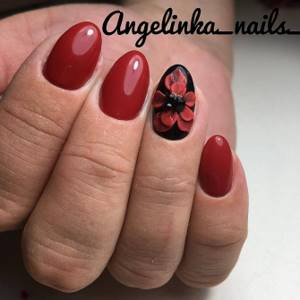
nail design black with red and flower
Content
- What is ombre manicure on nails
- Design Benefits
- Disadvantages of ombre nails
- What techniques exist for creating ombre nails?
- Ombre manicure with brush
- Gradient with sponge
- How to do an ombre manicure: step-by-step instructions
- Gradient on nails with gel polish with a brush: step by step
- Step-by-step instructions for creating a gradient with gel polishes
- Expert opinion
[ads-pc-2][ads-mob-2]
If you like ombre manicure on your nails, then you are a girl with a bold character, ready to keep up with current fashion trends. Gradient design remains trendy in 2019, so your favorite manicure can decorate your fingers for a long time. The color palette of nails can be completely different: from bright flashy shades to neutral colors, which, by the way, can even be worn to work.
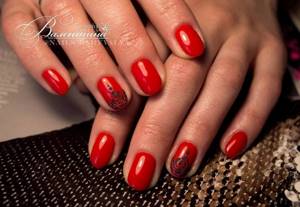
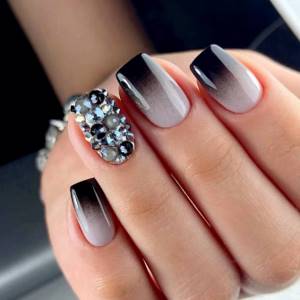
Design of red and black nails with rhinestones 2020–2021
Rhinestones have been used as an element of nail decoration for quite some time. Rhinestones made from Swarovski crystals have gained the most popularity.
red and black nail designs with rhinestones
nail design red and black with rhinestones
Using the red and black nail design photo, we can conclude that rhinestones have found new uses in nail design.
black and red nail design with rhinestones photo
Possible interpretations of rhinestones for nails:
- Different sizes of rhinestones. A scattering of small stones looks more interesting and original if they have the same shape but different sizes. The combination of different sizes when designing red and black nails can create a unique composition.
- Different color rhinestones. Multicolored rhinestones are used to give different color effects on red and black nails.
- Difference of forms. Different shapes will be a highlight in your nail design.
red and black nail design with rhinestones photo
red and black nail design rhinestones
The location of such decor can be different:
- completely covering the nail (usually used on one or two nails, others contain elements of stones, but are not completely covered);
- French decor (along the line of the overgrown nail, where the red and black colors border);
- design of the drawing;
- at the nail bed;
- drawings from stones.
nail design in black and red with rhinestones
nail design black and red rhinestones 2020–2021
design of black and red nails 2020–2021 with rhinestones
Properly selected rhinestones for decoration can add a special touch to your nails. It should be remembered that such bright decorative elements should not be in excess.
nail design 2020–2021 photo red and black with rhinestones
red and black nail design with rhinestones
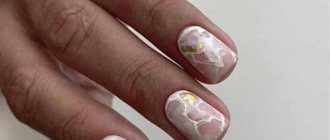
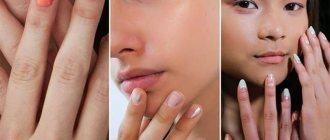
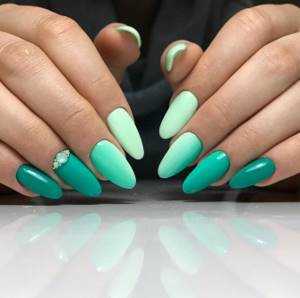
Delicate ombre manicure in white
In the field of color, the classic combination is white and beige. This manicure always looks very stylish, presentable and attractive. The gradual transition to white makes the handles more delicate. To diversify the design, you can use mother-of-pearl rubbing, which will create the effect of depth. Fine acrylic powder will add a slight shimmer to the delicate coating. It is transparent, so it will not affect the color of the main white ombre.

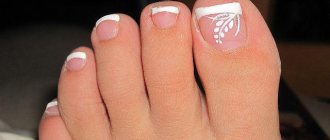
Design of red and black French nails 2021
For a long time, French has ceased to be an imitation of naturalness and the use of colors - pink (beige) and white. Contrasting colors, or those that are similar in shade but different in intensity, have long been a trend.
French red and black nail design
nail design red with black french
Red and black are a contrasting option for a bold French jacket.
black and red French nail design photo
There may be other color options. Nail designs red black white can be used on different shapes of the nail plate.
red and black nail design french photo
red and black French nail designs 2020
In this case, the whitened part of the nail is emphasized in different ways, the shape is selected depending on the configuration of the nail plate:
- oval shape;
- almond-shaped;
- square;
- triangular and others.
French nail design in red and black

fenchi nail designs red and black
nail design black and red french
nail design black and red french
black and red French nail design
You can easily come up with a photo of red and black nail design yourself. And who knows, maybe this particular look will become a trend tomorrow and win the hearts of all lovers of bold manicure.
Varieties of gradient manicure
This technique has many varieties, and they are all very elegant and delightful.
Vertical gradient transition
Bright vertical stripes of a gradient transition look very unusual on the nail plate. This design visually lengthens the nails, so it is often used on short lengths. This idea can be performed in any color scheme, as well as in combination with any texture.
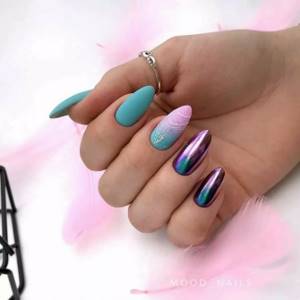
Angular or diagonal gradient
This unusual transition of tones can transform and refresh a manicure. This design will be an excellent choice not only for everyday occasions, but also for festive events. The main thing is to choose the right colors. Also, do not exclude additional decor.
Transition from the center of the marigold
This implementation of a gradient transition is an incredible trend for 2020. Most often, white color is used as a base, which is why this manicure is called the blush effect. To make the transition, you need to cover your nails with white, and from the middle begin a smooth transition to pink or peach. The end result is a very attractive and stylish design.
Ideas for long nails
Despite the increased popularity of short nails, many girls are in no hurry to give up long manicures, which make hands very feminine. The only thing that will be inappropriate is nail plates that are too long, square or overly pointed.