What is a nail rub?
By rubbing we mean a finely dispersed powdery pigment that gives a shiny effect.
Its texture resembles weightless powder or finely ground sand. The size of the glitter varies. It is recommended to use smaller ones for the first layer, and larger ones for the second and subsequent layers. If desired, you can use pigment not only of different sizes, but also of different shades. A brilliant gradient with a smooth flow from one tone to another always looks non-trivial.
The finer the rub, the more densely it is applied and the more uniform the effect.
The rub is sold in miniature jars, just like glitter. The kit often includes a special foam applicator for easy removal of the contents and application to the nails.
The pigment owes its name to the method of application. It is literally rubbed into the surface of the nails. Thanks to its fine dispersion, the pigment adheres perfectly to the base coat. His role is played by:
- regular varnish;
- gel;
- shellac;
- acrylic.
Rubbing in requires the mandatory application of a top coat. Otherwise, the pigment will only last until the first hand washing.
Benefits of rubbing
The rub quickly gained success, which is well deserved. Its main advantages include:
- a more spectacular result in contrast to gel polishes with a metallic effect and foil;
- ease of use - the desired manicure can be done at home;
- resistance to water, solvents and sun;
- easy removal from nails;
- wide variety of designs;
- wide selection of colors;
- low cost;
- economical consumption;
- harmless to nails, since it is applied to the base coat.

The rub is used on both long and short nails. In the first case, it looks more impressive due to the larger area of the nail plate. Long nails allow you to see the play of light in all its glory. When using the rub on short nails, it is important to avoid flashy shades. The ideal option is pastel colors. In any case, rubbing draws attention to the manicure, so it must be flawless.
Rub on regular nail polish
If the rub is applied to regular polish, the nails are also pre-treated.
How to rub in nails using regular polish, instructions:
- The first layer of varnish is applied and slightly dried so that it remains slightly sticky, but the varnish does not mix when touched with a finger to the surface.
- The rub using an applicator is applied in a generous layer to the nail. To distribute it, rub the pigment in with gentle smoothing movements. Do not press too hard, otherwise the varnish layer will be damaged and the procedure will have to be started again.
- Then remove excess glitter using a fluffy brush.
- A glossy top completes the manicure. The last layer should be dried well.
To have a beautiful manicure with the addition of rubbing, you don’t need to be a professional at all. It is enough to follow the instructions and do everything quite carefully. Gradually, confidence and dexterity will appear.
How to choose a rub
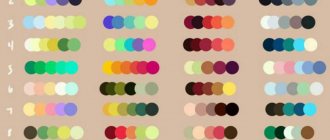
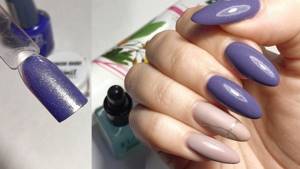
The rub is available in a wide variety of colors. The choice depends on personal preference. Popular shades of the rub are: pearl, red, blue, mother-of-pearl, rainbow, chameleon, gold, pink silver.
It is recommended to match the color of the rub to the base varnish. They must harmonize or complement each other. The rubbing manifests itself differently on each color.
To create a bright and rich manicure, use a base polish in dark shades. In this case, the applied rubbing will give greater depth. And, conversely, for a delicate design, give preference to calm colors, or do not use a substrate at all.
Popular and well-established brands that produce nail rubs are:
- Masura;
- Zoo Nail Art;
- Nika Nagel.
The range of each brand is quite diverse, and prices vary.
Before purchasing, pay attention to the quality of the pigment. Cheap rubs can ruin your manicure by creating unsightly stains of unclear color.
French with rubbing
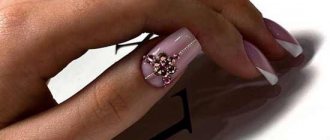
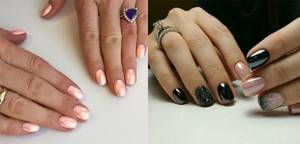
This season, another type of French manicure has appeared - French manicure with rubbing. Using the classic pink background of the nail, a silver or gold rub is applied using the ombre technique. And the nails begin to shine, but not completely, but from half of the nail bed. The advantage of this design is the visual increase in the length of the nails. Therefore, we can recommend it even to those with short nails.

But other types of rubs also go well with the white and pink color scheme of the French jacket. This is, first of all, pearl powder - a manicure with it becomes radiant, although it does not change color. Silver and holographic powders add shadow, while Chafer adds multi-colored dark highlights. A matte French coat with melange sprinkles looks very good.
How to use rubbing: important rules
Applying the rub is usually not difficult. The procedure does not require special skills, but has nuances that are important to know. Even a small deviation from the rules can lead to unexpected results.
Nail preparation
Thanks to its shiny effect, the rub accentuates the manicure, so it must be flawless. You cannot steam your hands in water or do a trim manicure. The optimal solution is to use a special product to remove dead skin particles and remove cuticles only with an orange stick.
The nail plate should be perfectly flat. Otherwise, the pigment will rub in poorly, and roughness and unevenness of the nail will be noticeable. Polish your nails thoroughly, remove dust and apply a good base coat to avoid bald spots. If there are any unevenness or kinks or kinks from the extension, do not apply the rub yourself. Contact a specialist who will do micromodeling. Otherwise, the pigment will simply slide into the creases of the nail plate.
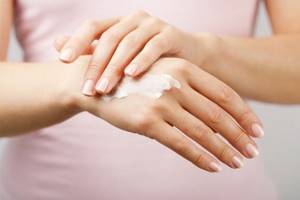
It is also important to monitor the condition of the skin of your hands. It should be smooth and moisturized. On unkempt hands, a manicure with rubbing loses its attractiveness.
How to apply the rub
There are no strict rules here. It is allowed to rub the pigment in either with your fingertips or with a special manicure rubber hoof. You can use eye sponges or a brush. The latter should be loose, but soft. This allows the pigment to immediately adhere to the nail in one go.
The choice of application tool depends solely on personal convenience. It is important to distribute the rub evenly over the entire nail plate, including areas near the cuticle and side ridges. It is often difficult to do this with your fingers, so it is still advisable to use a special tool.
How to choose a varnish for rubbing
It is necessary to check the expiration date of the product and its consistency. It should not be thick and viscous.
The color of the polish does not matter when it comes to mirror manicure. It will be completely blocked by rubbing.
How to apply the rub
An important condition is that the rubbing is applied to sticky drying varnish or shellac that has not undergone polymerization. To create a mirror manicure, the top layer, on the contrary, should not be sticky, otherwise there will be no shiny effect.
It is important to apply the base coat as thinly as possible and do not forget to “seal” the nail. To do this, just walk the brush along the cut of the nail plate. Gel polish also needs to be applied thinly. Even gaps and stripes in the coating are acceptable, since the pigment will cover them anyway.
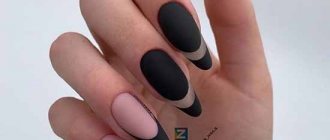
The rubbing must be coated only with a glossy topcoat. Matte finish is on trend today, but in combination with rubbing, it makes nails unattractive.
It is important not to dry out your nails in the periods between applying the base polish, top coat and rubbing. In case of overexposure in the lamp, the pigment simply will not rub in. The mirror rub is applied immediately after drying in the lamp, otherwise it will not fit well on the nails.
Types of rubbing
The result of a manicure depends not only on the rub, the pigments of which always differ in structure and shade, but also on the color of the base coat.
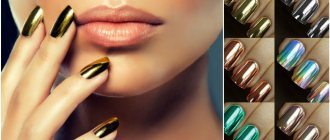
Mirror shine
The mirror effect always looks original. This is not only a bold decision, but also very profitable. The mirror shine simply captivates the views of others. The overflow can be of different shades - silver, copper, white. It depends on the color of the nail polish.
Holography
The holographic effect can only be achieved using gray rubbing. The shade of the holography depends on the color of the nail plates. Regardless of the color of the substrate, only gray rubbing is always used. It is better to make the base bright and rich.
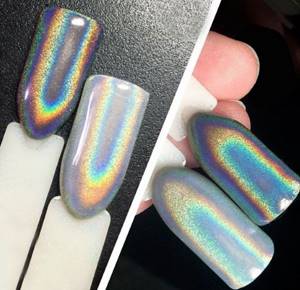
To obtain a classic holographic design, nails are coated with a white or black base varnish.
May beetle or chameleon
This type of rub shimmers with yellow, blue and green shades, making it suitable for any onion. It is sometimes confused with Northern Lights pigment, but they have differences. The cockchafer shimmers not only with cold tones, but also with warm ones. In the Northern Lights there is only a cold palette.
In order for a manicure with chafer rub to look beautiful and neat, you need to carefully treat the nail plates. They must be perfectly even.
Northern lights
The main feature of this pigment is its narrow color spectrum - the coating shimmers only with cold tones. All shades of red, yellow and orange are absent here. To get a manicure with the Northern Lights effect, nails are first coated with white or black varnish. You can also use gel as a base coat.
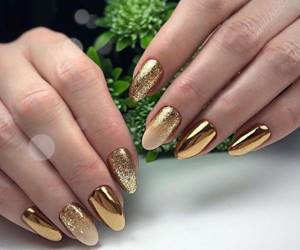
Gold
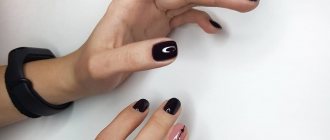
Using gold rubbing, you can create a luxurious mirror manicure that will add an elite chic to your look. It is not necessary to cover the entire nail plate with gold; you can highlight only the smile in a French or anti-French coat, or make any pattern you like.
To make the surface delight with its magnificent tints, the rub is applied to perfectly smooth nails coated with gel.
You can use regular varnish as a base, but in this case, the surface will have to be polished for a long time, since the mirror shine highlights all the roughness and irregularities. Beginners are not recommended to combine gold with silver, because only experienced craftsmen can achieve harmony in such a composition.
Pearl rub
Many people know how to apply nail polish, but to achieve a pearl effect, you should get creative with the bottom layer of varnish. This pigment can be applied to shellac of any shade; the look of the finished manicure will depend on the latter.
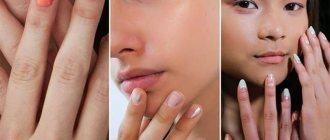
The pearly appearance of the rub allows you to give your nails a pearlescent shine, reminiscent of real pearls . The powder goes perfectly with the pastel palette and is great for complementing a wedding or romantic look.
Silver
Silver, like gold, is a classic manicure option. The powder creates a perfectly smooth mirror surface. However, when combined with different bases, the effect can be completely different. So, if the base is dark in color, then eventually the nails will take on the shade of graphite or wet asphalt.
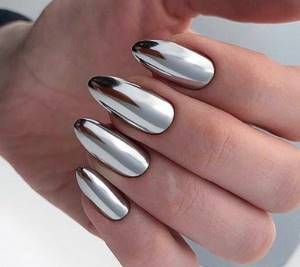
Manicure is ideal to complement a business or urban look. If the base varnish is light, then the shade of the nail plates will be much lighter and more delicate, so this option is perfect for festive events.
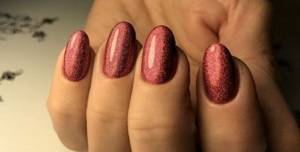
Rainbow
This type of decor is also called mermaid or unicorn. Multicolor shimmers are ensured here due to the fact that the rainbow rub consists of three types of powders at once - Northern Lights, holographic and pearl.
Melange
Melange rubbing has larger and more expressive grains, which creates the effect of a manicure using sugar on the surface of the nails. This is where all the available names for this powder come from: marmalade, ice cream, sugar, snowball - they all refer to the appearance of the nails.
Not all pigments of this powder have the shine characteristic of rubbing in, but some do exist. The finished manicure looks voluminous.
How to rub glitter onto gel polish
You will need:
- colored gel-based varnish;
- glossy top coat;
- fan brush;
- file;
- polishing buff;
- sponge;
- fine grinding;
- Ultraviolet lamp.
Execution technique
- Remove cuticles, file and polish your nails.
- Degrease the plate and remove nail dust.
- Apply a base layer of gel polish and cure in a lamp.
- Apply a second coat to your nails and dry again.
- Apply some rub to a brush and sprinkle it generously over each nail.
- Rub the glitter in with a sponge and dry your nails.
- Shake off excess pigment and apply top coat.
How to properly rub in “mirror shine”
You will need:
- fan brush;
- file;
- polishing buff;
- colored gel polish;
- glossy top coat without a sticky layer;
- black varnish base;
- mirror rubbing;
- drying lamp.
Execution technique
- Perform a hygienic manicure: remove the cuticles, give the nails the desired shape and polish. The last procedure directly determines how well the rub will be distributed.
- Degrease your nails, apply a thin layer of base varnish and dry under a lamp.
- Cover your nails with gel polish and dry again.
- Apply top coat and dry your nails.
- Take a little rubbing onto a brush and spread over the entire plate. It is important not to leave any gaps.
- Brush off any remaining pigment and coat your nails with two coats of a glossy finish, allowing time to dry in between.
To enhance the mirror shine after the first coat of finish, repeat the rubbing procedure. After this, apply another layer of finish. Mirror rubbing can be done even with a top coat, but masters still recommend following the technology to obtain a long-lasting, high-quality manicure.
Rubbing on shellac
To get an attractive manicure, you must follow the instructions:
- First you need to get your nails in order. Without this it is impossible to get a beautiful coating. Particular attention should be paid to the surface of the nail plate - it must be perfectly flat so that the pigment is distributed evenly.
- It is recommended to degrease the surface using a special product. The ideal option would be a primer.
- The next step is applying the base. One layer is enough.
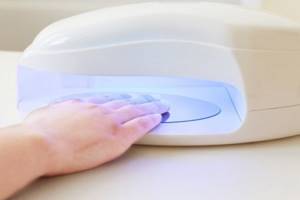
- Then you need to carefully dry your nails. Under UV rays this is done within 2 minutes, and in an LED lamp the procedure will take only 30 seconds.
- The next stage is applying a colored layer of gel polish. This layer needs to dry.
- The top shouldn't be too sticky. It should also be dried.
- Next, apply the rub; to do this, you need to pick it up with an applicator or brush and distribute it over the nail plate. The main thing is to avoid gaps, otherwise the result will not be perfect.
- Small lint, dust and other foreign elements can also spoil the beauty of a manicure. Therefore, the working surface must be perfectly clean.
- To prevent glitter from peeking out from the tip of the nail, a nail file will help. It should be used to file the edge, thus sealing the coating.
- At the end of the procedure, it is recommended to apply two finishing coats, thoroughly dried. But before this, the rub needs to be shaken off the nails well so that there is no stuck glitter and the color is not disturbed.
It happens that the varnish shines through from under the shiny pigment . This is possible if the color base is too dark. In this case, the procedure must be repeated to achieve a spectacular mirror finish.
How to do a manicure with prism rubbing
“Prism” is one of the varieties of mirror rubbing. It is distinguished by a finer grind, which allows you to get a 3D effect on your nails. Quite often, a prism is confused with a holographic pigment. The difference lies in the size of the grains of sand. “Prism” has a texture reminiscent of homogeneous dust and looks like sparkling mother-of-pearl. Individual sparkles are clearly visible in the holographic rub.
The choice of substrate depends on personal taste. Its color affects the shade of the “prism”. The classic application option involves using black or white rubbing.
You will need:
- file;
- polishing buff;
- base and top coat;
- colored gel polish;
- sticky layer remover;
- rubbing;
- fan brush;
- drying lamp.
Application technique
- Remove cuticles, file and polish nail plates.
- Apply the first base coat and let dry.
- Cover with colored gel polish and dry again.
- Remove the sticky layer with a special product.
- Take the required amount of pigment onto the brush and apply it to the nail with light massage movements, distributing evenly.
- Shake off excess glitter.
- Cover your nails with a glossy topcoat in two layers and dry.
Rubbing “prism” gives nails a stylish and expensive look.
Why doesn't the rubbing stick?
When the master makes mistakes during the rubbing process, the result is an unsightly manicure and the pigment does not stick. If the nail is unevenly covered with shiny sand and bald spots appear, it is better to immediately remove the low-quality material and start the procedure from the very beginning.
When applying the rub, you should not make mistakes:
- It is important to choose the correct size of the rubbing sand grains. If they are too large, there is a risk that they will not stick well. And the fine shiny dust takes a long time to dry. The optimal pigment size is one or two.
- There are low-quality gel polishes or shellacs. Their main problem is lack of tack, which prevents the glitter dust from attaching to the varnish.
- The applied layer should be thoroughly dried. If this is not done, when applying the finishing layer the glitter will stick to the brush and bald spots will appear on the surface.
- The aesthetic appearance of the nails will be spoiled if, when applying the rub, its particles get on the cuticle or side ridges of the nail.
For those who want to extend the period of coating with rubbing, manicurists advise that after applying a layer of pigment, cover the nail with a base, wait until it dries, and fix the color with a top coat.
An interesting idea on how to rub in nails without taking much time.
To enjoy the excellent results of a manicure with rubbing on your nails, you must follow all the steps for applying this coating. It is important to know how to do this correctly in order to end up with a beautiful nail design that is suitable for both holidays and everyday wear.
Article design: Anna Vinnitskaya
Nail design options with rubbing
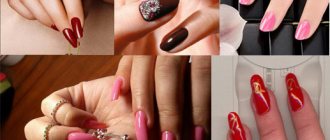
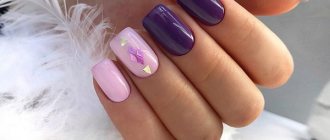
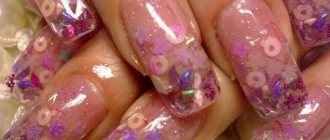
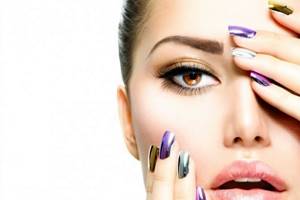
It is not necessary to cover all the nails with the rub. This manicure looks quite bright, so it may not always be appropriate. The optimal solution is to use the rub on one or two fingers. Shiny accents will make your manicure interesting and appropriate in many situations.
Another fashionable option is to apply patterns on your nails, leaving one or two for rubbing. A homemade option is to use stickers instead of drawings. This manicure looks interesting and stylish.
A kamifubuki manicure in a duet with rubbing looks original. This is a type of Japanese nail art that resembles confetti. You can make one of the nails using the kamifubuki technique, and cover the rest with a mirror rub.