What it is?

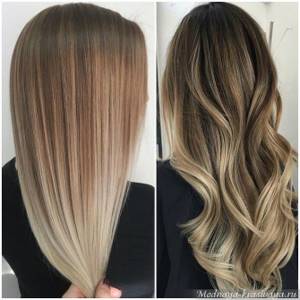
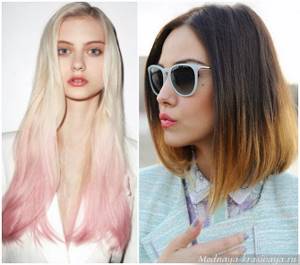
Painting balayage - how and what kind of technique is it? Balayage is a special coloring technique in which the artist lightens individual strands to create a bright color contrast on the hair. Balayage differs from the shatush technique in that it can cover a larger “area” for lightening . For example, in the shatush technique, no more than half the length is taken; with balayage, the lightening begins much higher.
Also, do not confuse balayage with the equally popular ombre. When performing ombre, the border of the color transition from dark to light is more pronounced, that is, the transition area remains smooth. Also, color dyeing is more applicable to ombre, for example, pink or purple ends for blondes and so on.
What is the difference between balayage and other highlighting techniques?
Balayage took a long time to gain momentum. This technique of highlighting, that is, partial lightening of hair, was first used in France in the mid-70s of the twentieth century. At that time, stylists were thrown from one extreme to another: the 60s, with their commitment to wigs, had passed quite recently, and fashionistas of those years did not at all consider it shameful to dye their curls in unnatural tones. In addition, uniform coloring of the heads prevailed - this is the result that was considered a manifestation of high professionalism and corresponded to fashion trends.
Therefore, balayage, with its smooth transitions and the effect of burnt hair, did not receive much response in the hearts of leading fashion creators. For women, this color was associated with sun-bleached strands. It was believed that balayage does not decorate the appearance, turning a woman into a village simpleton who allowed such a careless attitude towards her own hair.
In the new century, the balayage technique is experiencing a rebirth. Nowadays fashion trends are natural beauty, youth, and an active lifestyle. All this perfectly matches the mood that balayage creates in a hairstyle.
It is the effect of burnt curls that can do a lot, providing the following advantages of the technique:
- Creates volume even on weak, thin hair;
- Gives the hair a natural look;
- Visually rejuvenates;
- Does not require regular root dyeing. Moreover, balayage is the only technique in which dark roots do not spoil the appearance of the head, but add additional emphasis to the hairstyle;
- Individuality is born due to the uniqueness of the client’s hair: its color, structure, length. Therefore, every woman is unique after performing this procedure;
- Cost-effectiveness and gentle effect on hair is ensured by a small amount of dye applied.
The concepts of balayage, ombre and shatush and airtach are so merged in the minds of many women into one and the same technique that often even on websites about hairstyles you can find photographs of balayage under the text about the shatush or ombre technique, and vice versa.
However, there are differences. Ombre coloring is characterized by the presence of a clearly distinguishable border between two colors on the hair. It can be blurred along their entire length, as is achieved in the sombre technique, and, nevertheless, it is there. There is only one definitive answer to the question: how does balayage differ from ombre: the absence of a visible boundary between the colors. Others should have the impression that your hair has bleached naturally. Ombre creates the effect of regrown roots after the previous coloring.
Ombre
In the shatush technique, just like in balayage, the effect of lightening is created on the ends of the hair. But in balayage, this lightening seems to be born naturally, because it is distributed evenly throughout the strands. Thus, the light highlight on them looks natural and natural, like the last sunbeam of hot July, tangled in the hair and remaining in it until winter.
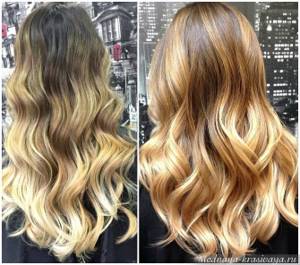
Difference in Techniques
This is exactly the effect that all women who choose balayage achieve. “Memories of summer” in a hairstyle makes a positive impression on others. A woman with this coloring is perceived as younger, rested, and full of internal energy.
When visiting a salon, ask the specialist what the difference is between these three popular coloring techniques. If you haven’t heard a clear answer, choose another place to experiment with your hair.
Is it possible to dye your hair at home in this style?
Dyeing your hair in balayage style yourself, is it possible? Do-it-yourself home coloring using balayage technology requires special effort . It is necessary to be careful when working with paint, and also to think about tones that will be as close as possible to the original color, because the balayage coloring technique uses lightening of only three tones.
What is needed for this?
How and with what to paint? In order to dye your hair in the balayage style at home, we should have on hand:
- Gloves.
- Comb with fine teeth.
- Hairpins or silicone elastic bands.
- Sponges and brushes.
- Paint and brightener.
Although balayage is a technique for coloring the ends, it is still recommended to lubricate the neck and ears along the hairline with a rich cream to avoid unpleasant surprises such as skin staining. You can also protect your clothes with a special hairdressing cape, if you have one, or just an old towel.
How to prepare?
Next we move on to preparing the hair. Since we do not touch the scalp, whether your hair is washed or not is not important . At this stage, the main thing is to comb them properly, otherwise during the dyeing process they will get tangled, which will cause a lot of inconvenience.
Step-by-step instructions on how to correctly perform the procedure for yourself or someone else
A simple and quick hair coloring technique for short hair
Technology for dyeing short hair (step by step), which you can do yourself at home:
Use a flat comb with fine teeth to comb your hair so that it is held vertically. In other words: we arrange a kind of hedgehog on the head, after dividing the strands into several parts. The more strands you comb, the more effective the coloring will be. If the hair does not hold, then you can resort to hairspray.- We apply the coloring composition with characteristic movements, as if “pulling” each strand from the bottom up. The paint can be applied using foil or wearing gloves. You should not do this with a brush or sponge - your strands may “fall”. Be as careful as possible in the color transition zone! Since the hair is short, one extra movement can ruin the entire coloring!
- Condition the coloring composition according to the manufacturer's instructions. How long does the procedure take? On average it will take about 20-40 minutes. When the dye wears off, rinse your hair with warm water. If desired, you can apply balm.
For medium length
How to do balayage step by step on medium length hair? In this coloring option, in addition to the items from the standard home hairdresser's kit, you will also need foil.
DIY painting technique:
Comb your hair well and divide it into 4 zones . Further, these zones can also be divided into several more, depending on your imagination. For convenience, we tie each tail with small silicone rubber bands. The optimal width for each strand is from 0.5 to 2 centimeters.
- We apply the coloring composition as follows: the rubber bands should be distributed so that the line where the color transition begins is approximately 1-1.5 centimeters below them. We apply paint separately to each “tail” and wrap it in foil. You can apply the composition with a brush or sponge. To get a smooth transition line, you need to hold the dyed strand in the place where the dye ends between the pads of your thumb and forefinger and carefully make several up and down movements, as if rubbing the dye into your hair.
- We cure the paint according to the manufacturer's instructions . You cannot leave the composition on your hair, otherwise the result will be very unpredictable.
- Carefully remove the foil and wash your hair . After coloring, it is recommended to use a balm. It is better to wash off the paint one by one, starting with the bottom layer and ending with the top. This will prevent the composition from getting onto unpainted areas.
Watch a video about dyeing medium hair using the Balayang technique:
For long strands
TIP : To dye long hair, it is better to ask a friend for help, since tangles are possible on the back of the head.
How to dye your hair using the balayage technique for long hair:
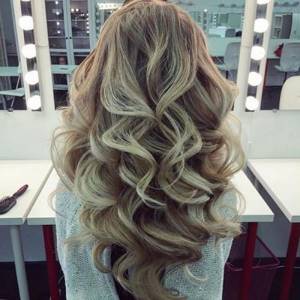
First of all, divide the hair into 4 equal parts . Next, these parts are added by another 4. The optimal width of one dyed strand is 0.5 - 2 centimeters. Here you will have to tinker with thick and long hair. We secure each resulting ponytail with a silicone rubber band 1.5–2 centimeters above the intended transition line.
- We apply the coloring composition . To achieve a smooth transition, we will resort to the method described above: we pinch the place where the paint ends between two fingers and make up and down movements, thereby “rubbing” the paint along the strand.
- Wrap it in foil . We cure the paint according to the manufacturer's instructions.
- It is necessary to wash off the dye on long hair one by one, starting from the bottom layer and ending with the top . After the procedure, it is recommended to apply a balm for damaged and colored hair.
Watch a video about hair dyeing using the Balayang technique for long hair:
Types of coloring using the balayage technique
This technique has many variations and types of execution, but for the most part the main types of this coloring technique can be divided into:
- a classic method of painting, in which 2 or more shades are applied with a smooth transition or an unclear separation of horizontal lines. In this variation, you can combine dark top and light bottom options, or vice versa.
- a classic version of painting with a clear division of boundaries, and here variations on the theme are also possible - the horizontal line can be high or low, located at the level of the cheekbones.
- painting the ends of the curls on the back of the head, in the front, in the front area, or creating a balayage effect like a backcomb and thereby creating the effect of a creative, torn bang.
- fashionable dyeing for a ponytail - just collect the curls and dye only the ends in this case, or create markings of contrasting color, chaotic or asymmetrical on the bangs and ends of the curls.
How to tint?
If after bleaching there is an unpleasant yellow tint left on your hair, then getting rid of it at home is quite simple. There are a lot of products that neutralize yellowness, such as tinted shampoos, special balms, etc. Sometimes manufacturers put them in boxes with lighteners.
There is also a budget way to tint bleached hair at home . For this we need:
- Balm "Tonic" purple hue.
- Hair balm.
It is necessary to dilute the “tonic” and your regular balm in proportions 1:1 and leave on the hair for 3-5 minutes. At the end of the time, rinse your hair thoroughly.
Be responsible when choosing “Tonic”: the balm should be purple ! All shades of cool blonde initially have this exact shade. To avoid mistakes, it’s easier to ask the seller to open a bottle of tonic in front of you. If it is lilac or deep purple, this is what we need. Don't confuse it with blue! Otherwise, you will end up with “green” in your hair. To be on the safe side, it is better to try the toner on a separate strand: this will help you adjust the time the balm is exposed and the intensity of the color.
Watch a video about tinting hair after bleaching:
Hair coloring
The main secret to successful balayage is choosing the right shade. And, of course, competent technology!
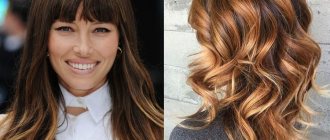
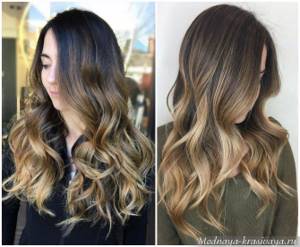
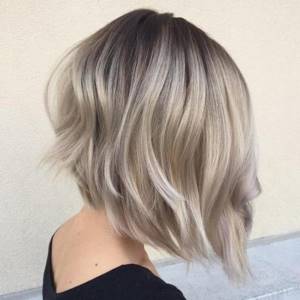
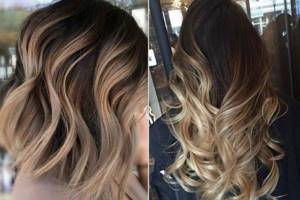
Balayage for dark hair
This is lightening and subsequent tinting of individual strands. Moreover, the ubiquitous blonde does not necessarily come into play. Cool grayish shades, light brown or copper shades look impressive. It all depends on what effect you want to get.
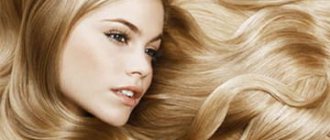
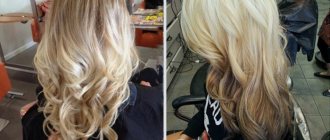
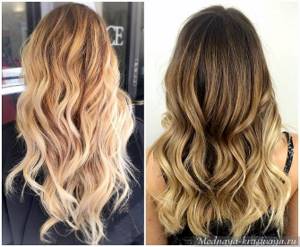
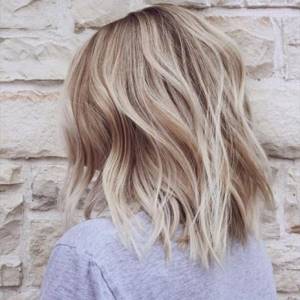
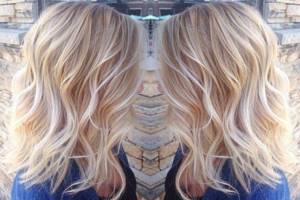
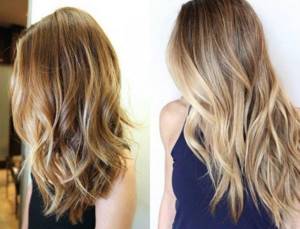
Balayage on blonde hair
For blondes, there are two options: lighten them even more or darken them a little. Balayage helps make blonde more interesting, lively and, oddly enough, natural.
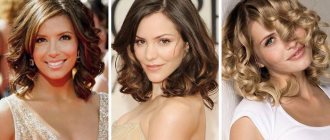
Balayage for brown hair
On light brown hair, balayage gives a very subtle effect of burnt strands. And adjacent shades help add volume and complexity, so the old stereotypes about mouse color are no longer relevant.
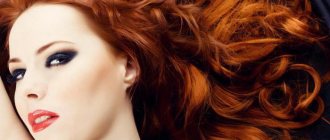
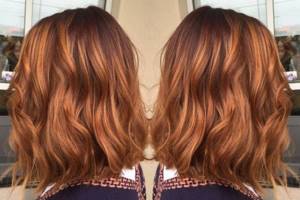
Balayage for red hair
Balayage on red hair is usually quite subtle and is a transition into a deeper or lighter shade of red. This is due to the specifics of the red pigment itself, which is difficult to remove without harm. But you get real flames!
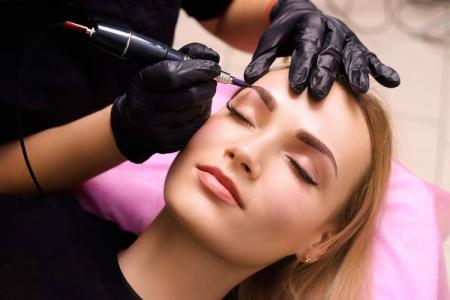
Permanent eyebrow makeup: what is it (before and after photos)
How to make one color yourself?
It also happens that modern and fashionable coloring becomes boring over time. Don’t despair and take up scissors to cut off the boring lightened ends - you can easily paint them over at home. For this we need:

Several packages of paint in the shade we need.- Accessories for painting.
- Patience.
It is best to take dye with a low ammonia content so as not to harm your hair.
Lightening hair is the removal of color pigment from it . This means that if we removed it and want to recolor it, then we need to “hammer” this pigment into the hair again. Therefore, you will have to repeat the staining procedure approximately once a week. On average, 3-4 colorings are enough for the pigment to stick well to the hair.
Technique for performing and applying paint step by step (for the first painting):
- We begin to apply the coloring composition to the ends, gradually moving up to the roots. After we have applied the dye to the lightened areas of the hair, let it sit for 10 minutes and carefully comb the hair.
- Next we tint the roots to even out the color. Leave for 30-40 minutes and wash off with warm water.
- After the procedure, it is recommended to apply a balm for colored and damaged hair.
For subsequent staining: repeat the same thing, but do not touch the roots. The action time of the coloring pigment is 20-30 minutes .
Life hack on how not to ruin your hair
How do you save your hair and what do you do after dyeing it to prevent it from splitting or deteriorating? If after lightening your ends are split and look inappropriate, you can lubricate them with castor oil or fish oil. Only a little bit, otherwise you may get the effect of dirty hair.
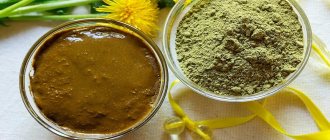
Also, after dyeing, you can make a reanimating mask from colorless henna and vitamin E. Henna must be diluted according to the instructions (usually 1:1) and add a few capsules of vitamin E. Leave the mask for 40-60 minutes, after the time has elapsed, rinse with hot water . Henna will help restore damaged hair structure , and vitamin E will provide the necessary microelements.
Contraindications
IMPORTANT : If your hair has been frequently bleached and dyed, and is also dull, looks lifeless and has split ends, then it would be better to avoid dyeing at home.
There is always a great risk of harming your hair, and if it is already damaged, then there is every chance that it will simply remain in your hands after bleaching. In such cases, it is still better to trust professionals who will choose a more gentle coloring method for you, as well as give you a lot of advice on care.
Some tips from experts, tricks for successful coloring
To make the coloring successful, there are some tips from experts:
- Dark strands on blonde will look good if they are tinted to match the color of the roots.
- The coloring result largely depends on the correct selection of shades. Masters can mix several tones into one to obtain the desired pigment. This is especially true if the store does not have the right color. By mixing paints you can get the desired tone. It is important to follow the main rule: all combined ingredients must be from the same manufacturer.
- At home, the coloring procedure should be performed using video tutorials. To do this, you should select the necessary master class and work on it.
- Do not overexpose the dye to your hair. This will not make the pigment brighter, but will only worsen the health of the hair.
- For training, you can dye one strand. For example, near the back of the head. This will allow you to see the result. If he is satisfied, then the technique is repeated over the entire head.
On hair, the reverse balayage technique with darkening will be an excellent opportunity to partially change the color. Even if you don’t like the coloring, it can be easily adjusted without complex consequences for the structure of the strands.
How to care after the procedure?
After dyeing, the weakest part of the hair is the ends . They will need to be trimmed once every one to two months. This will help hair restoration and better growth. Regenerating masks are also recommended. It is necessary to use special shampoos for colored and damaged hair.
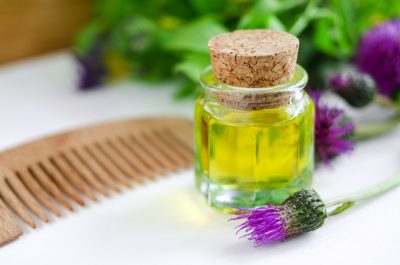
The use of oils will have a beneficial effect on bleached hair. For example, burdock oil is suitable for both oily and dry hair types, it nourishes the hair and makes it enriched with vitamins. After washing, you can rinse your hair with a decoction of nettle, oregano, plantain or sage herbs.
What to do if the result is not what you wanted?
When dyeing at home, the color may turn out not at all what you expected . How to fix a bad balayage?
- If the lightening turns out darker than planned, you can apply the coloring composition again, but for 5-10 minutes.
- If you wanted a darker color, you will have to tint. Take the paint of the desired shade and leave it there for 5-10 minutes.
- If your hair turns yellow, remove the yellowness using a purple tint balm as described above.
- The hair has turned green - the “green” from the hair is neutralized by the red pigment. Take a copper-colored coloring composition and hold for about 10 minutes.
Watch a video about correcting a bad balayang:
Benefits of reverse balayage
Reverse balayage with darkening the ends of the hair is a simple coloring technique. To create a shadow effect on your hair, it is enough to know the basic principles of coloring. In this case, the root zone remains intact. This feature helps preserve hair follicles.
This type of coloring is suitable for any skin and hair color. It is enough to choose the right shade that will harmonize with the natural tone. Another advantage of reverse balayage is the ability to adjust the coloring results. If the client doesn't like the resulting effect, it can be easily corrected.
The advantage of coloring is also the low consumption of dyes. Coloring occurs partially, and therefore it will take less money than for the entire length of the curls.