Eyeliner is a beauty product that is found in every cosmetic bag. Women started using it a long time ago, when there was not such a wide variety of cosmetics, and despite the fact that now the situation has radically changed, this “lifesaver” is still in trend. In order to make your makeup complete and expressive, you should definitely line your eyes with a pencil. This can be done deliberately brightly or secretly and unnoticeably. In this article we will look at what techniques exist for working out the eyes with a pencil, as well as what nuances are important depending on their particular shape.
A short introduction
Despite the fact that almost all modern women are well acquainted with the basics of makeup, the question of how to line their eyes with pencil remains open for them. Photos of models, actresses and other celebrities attract with their attractiveness and skill in applying make-up, and all because the eyes are well-designed. Is it possible to achieve a similar effect when getting ready for work in the morning? You can, of course. The most important thing is to find the type of eyeliner that will harmonize with the shape of your eyes. For some women, the ideal solution is arrows, for others - completely invisible lines along the eyelashes, for others - graphic stripes. Therefore, first of all, you should familiarize yourself with the varieties of eyeliner techniques, and then carefully study the shape of your own.
You may be interested in: Lancome Deodorants: Bocage and Envol
Below we will present various variations of this technique, as well as instructions on how to line your eyes with a pencil. For beginners, this lesson will also be extremely useful, since, in addition to the outlining process itself, we will discuss related issues that are the basics of competent makeup.
Paint big eyes
There is also a special technique for lining large eyes with a pencil. For example, Christina Ritchie's makeup is shown very beautifully. The actress often uses the pencil technique and paints her eyelids with a thin line at the top and bottom (under the eyelashes). Quite often she can also be seen with make-up only on the upper eyelid, or only on the lower one. Depending on this, a certain effect is created - the eyes are shaded (if painted from above) or visually reduced slightly (if painted only from below, and volume-increasing mascara is used on the upper eyelashes. We recommend watching our prepared video tutorial on makeup for large eyes (see above).
Photo - Different techniques for applying eyeliner
Jolie's eyeliner makeup always looks perfect. Angie is the happy owner of almond-shaped or cat eyes, which do not need to be emphasized at all. She simply paints the area around the eyelashes on both eyelids and applies lengthening mascara. If necessary, the pencil in the outer corner of the eye is shaded.
If you want to quickly become more beautiful, then just lightly stroke the eyelash area of the upper eyelid with a pencil and gently smear the resulting line with your fingers. If desired, you can lightly powder this area with shadows and apply light powder to the middle of the eyelid.
Please note that this is the only type of eye shape that can be painted using absolutely any technique and at the same time it will always look bright and beautiful. If you have your own additions on how to line your eyes with a pencil, write your review.
Preliminary preparation
To apply highlighter or bronzer to your cheekbones, apply foundation to your entire face. To paint your eyes, you need to apply an eyeshadow base to your eyelids. This stage should never be skipped, since any dye, be it eye shadow, eyeliner or pencil, applied to “bare” skin will begin to smear, get dirty and leak. Therefore, after you have washed your face, applied cream and primer to your face and have just started applying eye makeup, immediately treat your eyelids with a base. Its tone should match your skin tone or be half a tone lighter. After the base is absorbed, paint over both the upper eyelid (entirely) and the lower eyelid with nude shadows without glitter or simple mineral powder (in a thin layer). Such manipulations ensure that during the day the pencil will stay firmly on your eyes and will not bunch up or fall off.
Useful lifehacks in makeup
- Apply eyeliner only to previously cleansed skin. Applying makeup to an uncleaned surface of the face increases the risk of infection.
- Over time, the pencil may dry out. Take the pencil to the hair dryer and heat it to help the mascara come out.
- Don't use old pencils. Make it a rule to use new pencils that are no more than a year old, since germs that have accumulated on them can cause an infection.
- It is impossible to get beautiful and even wings on the eyelid with trembling hands, so you should fix your elbow on a table or other support.
- If you need to visually enlarge your eyes, apply the pencil only to the middle along the lower and upper eyelashes.
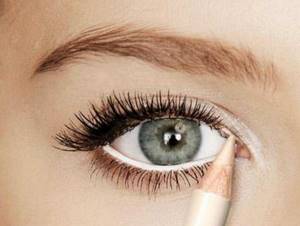
- The shadow base can be replaced with a white pencil. A white line is applied to the upper eyelid, which is then shaded. Shadows are applied on top. At the same time, the makeup looks completely different. In addition, shadows placed on top of such a base lie smoother, do not crease and last longer.
Now that you know the basic secrets and basic principles of applying eyeliner, you can try drawing any arrows.
Be careful not to get pencil or makeup remover in your eyes.
Be aware of signs of irritation such as red eyes and rashes. If you notice any of these symptoms, you should immediately stop using eyeliner or eyeliner and consult a doctor.
Delicate work
You might be interested in:Moisturizing toner for all skin types
You can apply the mark with a pencil in such a way that no one will guess that you even resorted to this technique, but at the same time your makeup will become more expressive and your gaze deeper. This type of eyeliner is called interlash liner; it is most often performed to create a work or light romantic look.
Well, now let's look at this step by step. We line the eyes with a pencil, starting from the upper eyelid, moving from the inner corner of the eye to the outer. We paint all the empty spaces between the eyelashes, we don’t try to make the line graphic - we just darken the roots of the hairs as much as possible. As a result, your eyes will become more expressive and wide-open, and mascara will help enhance this effect.
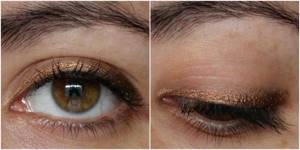
Eye liner techniques step by step
Particular attention should be paid to the choice of the shape of the arrows and the technique of drawing them. If chosen incorrectly, they can ruin all efforts and ruin even skillfully created makeup.
cat eyes
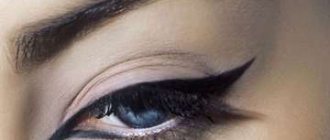
This is a long ponytail with a graceful curve. The line should be wide, at least of medium thickness. You can line your eyes with a pencil from the middle of your eyelid. Such arrows are often used by oriental beauties.
Step-by-step instruction:
- The movable eyelid is pre-lightened. This can be done using liner, powder or eye shadow.
- Using a pencil, carefully draw a thin line from the inner corner of the eye to the outer corner.
- The tail extends beyond the eyelid in an upward direction.
- Next, a second layer of the line is applied to thicken it. If necessary, then a third and fourth.
The look will be completed by lush eyelashes painted with mascara and matte lips.
Coloring the interciliary space of the eyes
This technique can be ideally performed only with a pencil with a fine tip. This type of lining visually makes the eyelashes more voluminous and the look more expressive. The interlash line can be applied before another type of eyeliner; this will enhance the effect of any type of arrow.
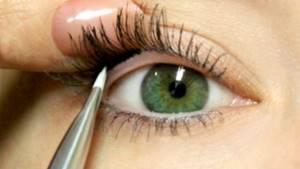
Step-by-step technique for applying interlash makeup:
- The pencil should be sharpened so that the tip is thin.
- Then use a pencil to draw a line along the roots of the eyelashes.
- It is recommended not to blink during the lining process to avoid the formation of marks on the lower eyelid.
The interlash line is suitable for everyday makeup.
Eyeliner
The technique resembles interciliary. Only here it is necessary to draw the lower roots of the eyelashes in the same way. The summary doesn't end there. If you leave it this way, your eyes will visually become smaller.
For those with large eyes, it will be enough to outline the outline one more time, making the outline thicker. If the eyes are small, then the outline is slightly shaded.
Important! If the pencil has high durability and instant fixation, then you should not hesitate to shade it. Having drawn one line, you need to immediately process it, then move on to the other eye.
Video: How to shade arrows on your eyes
Holiday arrows
Festive strokes include bright, sparkly, wide lines, unusual curves, and patterned ponytails. They are applied in the following order:
- The eyelid is first decorated with shadows. If the arrows are pronounced, then it is better to take a calmer shadow palette.
- Draw the outline of the arrows with a thin pencil.
- Next, the shape of the arrows is painted over.
The lines of extravagant curves can be left thin, depending on the design.
Classic summing up
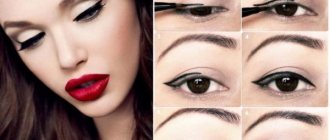
Classic arrows are suitable for any look and event.
Stages of summing up:
- Using a well-sharpened pencil, fill the interlash space.
- Small tails are drawn on both sides. They must be symmetrical.
- Then a line is drawn from the inner corner and connected to the tail.
To ensure an even connection between the line and the tail, the skin of the moving eyelid is slightly pulled back while drawing it.
Video: How to draw classic arrows
Drawing arrows
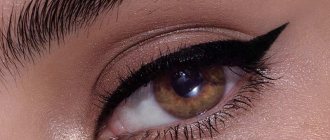
If you are used to wearing arrows, but eyeliner is too much for everyday work, then a pencil will perfectly replace it. You can line your eyes either with a thin and clear line or with a wider arrow that will emphasize the interval between the upper and lower eyelids. The most important thing is to choose the shape of the arrow that will look perfect on your eyes.
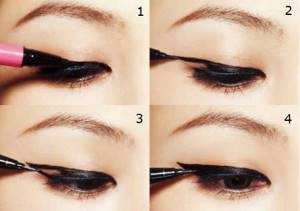
So, to get perfect winged lines, how to line your eyes correctly with a pencil? The step-by-step photo below gives a clear explanation. First, we shade the space between the eyelashes and then make a clear line along the growth of the eyelashes. Then we bring the tail out, raising it as much as you need. Now let’s thicken this ponytail a little and make it graphic.
How to choose eyeliner for your eye shape
In order to choose the right contour, you should determine the shape of your eyes. This is how they emphasize their advantages and hide their shortcomings. The look will become more expressive, the eyes will open and be visually larger:
- Almond shape. Any eyeliner will look good here. Ideally, choose classic arrows with a curled tail.
- Round eyes. Girls with round eyes need to lengthen the outline of their eyelids. To do this, you can draw only the outer corners, thickening the line in the tail area. The interlash line on the lower eyelid will add elegance to the look.
- Small ones. Owners of such eyes should visually open them. It is better to avoid dark colored eyeliners. In this case, a white pencil will help. It should be applied to the inner line of the upper and lower eyelids.
- Narrow. Girls with narrow eyes should avoid lining their lower eyelids. When drawing arrows with a pencil from above, you should not go beyond the outer corner.
- Drooping eyelid. In this case, it is recommended to highlight the corners with a pencil, making them thicker, and round the tails upward.
- Dropped corners. Eyes of this shape should be “raised.” To do this, draw the arrow with a pencil not to the end of the outer corner. Stopping just above the end of the eyelid, the tail is drawn upward. Thus, the eye is visually raised.
- Wide set. To visually reduce the distance between the eyes, the inner corners of the upper and lower eyelids are continuously lined. You should not go beyond the outer corners. If you draw out ponytails, then the eyes only visually move further away from each other.
- Closely planted. The task of girls with close-set eyes is to distance them from each other. To do this, draw only the outer corners of the eyes with a pencil, without affecting the inner ones. The line should start from the middle and thicken at the tail, which points upward.
- Asian eyes. A clear line along the upper eyelid that does not extend beyond the eyes will look good here.
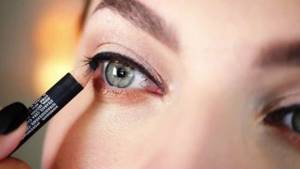
The arrows often don't work out the first time. It is difficult to achieve symmetry, because there are no perfectly symmetrical faces. There is no need to strive for perfect arrows; neat, even and visually identical lines are enough.
Drawing in a circle
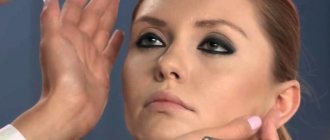
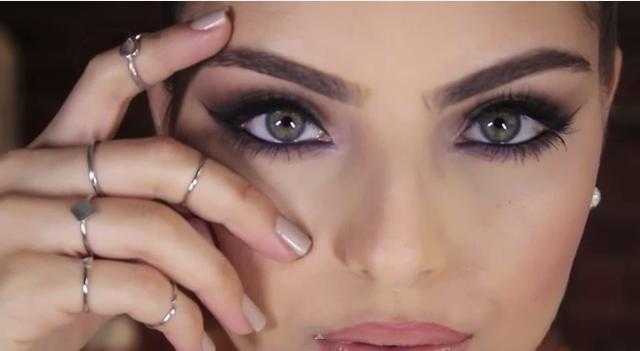
If you decide to line your eyes with a pencil using this technology, be prepared for the fact that the result will be much brighter than you expect. Black contours drawn along the mucous membranes and along the edges of the skin will make the look both bold and languid, bright and mysterious. This makeup option is definitely not suitable for daytime wear, but it will come in handy at an evening event.
It is worth starting the procedure by painting the interciliary space, and in this case not only the upper, but also the lower. Then we draw clear lines along the mucous membrane - above and below. The next stage is to completely outline the eye under the lower eyelashes and above the upper ones. You should not try to make the line perfectly clear - it will be shaded in the future. But definitely make sure that the strip is not too wide. Next, use shadows to shade the pencil line and thickly paint the eyelashes.
You may be interested in: Decorative cosmetics “Artdeco”: reviews from makeup artists and cosmetologists
The final stage in makeup
Correct all bugs. Any mistakes made during makeup application can be easily corrected using makeup remover and a cotton swab.
The brush will also help when correcting minor mistakes.
You can also apply a little foundation on a cotton swab and correct any imperfections. This is effective when there is a risk of removing too much of the applied makeup.
Set your makeup with eye shadow. A properly fixed pencil will last throughout the day and will not rub off.
Use a thin layer of loose eyeshadow to set your eyeliner. This will make your look deep and expressive.
Apply mascara. Mascara will highlight and visually enlarge your eyes.
Apply mascara last, only after you have applied eyeliner.
Basic rules and tricks
Whatever type of design you choose from the above, the pressing question remains how to beautifully line your eyes with a pencil so that they look neat, well-groomed, well-designed and complete. Cosmetologists shared some of their secrets in this regard:
- Don't draw straight and clear lines in one fell swoop. Work like an impressionist artist - apply small strokes one after another, layer, somewhere make the arrow brighter, gradually reducing it to nothing. This way the result will look neat and harmonious.
- Spaces are not allowed. Therefore, all the distances between the eyelashes need to be carefully worked out, sometimes even two or three times.
- The perfect arrow will turn out when you mark its tip with a dot. Two dots need to be placed symmetrically on both eyes. Now just draw a line to it.
- Too wide arrows can be diluted with shimmering shadows. Just “powder” the area of the eyelid painted with pencil with them.
- To make the pencil fit more tightly, slightly stretch the eyelid.
- You can line one upper eyelid, but you cannot line one lower eyelid.
- If the line turns out to be slightly uneven, you can correct it with a cotton swab. This is a pencil, not a waterproof eyeliner.
Lining your eyes with a pencil correctly and beautifully is half the work. But it is equally important to choose the type of liner that will match the shape of the eye.
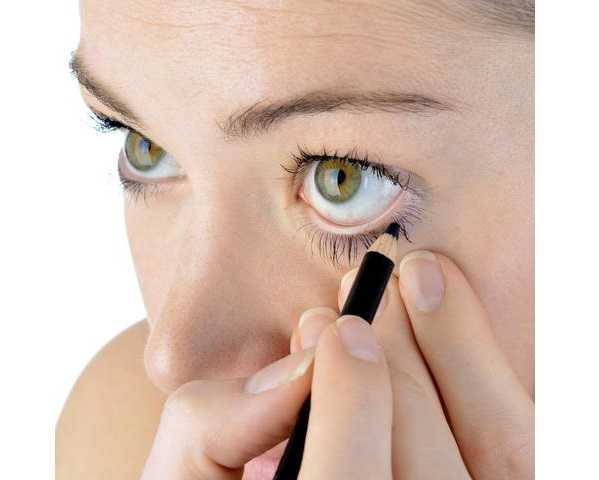
❤️ Which eyeliner is better?
The best eyeliner is the one that makes a flawless line, doesn't break, doesn't crumble, and stays on without smudging.
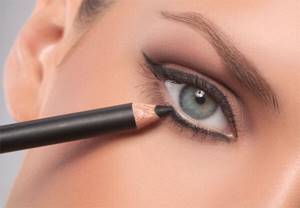
Eye pencils from the well-known brand of professional makeup and nail care products, Kodi Professional, have these qualities. Among the advantages of pencils of this brand: creamy texture, ensuring easy application, wide palette, versatility. They are intended not only for professional makeup artists, but also for ordinary girls who create makeup at home. In the product catalog of this brand you can definitely choose a good eyeliner and other professional decorative cosmetics.
Big eyes
In general, making large eyes visually smaller is blasphemy. They themselves, even without makeup, attract attention and make the image more expressive and bright. You can create this eye shape by painting only the top row of eyelashes, without making an arrow. This will be a great option for office makeup. For publication, you can use a circular type of stroke. Outline the eye with a black pencil, and then blend the clear lines with dark shadows of any shade.

Not just black
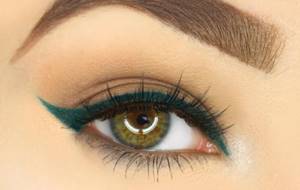
The classic color for drawing the eye contour is, of course, black. However, one can and should deviate from the classics. Pay attention to pencils of other colors, the choice of which is influenced by hair and eye color.
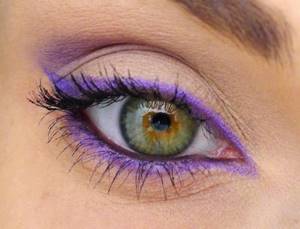
For example, almost all colors are suitable for those with gray eyes, brown and gray for blue-eyed people, and copper, bronze, and brown for green-eyed people. Blondes can use lighter shades. Dark purple, plum, and brown colors are suitable for brunettes. Redheads - green, brown, reddish-brown, golden.
Round eyes
Task number one in this case is to make the eyelid narrower and more elongated. Without experience and skills, it will be difficult to achieve the desired result, so if you have not previously corrected your appearance, you will have to train for a long time. Fill all the empty spaces between the upper eyelashes and draw a thin arrow over them. Her tail should only point slightly upward, otherwise the effect will be the opposite. We emphasize the mucous membrane of the lower eyelid with a black pencil and, as it were, connect it to the base of the arrow.
❤️ How to sharpen eye pencil?
To sharpen your eyeliner, use a special sharpener for cosmetic pencils.
An ordinary stationery sharpener is not suitable for this purpose, since cosmetic pencils have different diameters; you need to select a sharpener for them separately. During the sharpening process, monitor the length of the lead. It is soft, so it will break quickly if it is too long. It is better to sharpen your pencil more often, since sharpness is more important for beautiful makeup, not the length of the lead. If you don't have a sharpener at hand, use a kitchen knife or razor blade. Place the pencil vertically on the lead and carefully remove the shavings, then sharpen the lead to the desired sharpness.
Close-set eyes
This “problem” often occurs in many women. Visually, I want to make the look more predatory, to “spread” the eyes, but by nature they seem to be drawn to each other. Well, arrows and white shadows will help fix this. We will work only with the upper eyelid. We draw a thin arrow above the eyelashes, slightly lifting its tail and leading it towards the temple. In this case, you should start drawing it not from the inner corner of the eye, but from the middle, as if rising from the eyelashes. The inner corner of the eye is worked out with white shadows.
How to use a pencil
Professionals recommend applying makeup to prepared skin. Therefore, you should first apply a base or corrector. This video will help you figure out how to use eyeliner.
The simplest makeup option is the line along the eyelashes on the upper eyelid. The eyeliner is drawn along the eyelid and continues behind it. If you use a very soft pencil, you can lightly powder the eyelid.
To get a straight line you need to have experience. At first, you can put individual points with a pencil, and then connect them into a single line.
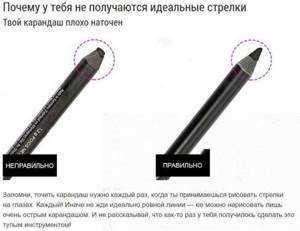
It is very difficult to draw a clear outline if the eyelashes are thick and grow unevenly. In this case, we can recommend drawing not a line, but drawing an outline using densely applied dots.
If the eyelashes are thick and grow unevenly, then the pencil does not lie neatly. It is recommended to place small dots close to each other instead of a line, which will look like a rich outline.
Without experience in carefully applying eyeliner, there is no need to outline the eyes around them. This visually spoils the appearance. It is enough to apply a line on the upper eyelid. But it’s worth tinting it more gently with a light shade.
Eye shape
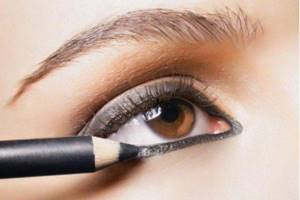
When drawing arrows, pay attention to the eyes:
- for an almond shape, you can use arrows of any thickness;
- round eyes will have to be stretched out a little, so it is necessary to extend the line on the upper eyelid beyond its limits, raising the edge;
- owners of large eyes can even afford to line the lower eyelid;
- sometimes you have to make the arrows thin at the edges and thicker towards the center - this technique allows you to widen too narrow eyes;
- You can start drawing the line from the middle of the eyelid, this allows you to visually soften the defect of eyes that are too close together.

