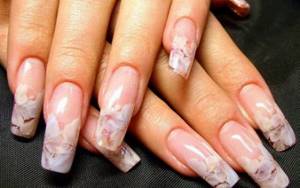
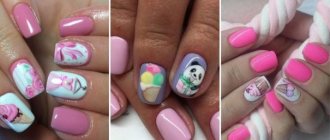
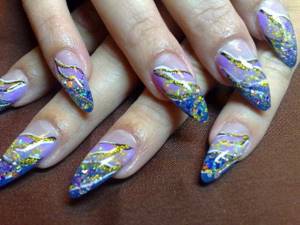
Every girl wants her hands to look well-groomed and beautiful, and her nails to stand out with a spectacular manicure. Different nail designs allow you to emphasize your style, express your mood and simply make your nails original. This is why many girls choose beautiful nail designs and painting when creating a manicure. The use of acrylic paints helps to bring many ideas into reality; on your nails you can depict various patterns, floral motifs, abstract figures and quite realistic drawings of landscapes, any figures and many other ideas.
Today the site For-Your-Beauty.ru will show you how to paint on nails with acrylic paints , what designs can be made and how to properly use such paints in nail design. Acrylic paints are very popular; they are used by manicurists in their complex works, as well as by girls who make their own designs at home. Acrylic paints are safe and odorless, making them very easy to work with. It is absolutely not necessary to buy special acrylic paints for painting nails; you can purchase the desired colors of paints at an art store. These paints are no different from each other and allow you to save significantly. But not all paints are of good quality; too cheap ones will not allow you to create beautiful designs on your nails; they may crack or lie unevenly. According to reviews, Polycolor acrylic paints are suitable for painting on nails.
Drawings on nails can be done using various materials: varnish, gel, shellac, gel paint and, of course, acrylic paints.
What are the advantages and features of acrylic paints?
- A very wide color palette; besides, the paints mix well with each other and allow you to get an unlimited number of new shades.;
- Acrylic is a very flexible and easy-to-apply material;
- You can make drawings both on natural nails and extensions, on gel polish;
- Acrylic paints are diluted with plain water;
- They do not require special products to remove nail designs. It is easy to remove with regular nail polish remover (ZHDL);
- The drawing applied with acrylic paints dries quickly in air;
- Acrylic paints are used very economically, especially for nails. Therefore, the purchased paint tubes will serve you for a long time.
Nail extensions with acrylic
To perform various designs in the nail service, such popular materials as gel, acrylic and shellac are used.
Any of these compositions has both pros and cons. It is worth noting that acrylic is the basis for creating gel and shellac.
Any of the presented products can be used as a material for nail extensions and manicures.
Moreover, it can be done in the salon or at home. Representatives of the fair sex can give preference to any of these compositions.
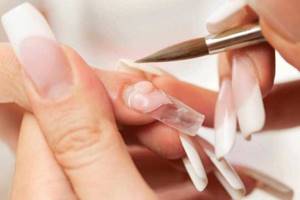
The extension process is performed in the following ways:
- on forms;
- for tips;
- on your nails.
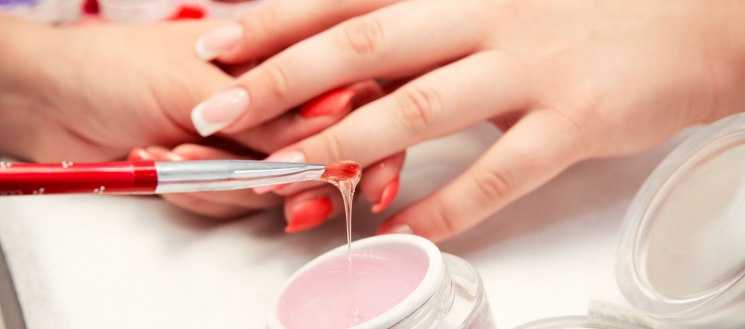
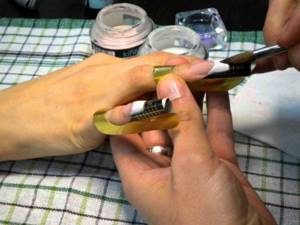
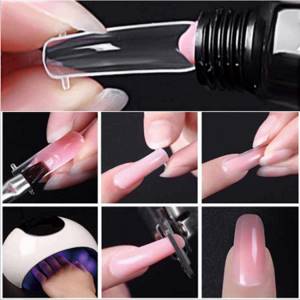
Let's look at how nail extensions are done using acrylic:
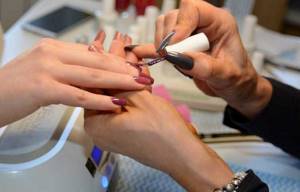
- first we treat the nails with a manicure tool;
- We polish the surface of the nail for better adhesion to the material;
- degrease the nail plates;
- mix acrylic, cover the nails with it in accordance with the selected extension model;
- We grind the nail plate and remove unnecessary material from it with a file.
Once the shape of the nails is prepared, you can begin to design.
Design workshops
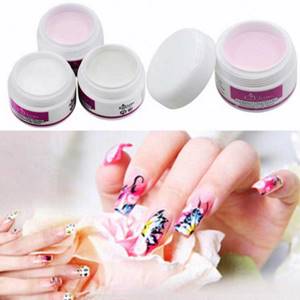
Acrylic paints
What is necessary:
- acrylic paints for manicure;
- varnish base;
- top;
- brushes;
- dots;
- toothpicks;
- palette;
- water;
- napkins.
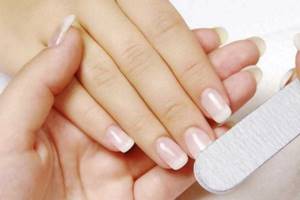
- Prepare the plate. Get a classic manicure or French manicure. Compare the length and shape of your nails.
- Select an image. If you are doing a manicure for the first time, you should not opt for too complex designs. Before you start painting on your nails, practice on a piece of paper.
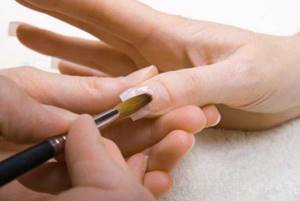
- Apply foundation. Wait for it to dry. The first layer should be more intense in color than the others, the second should be slightly more transparent, and the third should be almost invisible. This is a glaze method. Wait for everything to dry.
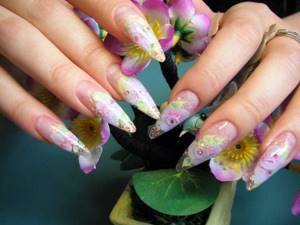
- You can create a drawing. For example, draw a flower. Dilute the paints to the required consistency using a palette. Create an outline and shade it. Acrylic takes a little time to set. After this you can move on to the petals. Paint them with light strokes. You can separate the petals with dots or toothpicks. Draw the middle of the flower. The drawing is ready!
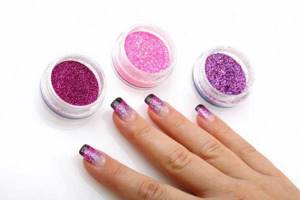
- The final. The simplest option is a regular transparent coating. If you want something more complicated, you can masterfully decorate the design with sparkles or rhinestones, and then secure it with a final coating.
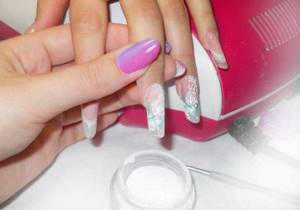
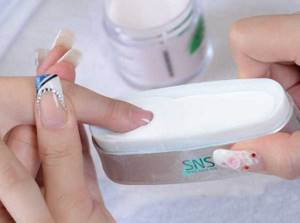
Acrylic Powder
- After preparing your nails, apply two layers of gel polish and let it dry thoroughly.
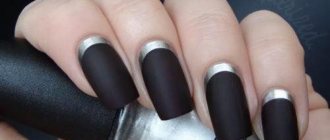
- Choose a base. It can be either a matte finish with a pattern, or a similar glossy finish.
If you chose the first option, sprinkle the top with transparent acrylic and dry it in a lamp. Remove any remaining material using a brush.
In the case of the second option, simply dry the top, remove the sticky layer and create a pattern.
- Once the base is ready, apply the pattern. As an example, the winter “pigtail” pattern.
Paint it with gel polish and cover it with powder (you can use gel paint). If the gel is colored and the powder is white, it will take on the color of the gel, or vice versa.
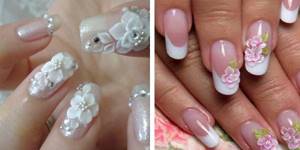
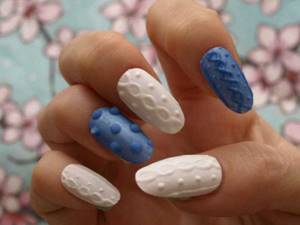
Modeling
- Treat hands, nails and cuticles as standard.
- Cover the plate with an acrylic backing that serves as a base for the sculpted elements.
- Select all design details. Creating an acrylic drawing is a difficult but interesting stage. Remember that the main thing is to maintain the volume of the entire drawing. Handle the material carefully and adhere to the requirements.
- The most important stage in creating such a design is perforation. Apply a drop of powder to a plate or sheet of paper and, without allowing it to harden, use a brush to give it the desired shape. You need to act carefully, but quickly.
- Select the place on the nail where the created pattern should be located. At the highest point of the plate, the image will be preserved for a long time. Destruction will occur most quickly if the pattern is placed at the tip or near the cuticle. Apply a little special glue to the selected area, attach the pattern with a brush and fix it.
- Cover everything with a thin acrylic or gel layer to protect against possible damage. Moisturize your cuticles.
- Once the design is ready, give your nails the final shape by filing away anything unnecessary.
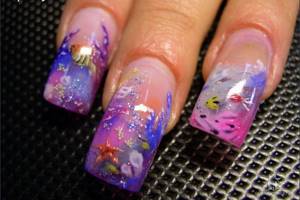
Aquarium
What you will need:
- tips;
- sculpting gel;
- wire cutters;
- manicure set;
- brush;
- decorative elements.
- Match the tips and give them the required shape.
- Drop a little gel onto the base of the large tip.
- Attach small tips on top, but leave space between them.
- Glue the tips on the sides.
- Place the blank lamp.
- Place the finished decor between them.
- Using an injection needle, inject water into the space, filling it almost to the top. Seal the edges with gel and place in the lamp.
Knitted manicure with acrylic powder
The demand for its design increases with the onset of spring and autumn.
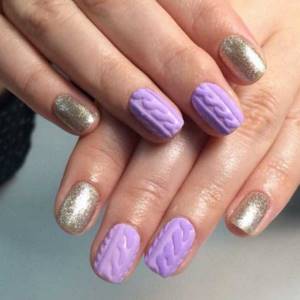
A characteristic feature of this design is the presence of patterns reminiscent of sweater knitting. In the photo you can see what a similar acrylic manicure design looks like.
Advice from professionals
When painting your nails with acrylics yourself, you should consider some recommendations from professional nail artists:
- To perform the procedure, you need to choose a comfortable place where your hand will lie without tension.
- When covering the surface, do not press hard on the brush.
- You shouldn’t choose a complex pattern for the first time.
- When depicting a drawing, first of all, draw an outline, which is then shaded.
- It is better to perform a complex design on one nail plate; on the remaining nails, depict simplified fragments that echo the main theme of the design in color.
- Any image made with acrylics must be fixed with a special fixative.
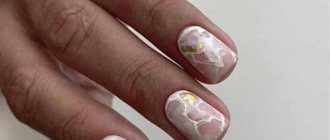
Monograms with acrylic powder
Monograms are also a popular option for manicures. This design looks impressive. In this case, the powder can have a different shade, allowing you to complement the effect of the manicure.
Common problems with hair extensions
- The natural nail plate is completely flat or its edge tends upward. In such cases, the stress zone is difficult to form and most often remains the weakest in the extended nail.
- What to do: Before printing the material, drop a little polygel in the center of the stress zone. The ball should be no more than 1.5 mm in height and no more than 1 mm in width. Dry the ball in the lamp and start printing.
This technique will help keep your shape at the desired level and prevent it from falling below the required level.
- A very arched nail. When looking at the end of the free edge of a natural nail, a strongly rounded arch is visible. In this case, it will not be possible to press the workpiece tightly, since the transverse arch of the workpiece will not be so rounded.
- What to do: before imprinting the form, add a little polygel to the natural nail in the cuticle area. This technique will help smooth out a steep arch.
- Nails grow downwards. If the nail plate tends downwards, the edge of the workpiece at the cuticle will constantly move away.
- What to do: Place a small layer of polygel near the cuticle, as well as drops in the center of the stress zone. Only after the layering has polymerized, start printing.
- Large gap between cuticle and mold. There is no need to install the workpiece tightly to the cuticle, but there should not be a large gap. The maximum indentation is 1 mm.
- What to do: File the plastic blank on the sides so that the edges do not interfere with moving it closer to the cuticle. You only need to cut down a little bit so that there are no gaps in the side sinuses.
- There is no free edge. To work with top forms, it is best that the natural nail has at least minimal regrowth. The distal edge will help avoid material leakage and also increase the strength of the structure.
- What to do: Before modeling, complete the free edge with polygel. You can do this on disposable paper blanks.
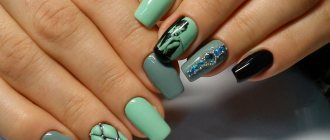
Aquarium manicure with acrylic
On the flat surface of the nails, under the transparent acrylic layer, colorful designs and patterns are visible.
How to do aquarium nail design? The following is the execution technique.
- The first stage is the treatment of nails with special tools.
- Using a nail oil remover.
- Apply an initial layer of acrylic.
- Modeling and design of the nail plate using sculpting or appliqué.
- Covering the finished design with a second layer of acrylic, under which all the decorative elements (glitter, rhinestones, shiny sand) are visible. This is a great option for creating a New Year's manicure.
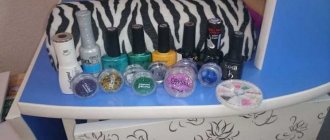
What do we need

Before you start painting your nails with acrylic paints, you need to acquire the necessary tools.
- Manicure accessories (tweezers, nail files).
- Set for applying gel polish.
- UV lamp.
- Acrylic paints of various colors.
- Brushes of different sizes.
- Surface for mixing paints (you can use a piece of foil).
- Cotton pads, a vase of water.
Having prepared everything you need, we begin to learn how to create a unique design at home.
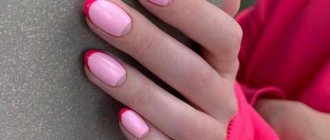
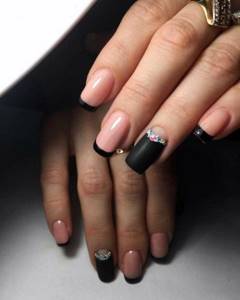
French acrylic design
French acrylic manicure is in great demand among women and girls. Due to the fact that acrylic nails will have to be worn for 3-4 months, the chosen design must match any outfit.
We recommend reading:
- Minimalist manicure: 145 photos of top ideas for fashionable and beautiful manicure designs
Shellac manicure: design options, design features and application technology (140 photos)
Classic manicure: application technology, types and video lessons for beginners (100 photos)
What is paint?

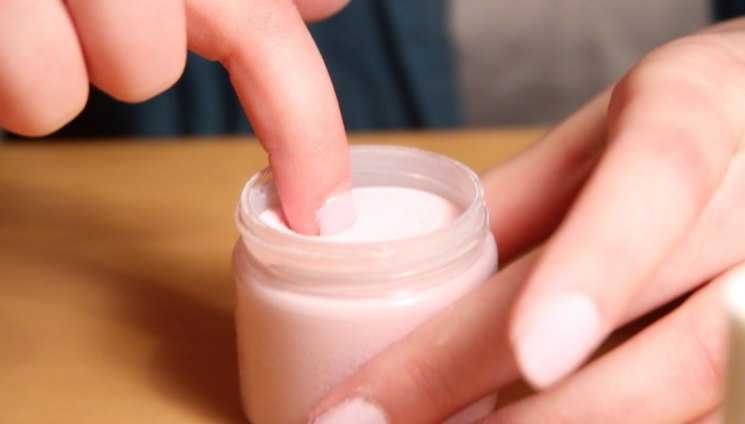
Acrylic paint is a special mixture based on a water-dispersed liquid with a creamy consistency. It is quite convenient to use: it is diluted with water, has no odor and is quite easy to apply to the nail.
Before you learn how to paint your nails with acrylic paints, you should clarify some nuances: how to choose high-quality paint and how to apply it correctly.
How to use acrylic powder to strengthen your nails
Nail design masters use acrylic powder not only to design nails. This material also serves to strengthen and strengthen nails, and also affects rapid growth.
If you want to improve the condition of your nails in this way, you will need information on how to strengthen nails using acrylic powder so as not to use extension services.
In addition, nail art experts advise covering your nails with acrylic under a layer of gel polish. This way your nails will become durable and beautiful for a long time.

Let us describe a step-by-step sequence of actions with which you will be able to properly strengthen the structure of your nails:
- thorough treatment of nails with a degreasing agent;
- applying a primer: if your nails are not weak, the free edge and side ridges are allowed to be treated with the product, sore nails are treated completely;
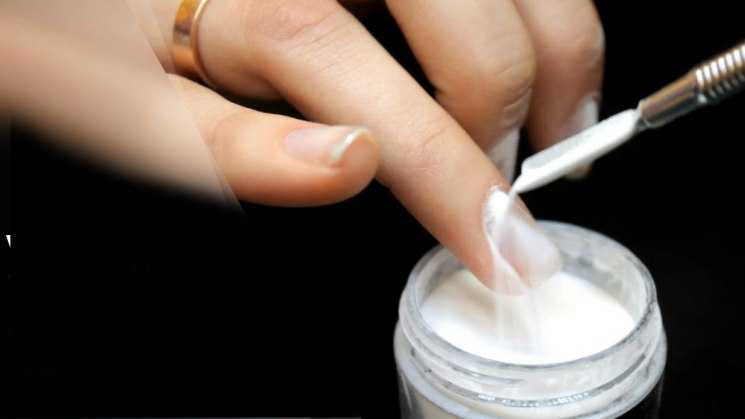
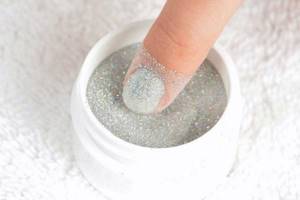
- Apply a base coat on the nails over the primer, then carefully sprinkle acrylic powder on them without drying;
- we send the nails under a UV lamp to dry thoroughly;
- remove excess material from the surface of the nails with a special brush;
- Finally, we apply a decorative varnish of a suitable color or any top coat to the nails.
So, acrylic manicure has been trending for a long time. And for good reason, because acrylic has many advantages. After it, the nails become firm and at the same time elastic.
The coating on the nail plate does not look dense, but looks neat and elegant.
If the acrylic layer is damaged, there is no need to remove the entire extended nail; it can be restored at home. Below is video material on this topic.
Why is painting on nails with acrylic paints better and more effective?
When deciding which paints to start your studies in nail painting, don’t even doubt that it’s best to try right away with acrylic paints. They have a number of undeniable advantages:
- allow you to get beautiful and rich shades (the attractiveness of the color can cover up some inaccuracies in the execution of the drawing);
- they are harmless to the body and to the nail plate;
- dry quickly;
- contrasts well with the main background;
- mix easily, giving an original non-standard color (you won’t need to buy a huge palette to start with);
- economical in consumption.
Don't be afraid to experiment, drawings with acrylic paints will help you always be fashionable and stylish!
Photo of acrylic manicure
Please repost
0
2
Advantages and disadvantages
Many experts consider acrylic extensions to be an outdated procedure and advise using gel materials.
However, using acrylic has its positive aspects, which are as follows:
- High level of elasticity, making artificial coatings similar to natural nails.
- Resistant to temperature changes.
- Significant strength with low plate thickness.
- Providing protection from aggressive external factors.
- Ease of carrying out the procedure for removing the artificial layer.
- Preservation of the natural shape of the growing nail.
At the same time, acrylic coatings also have certain disadvantages that they are endowed with in contrast to gel extensions. The main similar features are given below:
- The presence of a persistent odor, which is not pleasant to all people.
- Disorders of the respiratory processes of the nail plate.
- When painting, it is necessary to first use a colorless base varnish.
- There is a risk of an allergic reaction.
- Loss of natural shine of the nail.