Many girls are already bored with plain coatings or standard designs. To diversify your usual manicure, we recommend paying attention to designs with streaks. It looks more original, unusual. In addition, thanks to the ability to experiment during the application process, the design always turns out unique. In 2021, it is rightfully called one of the most fashionable and popular.
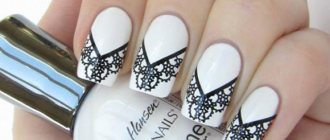
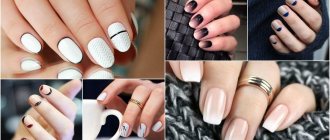
White manicure with streaks
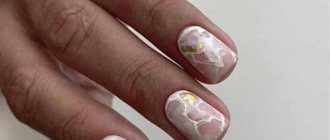
White color has long been a classic solution for any design. It is used not only as an accent, but also as the main background for the picture. Therefore, white manicure is suitable not only for everyday life, but also for important events.
As for a manicure with white streaks, it looks especially beautiful. And it doesn’t matter at all what shape and length your nails are. For work, it is better to choose varnishes of a contrasting color. Thanks to this, the design will be brighter and catchier. For example, red, blue, black or pink are the most popular options.
Lovers of delicate manicures should combine white with pastel shades. They look especially harmonious in this application option.
Wet gel polish drawings that beginners can do
Drawings using wet gel polish for beginners should be simple:
- smooth divorces,
- different sizes of dots or circles,
- abstract images,
- cobweb,
- simple ornament,
- hearts, shells, and other easy-to-make figures.
And it’s better to sketch out in advance on a piece of paper what you would like to have on your nails. This makes it possible to think through the movements of the tool in advance and determine the location of the parts.
Step by step drawing on wet gel polish is done like this:
- The nails are filed, the cuticle is cut or pushed back, and the skin around the plates is polished.
- Surfaces are treated with a buff to remove gloss.
- Nails and skin are wiped with a degreaser.
- After it evaporates, a primer is applied to the surfaces of the plates and ends, and allowed to air dry.
- The next stage of the gel polish base is its polymerization.
- Nails are painted with the first layer of flower garden.
- This coating must be dried and residual stickiness, if any, must not be removed.
- Apply another layer of gel polish of the main shade, do not polymerize.
- The second flower bed is laid out as a drop on the palette.
- By dipping a dots or other tool into it, they apply patterns to the undried layer of gel polish on the nails.
- The hand is placed in the lamp.
- Cover the nails with a finishing agent and polymerize it.
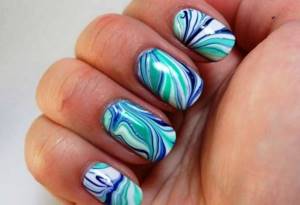
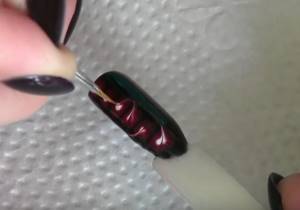
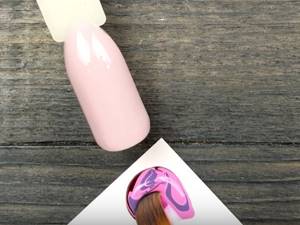
Divorces
Divorces can be done using 2 or 3-4 flower beds plus the main background, and there are 2 ways to do this. The first one is done like this:
- The prepared nails are covered with a base and dried.
- Apply 2 layers of the same color, leaving the second undried.
- Gel polishes of other shades are dripped onto the foil or palette separately from each other.
- Take each one in turn with thin brushes and use them to make lines on the nail along the undried base color.
- When the design takes on the desired appearance, the coating is polymerized.
- All that remains is to apply the top coat and dry it too.
Watch the video about design options for wet gel polish:
The second method is more difficult, but the divorces are more natural:
- The base is applied to prepared nails without leveling, so that in the end they do not look too thick.
- Cover them with the main color and dry.
- Additional shades of gel polishes are dripped onto each other onto the palette and mixed with a thin brush or dot until streaks appear.
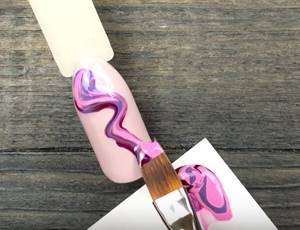
- Using a wide brush, pick up this mass and transfer it to the nail, stretch it from the base to the free edge, without disturbing the formed lines.
- The same is done on the side parts of the plate.
- Use a thin brush to paint the space around the cuticle.
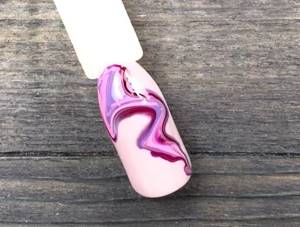
- Dry the coating.
- Next you need to apply the top coat and place your finger in the lamp.
With this method, you don’t have to paint the nail with the main color, but apply stains directly onto the dried base, because they will cover the entire surface. If such a technique seems difficult, stage 2 is not skipped. But stains from the palette are applied to part of the nail. And then they level the gel polish with a thin brush so that it does not lie in a lump.
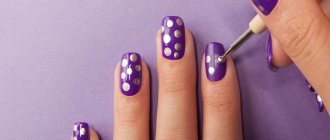
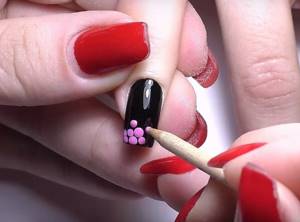
Dots, circles
The dot pattern is one of the simplest, you just need to follow a few rules:
- The second and subsequent shades of the flower garden are dripped onto the palette so that they do not mix.
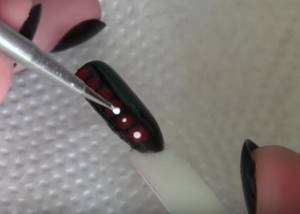
- From there they are taken with dots; you can use different sizes of tools.
- If the first gel polish is not dried on the nail, they leave marks on the surface of the second and subsequent flower beds.
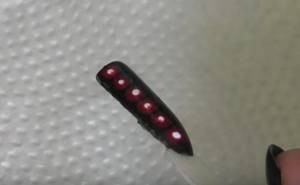
- Decorate the entire plate or part.
- To make the dots of different diameters, apply several pieces of gel polish with one portion until it runs out.
- Immediately after application, the circles blur, so there must be a certain distance between them, otherwise the entire decor will merge into spots.
When the pattern is completed, it is dried and covered with topcoat. The dots can be made of the same shade or different.
Abstraction
An abstract image is beautiful because of its uniqueness, because you won’t be able to make exactly the same thing again. This design is done as follows:
- Drops of gel polish of different colors are placed next to each other on the palette so that one flows into the other.
- After preparation, the nails are covered with the main background and dried.
- Paint them again with the same color.
- Using a comb brush or other flat brush, scoop gel polishes from the palette, like a spatula.
- Transfer them to the nail slowly, making a broken line in one movement.
- You can turn the brush over and walk it next to the already applied stripe.
- If bubbles have formed on the surface due to the large thickness of the gel polish layer, they are removed with a tool with clean bristles.
- The abstractions are allowed to spread a little more for a couple of seconds and the finger is sent into the lamp.
- The top of the nail is covered with topcoat and it is also polymerized.
For abstraction, you should use at least 3 shades - contrasting and intermediate.
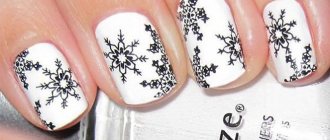
Patterns with cobwebs, twigs
Patterns in the form of a cobweb and a branchy ornament are very relevant this season and are easy to do:
- In the first case, 3 thin stripes are applied along the nail along the wet base gel polish. They should be parallel to each other, and their edges should be at a short distance from the end and cuticle. Using a toothpick or a needle, transverse lines are drawn from these strips at different levels in both directions so that they form a circle consisting of broken segments. This is how a web turns out.
- The branches begin to be drawn from points that are scattered quite far from each other. Using a needle or toothpick, they are pulled out to form leaves and connected to form stems. You can use different shades of gel polish.
Hearts, shells
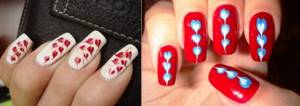
To draw a shell, dots are placed on the nail plate so that they form a circle. Inside it you need another circle - a small one. It is pulled out with a thin brush so that you get a blot with uneven edges. It is necessary to connect this element with a large circle with thin lines. And also draw segments between the points that make up the outer circle.
The heart is drawn based on several marks made with a dots or a thin brush:
- one in the middle of the plate,
- two on each side of her and above,
- another point located below the central one.
The first mark is connected to those above with smooth lines. Curved stripes are drawn from the paired lateral points to the lowest one.
The heart can be made from circles. Use 2-3 shades of gel polish, place large and small dots with them so that overall they form the intended figure.
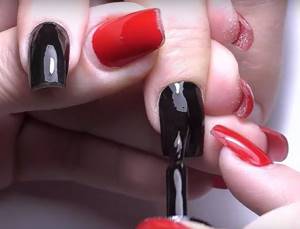
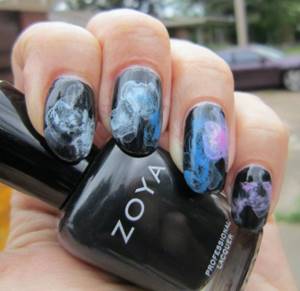
Black manicure with streaks
Lovers of design in dark colors will definitely appreciate a black manicure with streaks. It looks very unusual and therefore never goes unnoticed. It's all about a light haze that complements the monochromatic coating. Increasingly, other shades are used in the design process, which visually transform the manicure.
If desired, a black manicure can be complemented with decor in the form of small rhinestones or sparkles. Such details add special elegance and chic.
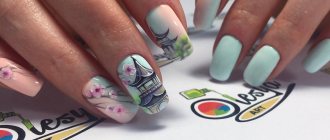
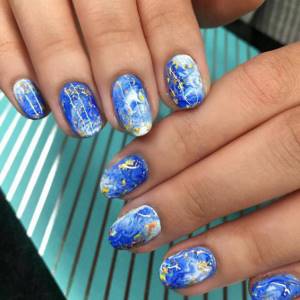
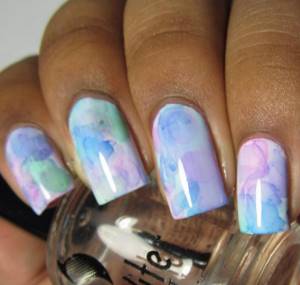
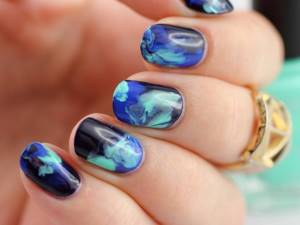
Stylish manicure: watercolor stains
Watercolor stains on nails are becoming increasingly popular. The thing is that such a manicure turns out rich, multi-colored. In the process of work, you can use not only artistic paints, but also special gel polish. At home, an excellent solution would be the water-based design application technique. In any case, such a manicure turns out incredibly beautiful and stylish. It can rightfully be called an ideal option for the summer.
Design features for wet gel polish
A wet gel polish design is an image, pattern or vague shapes that look as natural as possible. The technique itself gives them greater naturalness, because the wet coating makes all the lines a little fuzzy. To get the desired effect you need:
- choose a gel polish of medium consistency so that it does not spread instantly and at the same time easily mixes with other flower beds;
- use a suitable tool, because the details of the drawing can be larger or smaller.
Which varnish is best
For a vague design, it is important to choose the right gel polish:
- Well pigmented. If the flower garden leaves streaks, you will have to deal with them. Otherwise, the drawing will look sloppy.
- Correct consistency. A product that is too liquid will spread, may flow onto the cuticle or mix so that vague spots appear instead of a pattern. And thick textures do not mix well; soft transitions will not work.
If the gel polish is too viscous, it can be diluted with a liquid finishing agent.
How to apply drawings
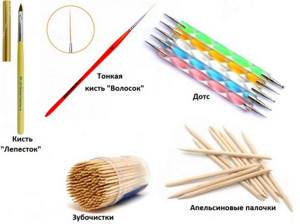
Drawings are made:
- with a thin hair brush or liner,
- dotsami,
- a brush from a bottle of gel polish,
- orange stick,
- toothpick or needle,
- point brush, petal brush, beveled or flat.
The tool is chosen in accordance with the design and for reasons of convenience. Brushes are suitable with natural and synthetic bristles, even silicone ones. The main thing is that the gel polish does not slide off the instrument instantly.
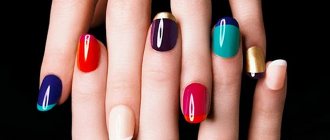
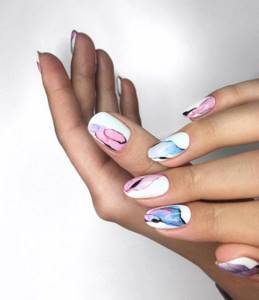
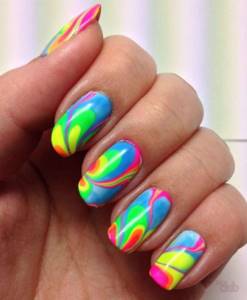
Manicure with multi-colored stains
Colored manicure is better than others for creating a stylish, bright look. Moreover, the choice of shades directly depends only on your personal preferences. However, we note that nail experts recommend choosing no more than two contrasting colors. Thanks to this approach, the design will be stylish, rather than gaudy with a lot of detail.

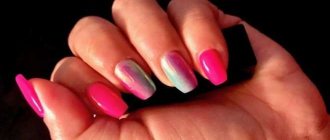
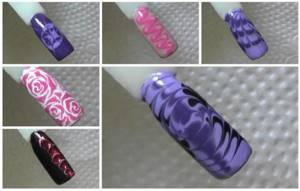
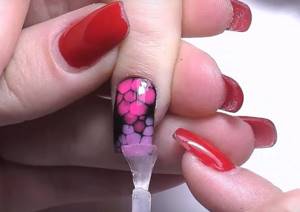
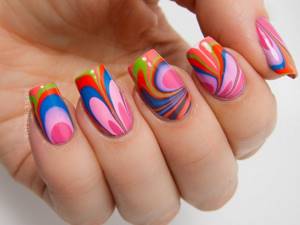
Pink manicure with streaks
Of course, not only classic tones are in fashion, but bright shades of varnish. Choose a basic pink coating and feel free to complement it with colored patterns in the form of stains. This design is ideal for summer experiments. But keep in mind that the manicure should go well with your usual looks. Only under this condition will you look harmonious.
A manicure with streaks is a great option for experimenting even at home. Of course, the process will require a little patience and practice. But thanks to this, it will be possible to bring original, unusual design ideas to life.
What are the mistakes when painting on wet gel polish?
Painting on wet gel polish fails for several reasons:
- Incorrect base application. If it lies in lumps, a flower bed applied to a wet coating may flow in the wrong place.
- Air bubbles at the base of the nail. This happens when a manicure is of poor quality, when the cuticle is unevenly cut or not pushed back enough. The same problem as in the previous case is possible.
- Incompatibility of the means used. First of all, these are gel polishes, which are chosen for the general background and for painting on it. They may mix poorly, leak or shrink, and the design will not come out.
- Insufficient drying of the design. With some of them, there is a lot of material on the nail, and the standard 2 minutes in a UV lamp or 30 seconds in an LED lamp is not enough. The design lags behind the nails, despite the presence of a topcoat on top.
Tips for beginners
To get the design right the first time, you should use the secrets of experienced craftsmen:
- All movements and brush strokes must be clear. There is no need to carry the tool several times over the same place, this will lead to the appearance of bald spots.
- If the stains seem unsightly, they can be corrected. To do this, take a dry and clean brush, and wipe the bristles on a napkin from time to time.
- To make the design more expressive, you can use glitter gel polish where appropriate. It is also used to paint the contours of individual parts.
- It is important that nail art is performed on well-prepared nails. No drawing will hide the “shaggy” cuticle and irregular shape, bumps and depressions on the surface.