Wet method of applying eyeshadow
This method requires the use of an applicator soaked in water. Applying shadows in this way makes their color bright and saturated. At the same time, they stay on the eyelids much longer, unlike dry application.
For this technique, it is better to use mineral baked shadows with the most natural composition. They won't roll up. And they lay down in a neat and even layer.
evening make-up
For a festive event, makeup is not limited to glowing skin or eyes. Bright elements are added that focus attention on the eyes or lips.
Graphic arrows or smokey eyes in dark tones with shine are suitable. A neutral shade of lipstick will suit them. Eyebrows should be well defined and styled with gel, which will give them a slightly noticeable shine. They should not be lost against the background of the entire face.
When focusing on your lips, you should choose a shiny lipstick in a bright red shade. You should add satin blush to them. Eyelashes should be painted over with black mascara in one layer so as not to draw attention to yourself.
Significant disadvantages
You may be interested in:Avene Eluage: reviews, composition, properties
Dry and wet application of eyeshadow is significantly different. Application with water is ideal for an evening look, but during the day it is better to give preference to the “dry” method.
Despite the advantages, this method has a significant drawback. When applied wet it is very difficult to shade. Therefore, it is very important to control the amount of cosmetic product.
Another disadvantage of the technique is that matte and other shadows can quickly deteriorate, namely become crusty. This happens when there is a very large amount of moisture on the brush or applicator. In addition, using the wrong amount of water can lead to cracking of the eyeshadow already applied to the eyelid a couple of hours after completing eye makeup. But this does not always happen and often depends on the quality of the product itself.
“Wet” makeup or wet-look!
The Gucci fashion house never ceases to surprise its audience with “tasty” and sometimes provocative ideas. When in 2010, models representing the brand appeared in front of hundreds of cameras with rich, shimmering “wet” makeup, the opinions of fashion show participants agreed that this makeup was too pretentious and grotesque to leave the catwalks for the masses. Today, most makeup artists are happy to adopt and develop this technique.
Despite the apparent complexity, doing wet-look makeup is quite simple! But first, let's look at the features of the direction.
So, “wet” makeup comes in two types:
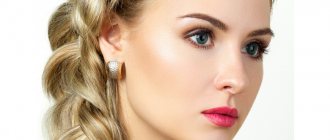
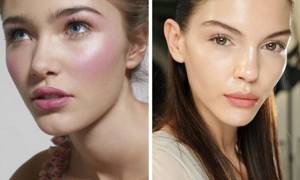
- Wet skin effect. If you want to give your face radiance and freshness, then “wet” skin is what you need. To create “wet” skin, decorative products of soft, non-aggressive shades and with reflective particles are used. But! Having chosen this type of makeup, it would be right to refuse shiny, pearlescent shadows and rich lip glosses, otherwise, instead of a fashionable look, you will demonstrate a complete lack of taste. The image created using this technique turns out incredibly tender and sensual!
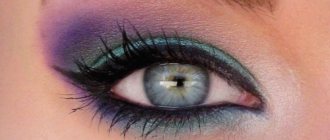
- Wet eye effect. This technique is good because there are practically no frames in it. You can choose any shade of shadows, shade them the way you like, the main thing is not to forget to add the final touch to your eyes - a glossy shine using the product that we will discuss below. Regarding the lips, everything is also very simple here: if the eyelids are covered with delicate shadows, a bright emphasis is placed on the lips and vice versa. Any color scheme and technique can be used for facial makeup!
Step-by-step instruction
How to apply eyeshadow wet?! Let's begin to analyze this issue.
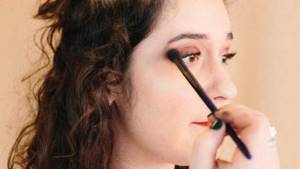
- Before you start directly applying makeup, you need to degrease your eyelids using a special product. This stage should not be skipped, since a beautiful and uniform application of the product depends on it.
- Wet the applicator or brush with a small amount of water. Shake off excess water. The applicator should remain slightly damp.
- Select the desired shade of eyeshadow.
- When applying, gently lift the outer corner of the eye. Try to apply shadow as close to the eyelash growth as possible.
- Remember that light shades of the product are applied closer to the inner corner of the eye, and dark shades - towards the outer corner.
- The eyelash line should be highlighted with dark shades.
- And under the eyebrow use a translucent shade of a light color scheme with a slight shimmer effect.
- Blend the shadows well using special cosmetic brushes and a very light shade of product. Performed using standard technology.
Apply a base so that the shadows do not roll off
The foundation (or base) for eye shadow has a very important purpose - thanks to its use, eye makeup lasts much longer, without creasing or changing its original appearance. In addition, the base allows you to make the colors of the shadows more saturated and helps hide imperfections on the skin of the eyelids. There are special cream, gel and liquid foundations offered by leading cosmetics manufacturers, and all you need to do is simply purchase the product and start using it in your practice. The scheme of action is as follows: you need to apply the composition to cleansed skin in a thin layer using a special brush or finger, and then carefully shade the boundaries. After a few minutes (a pause is needed for the base to dry), you can begin to apply shadows.
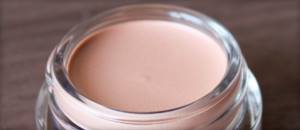
If you don’t have a purchased base on hand, you can try replacing it:
- foundation;
- to enhance the color intensity, you can apply a white pencil to the skin;
- the easiest way out is to apply the shadows wet;
- Some people risk using lip balm together with foundation, but this is a very extravagant solution that can lead to an allergic skin reaction.
Important nuances
You will be interested in: “Givenchy Look”: description of the fragrance, photos and reviews
So we looked at the question of how to apply dry eyeshadow using a wet method.
Important! Until you learn how to properly apply the product using a wet technique, try to pick up shadows from the edge of the palette of each of the shades presented, and not from the middle. This way you will reduce the likelihood that you can ruin the shadows due to inexperience.
Some girls use a slightly different technique from the one we looked at earlier. They scoop the eyeshadow onto a dry applicator and then lightly spritz it with water. Try both options! This will make it easier to determine which one is right for you.
Correct eye design
✨The first thing to do is to hide all skin defects around the eyes with concealer. To do this, it is applied pointwise to problem areas and shaded.
✨Next comes the turn of the primer, which is easiest to distribute over the eyelid with your fingertips and leave for half a minute to absorb. On its basis, any shadows will lie smoother and brighter, and during the day the primer will protect them from unaesthetic rolling in the folds of the eyelid and falling off.
✨First, a base layer of shadows is applied to the eyelid, the shade of which should be as close as possible to the skin color. The base plays the same role as powder on the face - it evens out the tone of the eyelid. ✨The palette for natural makeup is based on a brown range, ranging from pastel beige to rich dark chocolate color. In everyday makeup, as a rule, two colors of shadows are used - dark and light. A light shade covers the area from the eyebrow to the border of the movable eyelid, and it should also be used to line the eyelash growth line on the lower eyelid, using a thin brush or a pointed applicator. A more saturated shade of the selected range is applied to the outer corner of the upper eyelid, followed by shading to its middle.
✨Now that the shadows are applied correctly, all that remains is to draw up the eye contour. To do this, you can draw the space between the eyelashes with a sharply sharpened pencil and finally apply mascara.
How to apply shadows?
Wet or dry method of applying eyeshadow? The choice depends on the result you want to get. The structure of a cosmetic product is of no small importance.
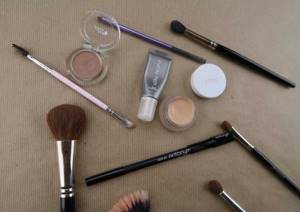
Let's look at the most popular tools for applying shadows:
Some types of cosmetic products are already initially produced in such a way that no additional devices are required for their application. The most popular option is pencil eyeshadow. But everyone chooses a product individually based on their preferences. Some people find it more convenient to apply shadows with an applicator, while others can’t do it without a set of professional brushes.
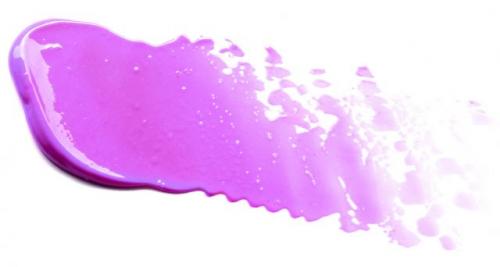
Liquid glitter eyeshadow. How to use liquid eye shadow?
Liquid shadows are applied in one stroke, lie on the eyelids in an even layer and last all day. True, for everything to work out as it should, you need to know some tricks
Text: Veronika Gnezdilova
© iStock
Reliable base
Despite the fact that liquid shadows are highly durable, you should not ignore the primer. The surface of the eyelids is most often a little oily, and this can spoil the makeup. It is possible that after a couple of hours the shadows will smear or bunch up. There will be no such problem with a base layer: it will even out the skin and degrease it, so that the shadows will last as long as possible.
Basic application rules
1
Handmade
Liquid eye shadows most often come in tubes with an applicator, just like lip glosses. Makeup artists and beauty bloggers advise applying liquid shadow with an applicator, and then blending the product with your fingertips. There is no need to worry that the shadows will form an uneven layer: the liquid texture spreads easily over the skin. But keep in mind that the color of the shadows will be very saturated - the same as in the tube. Therefore, there is no need to apply too much shadow with the applicator. If you see that the result is too bright, add a little loose powder to your eyelids - it will “mute” the bright shade.
2
Application with a brush
If you apply liquid shadows with a small fluffy brush for shading, the result will also be decent. It is worth remembering that brushes with natural bristles are not suitable for liquid textures. The fact is that they have a porous structure and therefore absorb the product. When using synthetic brushes, this problem will not arise.
3
Layering
Those who plan to do monochromatic eye makeup using liquid shadows need to know that it is enough to apply them in one layer. At the same time, smoky eyes using liquid shadows are also easy to achieve: in this case, you can resort to layering one color on top of another.
Graphic makeup
If powder shadows are most suitable for creating smoky eyes with a soft transition from one color to another, then liquid shadows are an option for those who love graphic eye makeup.
Using liquid shadows (especially dark shades) you can draw arrows all over the eyelid, and any other make-up options with clear outlines.
The lines drawn with liquid shadows will not be smeared, so you don’t have to worry about the safety of the pattern on your eyelids during the day.
Classic eye makeup
To make your look more attractive and your eyes more expressive, use the following type of makeup, and it will certainly amaze you with an excellent result.
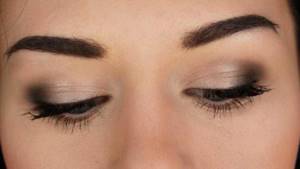
Regardless of whether you choose a wet or dry method of applying eyeshadow, the main thing is that the makeup is done correctly and accurately!
Source
Shadows with the effect of wet eyelids. Makeup with the effect of wet eyelids: 3 options
The expression “wet eyes” has a second meaning.
How to repeat fashionable makeup, see our photo instructions Text: Veronika Gnezdilova
© Makeup.ru
Makeup with an emphasis on lips
- Apply lip balm to the entire surface of clean eyelids using your fingertips or a flat synthetic brush. Apply a thin layer of waterproof mascara to your eyelashes.
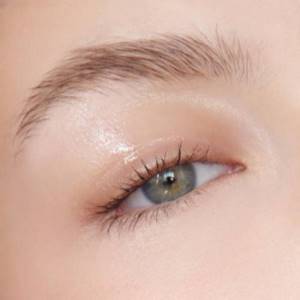
© Makeup.ru
- Complete the look using a radiant makeup base, light foundation and highlighter. Blend the blush on your cheeks, and also add a little color to your temples and sides of your forehead. For lip makeup, choose a rich shade of lipstick and blend a drop of gloss of a similar color in the center.
© Makeup.ru
Makeup with unusual arrows
- Paint over the mucous membrane with a black waterproof pencil - both above and below. Using liner or eye pencil, highlight the lower eyelid and draw an arrow towards the temple. Cover the entire upper eyelid with clear lip gloss or special eye varnish. Paint your eyelashes thickly with waterproof mascara.
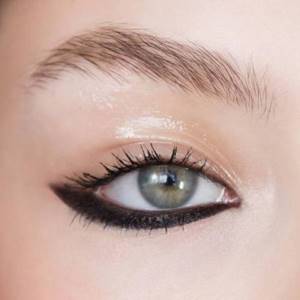
© Makeup.ru
- Highlight your cheekbones with peach blush and bronzer, and outline your lips with a dark brown pencil and blend the border with a lighter shade of matte lipstick towards the center.
© Makeup.ru
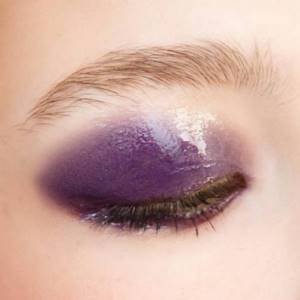
Bright makeup with rich colors
- Waterproof pencils, eye shadow pencils and gel eyeliners work best under a layer of clear gloss or special varnish. Apply a vibrant shade of any of these long-lasting products, blend the edges with a fluffy synthetic brush, and top with lip gloss or a special eyeshadow. Paint your eyelashes with waterproof mascara.
Step-by-step instructions for applying eye shadow
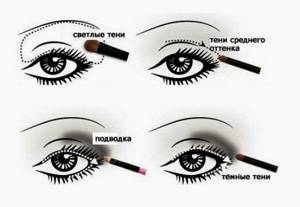
Here I will tell you the step-by-step sequence when using 3 shades. This will be the basic guide. But you should also take into account the shape, size and shape of the eyes, and based on these data it is worth choosing the right technique.
- Apply the lightest pigment to the inner corners of the eyes and to the bone under the eyebrow.
- In the middle, on the entire moving eyelid, we apply the main color, also known as the base or intermediate color.
- We accent the outer corners of the eyes with the darkest shades (marker).
- Next, be sure to shade the borders to hide clear lines.
- Finally, apply a thin layer of loose powder to set it.
Eyeshadow and its texture

Let's take a closer look at what shadows there are and what their main differences are.
Dry
Such cosmetics can be in crumbly or compact (pressed) form. It is easy to apply and lends itself well to shading. You can use both brushes and applicators. The shadows are ideal for oily eyelid skin, but will dry out dry skin a little. Their negative side is their tendency to crumble.
Liquid
The rich pigment of these shadows is perfect for the evening. They are also easy to apply and dry very quickly. They need to be applied in small quantities, otherwise they will look too bright, especially in photographs. It's better to do this with your fingers.
Among the negative aspects, one can highlight the difficulty of application, because they cannot be corrected or shaded. Therefore, one layer will be enough. They can also roll off on eyelid skin that is prone to oiliness.
Cream
This texture of shadows can be placed in sticks, pencils or jars. They have a very delicate and weightless consistency, and they are very easy to apply. They do not crumble and are quite stable. But among the disadvantages, one can highlight their combination with oily eyelid skin.
Baked
The main highlight of these shadows is the innovative approach to their creation - they are baked in an oven at high temperature. As a result, they turn out to be very soft, with a delicate and fine texture and a noble glow. Ideally applied both wet and dry. They do not dry out the eyelids and are quite stable.
How to achieve the effect of wet skin or perform “wet” makeup?
We tell you what to do to make your skin look radiant and hydrated
it will take 4 minutes to read
Text: Alina Kharaz

First, let's figure out what products are needed to do this makeup.
You will need:
- liquid highlighter Master Strobing Liquid Highlighter, Maybelline New York;
- foundation Luminous Silk Foundation - 2.0, Giorgio Armani;
- Naked Reloaded eyeshadow palette, Urban Decay;
- Hypnose Doll Eyes Waterproof mascara, Lancôme;
- spray for fixing and fixing makeup All Nighter, Urban Decay.
