Step-by-step video tutorials for face makeup
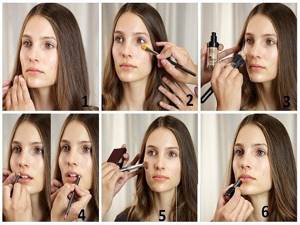
Step 1: Apply moisturizer.
The last step before applying makeup is to apply moisturizing lotion. This will help your makeup last longer and create a better final look. Choose a good face moisturizer that works with your skin type. Massage it gently all over your face. Don't forget about your eyelids, lips and nose.
Let the moisturizer absorb into your skin for a few minutes before applying makeup. Applying makeup while your face is still wet or sticky will result in a mess!
Step 2: Apply foundation that matches your skin tone.
Choose a foundation that works with your skin type and matches your complexion. Liquid foundation is a great choice for many skin types. You can also use a tinted moisturizer or BB cream. If your skin is oily, you may want to consider a compact or powder foundation. At the store, test your foundation to make sure it matches your face by lightly applying it to your jawbone. Never apply it to the back of your hand as the skin color is different from your face.
- Apply foundation evenly to face using a foundation brush, pad or finger.
- Avoid applying additional layers of foundation over blemishes. This will only make them stand out even more.
- Blend foundation around the edges of your face and where it meets the bottom of your chin.
Step 3: Apply Concealer
Choose a concealer that matches your skin tone—or, if you have dark circles under your eyes, go one shade lighter. Apply a small amount of concealer using either a concealer brush or your finger, dabbing it under your eyes and blending it gently. This will make your eyes look bright.
- If you're trying to cut down on your makeup, you may want to skip the concealer. It all depends on which features you want to replicate and which ones you want to highlight.
- Use a little extra concealer on blemishes if necessary (make sure to use a color that matches your skin tone).
Step 4: Apply powder
Choose a powder that matches your skin tone. Use a powder brush (a large, fluffy brush that will apply powder evenly) to apply the powder to your face in a circular motion. This will give your face a natural look and help set your foundation so it stays in place all day.
On those days when you have more time to spend on applying makeup, you can also apply bronzer and highlighter to contour your face. The bronzer helps create the right shadows, while the highlighter brightens the areas you want to highlight using the strobing technique.
Step 5: Apply blush
Choose a pink-toned blush. Swirl the blush brush in the container, smile and apply it to the apples of your cheeks in a circular motion.
Green eye makeup
Daytime makeup for green eyes can be done in the tones described in the previous lesson, since owners of brown and green eyes most often have similar color types of appearance. The principle of application will also be similar. Makeup for green eyes can be done using hazel, golden and light brown shadows. Use green shadows wisely and carefully: if you choose the wrong shade, the shadows will take on the accent and your eyes will “get lost” in such a variety of colors. It is better for green-eyed ladies to avoid some shades: for example, pink and purple - they will create the effect of tear-stained eyes. To complete the makeup, take some black eyeshadow on an angled brush and draw an arrow. By the way, this method of application is very convenient for daytime makeup - the arrow drawn with the help of shadows looks strict and neat. In addition, it can be easily corrected during the day, if necessary.
Makeup tutorials - videos for amateurs
If you have already mastered the basic techniques, then watch the lessons that will help you improve the skills you have already acquired.
Jenya Geyn shares with all lovers of beautiful makeup a lesson that will help in creating spectacular and sexy makeup that guarantees increased attention from the opposite sex!
If you consider yourself an active user of social networks and like to post various photos there, then you will probably be interested in makeup from Jenya Geyn, which will look flawless in selfies!
In summer, natural makeup is more appropriate, but not without rich colors. Zhenya Gein will tell you in her lesson exactly how to make it without spending more than five minutes on it.
If you want to look fresh and spring-like, then this tutorial from Nionila Bronstein will help you with this. The makeup artist offers you makeup done in soft pink tones.
Eye makeup - video tutorials
Girls who prefer to focus on their eyes in their image will find it especially useful to watch the video tutorials. You will learn the sequence of applying certain cosmetics and learn to emphasize your advantages.
If you have green eyes, then Mark Kaufman will tell you how to make them look especially impressive. The video will be interesting to fans of the eccentric actress Jennifer Lawrence and her heroine from The Hunger Games, because in her video the makeup artist was inspired by this very image. This evening make-up would be most appropriate for festive events.
Blue eye makeup
Blue eyes often attract admiring glances. Proper makeup will only emphasize their depth and expressiveness. How to do everyday makeup for blue eyes? Step by step it looks like this:
- Apply shadows of neutral shades to the mobile eyelid. Beige, cream or white work well.
- Apply shadows of lavender or pink shades into the crease of the eyelid. Shadows must be matte. Shiny eyeshadow applied into the crease of your eyelid will make your makeup look cheap. Do not use bright or dark shades under any circumstances - this is unacceptable in everyday makeup.

How to do face makeup
An even, radiant complexion is an important component of beautiful makeup. Below are simple tips on how to achieve this effect using cosmetics.
What you need for face makeup
If you're just starting to use cosmetics, basic brushes will come in handy - you can buy them as a set or separately. Choose the right ones depending on the products you are going to use.
What brushes are needed for face makeup?
- for foundation - a flat synthetic brush or beauty blender;
- for powder - large and fluffy, with a rounded edge;
- for blush - fluffy beveled;
- for concealer - a flat synthetic brush (like for foundation, but smaller);
- For shadows, two brushes are useful: a flat one for application and a barrel brush for shading;
- for eyebrows - a thin, angled brush with hard bristles.
Before applying makeup, professional makeup artists wipe the face with a cotton pad soaked in moisturizing toner to degrease the facial skin and remove excess care cream. Once it is absorbed, you can start applying cosmetics.
Start by applying a basic face makeup product - foundation. Most often, they have the consistency of liquid cream - such products are convenient to apply using a flat synthetic brush or beauty blender. Solid foundation sticks can be blended with your fingers. And the lightweight cushions have a nice foam applicator.
Types of beauty blenders for makeup
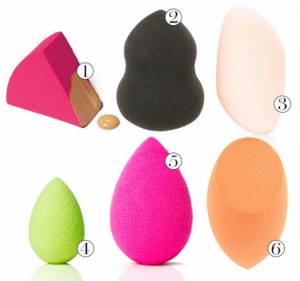
After you have evened out your complexion using foundation, you can use concealer for spot correction of imperfections - for example, dark circles under the eyes, acne and post-acne. Apply a small amount to problem areas and blend thoroughly.
To set your makeup and avoid shine throughout the day, apply a small amount of compact or loose powder to your T-zone.
If you don’t like the feeling of “a ton of plaster” on your face, you can get by with a light tint fluid or not use foundation at all. It is not at all necessary to use all of the listed products and do a full face of makeup every day.
Do I need to use a makeup base and how to do it?
According to professional makeup artist Nastya Sigmund, not everyone needs a makeup foundation—those with good skin can do without it.
— The main task of foundations, or primers, is to make the foundation easy to apply and adhere well, and at the same time to maximally even out the complexion in color and texture. Sometimes make-up artists only use care products under makeup: when the skin is good, everything is easy to apply and stays on well. In everyday makeup, you can safely do without primers, says the makeup artist.
It is believed that correcting the shape of the cheekbones, forehead and nose - contouring - is only appropriate for evening makeup. However, today the line between daytime and evening looks is gradually disappearing, so contouring can be done not only as evening makeup or for a photo shoot, but also for daytime makeup.
— The difference between daytime makeup and evening makeup is, first of all, in the girls’ heads. For some, two layers of mascara is already evening makeup, for others it’s normal to do a smokey eye early in the morning and go to work. I never divide either professional or amateur makeup into daytime and evening: any techniques, including contouring, can be used whenever you want. Any new makeup practice should first be tried in front of a mirror in a calm, unhurried environment, and only after that decide: is it necessary? You will never understand whether you like this technique or not until you try it several times, if possible - with different products or in different variations, advises Nastya Sigmund, makeup artist
The master also believes that it is necessary to adapt conventional contouring schemes to your facial features - you can learn this in makeup courses for yourself.
It is also not necessary to use a dark contouring product - sculptor. You can highlight those areas of the face that you want to highlight more. This can be done with matte products (light foundation or concealer) or shining highlighters. Select the area under the eyebrow, outline the cheekbones, chin, bridge of the nose, highlight the earlobes or cartilages, collarbones.
When choosing between dry and cream contouring products, Nastya advises to be guided by personal preferences.
How to do light makeup for every day step by step
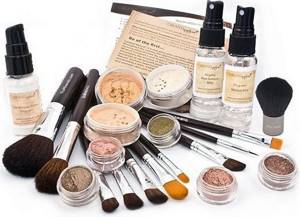
Before starting the makeup process, wipe your face with micellar water for your skin type. What we need for light daytime makeup:
- makeup base;
- BB or CC cream;
- corrector;
- spot application brush;
- beauty blender;
- eyebrow pencil;
- Mascara;
- white and black matte shadows;
- black eyeliner;
- brown shadows;
- shimmering shadows with a light structure;
- light lipstick.
In the summer, we recommend using BB or CC cream with SPF sun protection.
Step-by-step execution of actions:
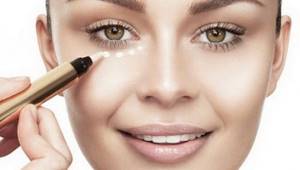
- Apply the makeup base and let it absorb, then use a brush to apply the corrector to problem areas on the skin.
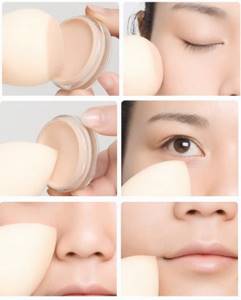
- Next, use a beauty blender to evenly distribute the BB or CC cream.
- Draw your eyebrows with a pencil of a suitable color for you.
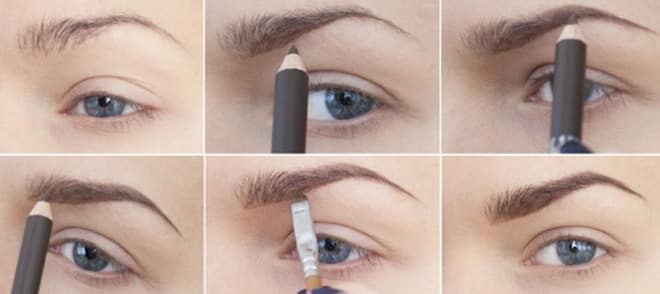
- Now we design the eyes in several stages.
- Paint your lips with a neutral color.
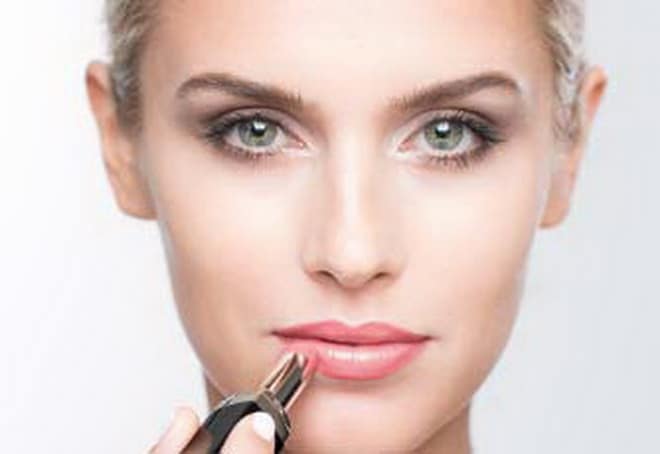
- This simple makeup will give you elegance and charm.
Preparing the face
Applying makeup in stages for beginners should begin with preparing the facial skin and will depend on the woman’s age and skin type:
| Procedure | Recommendations |
| Cleansing and washing | To improve your complexion, it is recommended to wash your face with cool water, or mineral water. |
| Applying toner or moisturizer, depending on skin type | For teenagers, you can use alcohol-based toners to prevent acne. |
| Hydration | It is recommended to use creams based on hyaluronic acid, as it can provide a deep level of hydration at the cellular level |
Cleansing
To cleanse your face, you can use several types of cosmetics:
- Makeup remover cream, cleansing milk or micellar water are used if you already have makeup on your face and need to remove it. Using a special product and a cotton pad, wipe the skin along the massage lines.
- Scrub or peeling is not used daily, but 1-2 times a week, depending on the condition of the skin. Instead of a purchased scrub, you can prepare the product at home using a washing gel and any abrasive product (ground coffee, salt, sugar, crushed walnut shells).
- Cleansing foam is used for delicate skin. For example, this product is recommended for girls under 18 years of age. It is also used for the skin around the eyes, where scrubbing cannot be done.
Toning
Tonics help narrow pores, thereby normalizing the water-fat balance of the upper layer of the epidermis. In addition, they enhance the effect of nourishing and moisturizing creams. For oily skin, alcohol-based tonics are recommended, which have a slight drying effect and an antiseptic effect.
For normal skin, it is enough to use refreshing and vitaminizing products. Instead of store-bought products, you can tone your skin with aloe juice, cucumber or frozen ice cubes made from a decoction of herbs (chamomile, calendula, string).
Hydration
To moisturize, you can use any day cream, fluid or serum. Also suitable for this purpose is a cream base for makeup, which has a moisturizing effect and evens out skin tone before applying foundation or correctors.
Lip makeup
Step 1. Choose a color.
- You should test lipstick or gloss not on your wrist, but on your fingertips.
- The lipstick color should match the colors of your eye and face makeup.
- To enlarge thin lips, use a contour in light shades of beige or pink.
- For plump and wide lips, it is better not to choose bright shades.
- If your teeth are not white enough, this flaw will help hide the light pink tint. In this case, you cannot use brown tones.
Step 2. Preparation.
- A scrub will help your lips become smooth and moisturized. It can be made at home: mix sugar and vegetable oil in equal proportions.
- Apply the scrub onto your lips with gentle movements, then wipe off with a tissue. After this, your lips will be in perfect condition for applying makeup.
- If you don't have time to scrub, just clean your lips with a special toner.
- Apply lip balm or chapstick.
Step 3. Outline.
- Paint 2/3 of your lips with a pencil to match your lipstick. If the lipstick wears off quickly, it will prevent your lips from being left without makeup.
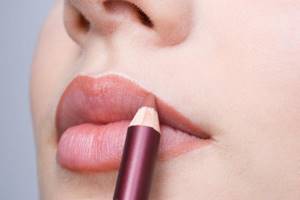
- If you want to make your lips plumper, apply the contour slightly beyond the natural boundaries.
Step 4. Lipstick.
- To make the lipstick lay more evenly, you can use a brush.
- Apply lipstick to the entire surface of your lips, starting from the middle and moving to the corners.
- Blot your lips with a tissue to remove excess.
- Apply a second layer of lipstick. Before doing this, you can lightly powder your lips so that the lipstick stays on better.
- Blend the border between lipstick and pencil.
Subscribe to our channel in Yandex.Zen
Finishing touches
You can add a few more notes:
- An illuminator or highlighter is applied to the cheekbone over the blush. These are shiny pearlescent products that give the face a healthy glow. They can also highlight the bow above the upper lip and the tip of the nose, which will visually make it thinner. Both products can be creamy or dry. In winter, it is recommended to use liquid and fatty consistencies, and in summer, when it is hot, dry ones.
- To fix cosmetics on your face, you can use thermal water, which will create an invisible mask over the cosmetics and protect it from moisture. This product can be purchased at any cosmetic boutique.
It is important to follow all the step-by-step steps in applying makeup in order to achieve the beauty and quality of the make-up. For beginners, you can purchase all kinds of brushes and stencils that will help you evenly shape your eyebrows, lips, eyelids or contour your face in general.
Tips for perfect makeup
Before starting the lesson on how to apply makeup correctly, learn a short list of tips that will help you create an even tone and make the perfect makeup.
- Stock up on quality brushes. In your kit you will need the following options: for eye shadow and powder, for foundation and blush.
- Use each tool for your task. Unless in extreme cases you can replace them: for example, use concealer instead of base.
- To create a light tan on your face, purchase bronzer.
- If you often use powder, avoid using a lot of other products. The layer of powder should be transparent and thin. It is better to use powder where there is an oily sheen: on the chin or in the T-zone. With this method you will get a light toning result.
Important: use only high-quality cosmetics from a trusted brand. Low-quality products contribute to allergies and behave worse when worn for a long time.
Ideas
Every girl can learn how to do makeup for beginners. You only need to determine the type of dermis, as well as the shape of your face. After studying the advice of makeup artists, you can begin to navigate and understand how colors are combined with each other.
- Makeup in the “smoky eye” style is very popular, applying which is not difficult even for a beginner. Before starting work, you should even out your skin tone and apply a small amount of powder to your eyelids.
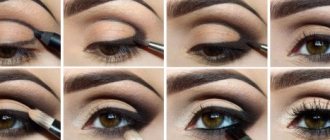
- You need to start your make-up with the arrows. They are applied using a cosmetic pencil. If you wish, you can use a flat brush or outline the eye contour using shadows. Keep in mind that this technique eliminates the use of liquid eyeliner, because you need to get clear and strict contours.
- Next, you should raise the line of the outer corner, heading towards the temple area. Give the line a thickness that is much thicker compared to the inner corner. The contour should be carefully shaded. A thinner outline is drawn on the lower eyelid, which should also be shaded.
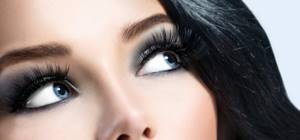
- Buy shadows whose shades are close to each other and form smooth transitions. Choose a color palette so that it looks harmonious with the pencil. The darker shadow pigment should be placed on the moving eyelids, using several layers to create the effect of sufficient thickness. Apply starting from the outer corner and moving towards the inner corner. You can create a contour using shadows, and highlight an arc in the area of the eye sockets.
- Apply shadow to the lower eyelids in the outer corners. The movement should be carried out towards the inside of the corner, reducing the intensity of the shades. Light pigment is applied from the age-old folds towards the eyebrows. All transitions with borders should be shaded.
The described makeup technique is not considered the only one. This option is more popular, but in order to master its subtleties, you should try out different techniques for this type of makeup. For example, the main shade is replaced by a thicker pencil line. It is shaded upward along the upper eyelid. A similar manipulation can be done using your fingers. Shadows are also distributed with your fingers.
Some makeup artists initially use an intermediate shade in the middle of the upper eyelid. Then a black tone is applied along the lash line and under the crease with the outer corner of the eye. All lines are carefully shaded.
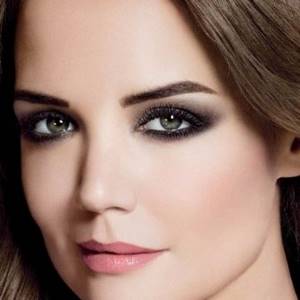
- For beginners, natural makeup ideas will be relevant. This technique also consists of evening out the tone of the face, emphasizing the beauty and freshness of the skin. For this look, use a small amount of concealer, foundation and powder in natural shades, as well as natural shades of eyeshadow.
- Light beige shades are applied under the eyebrow, and the light tone is used as a base for the shadows. The edges of the shadows should be shaded. Darker shades are placed at the outer edge of the eyelid and are brought to the border of the moving eyelid.
- If you decide to do natural makeup, you will need a brown, gray or green pencil. Using an arrow, you will need to highlight the upper eyelid at the base of the eyelashes. Eyelashes should be painted without lumps. Apply mascara to your upper and lower lashes.
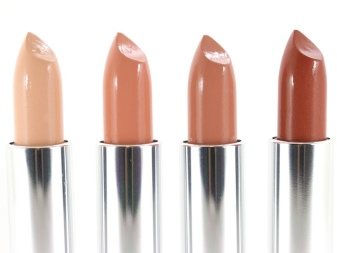
- When choosing lipstick, choose natural shades to highlight the natural beauty of your lips.
Features of light makeup
Light makeup is used in everyday life. It is unobtrusive and does not have pronounced accents on a certain part of the face. To create the perfect look with delicate makeup, you need:
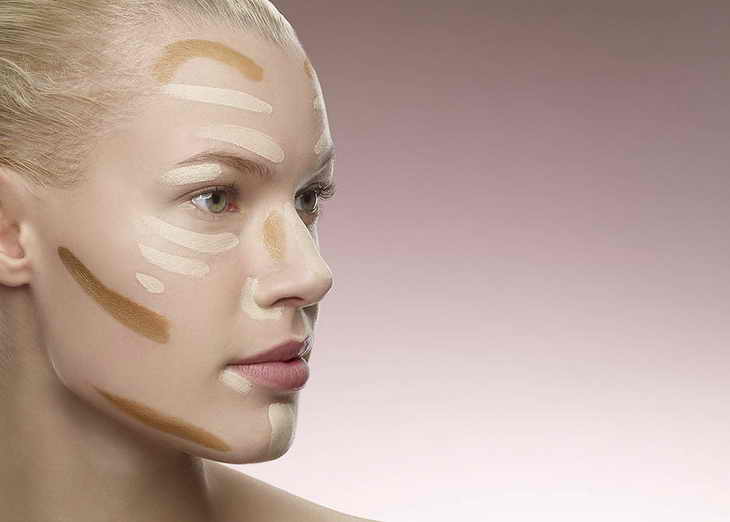
- Have two shades of foundation . A dark base is applied to the chin, cheekbones and sides of the nose. The forehead and cheeks are shaded with a light tone.
- The powder needs to be shaded by pointing the brush upward . Particular attention is paid to the area under the eyes; if necessary, dark circles are masked with light powder.
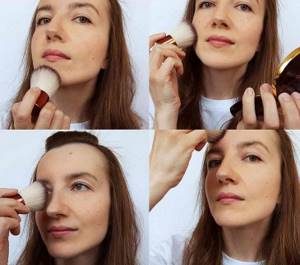
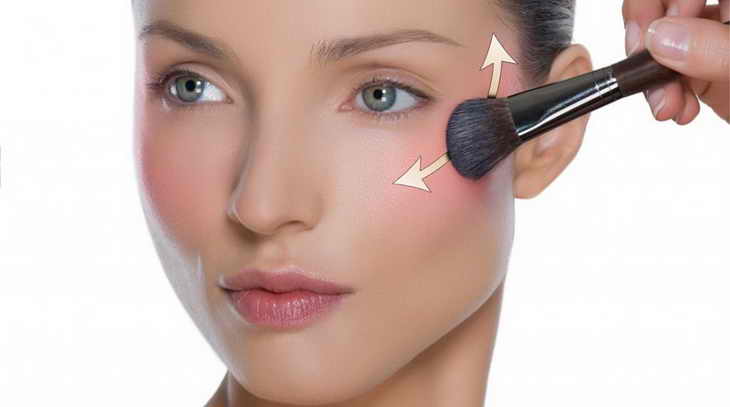
- Blush, like powder, is applied with a brush in the direction from the nose to the temples , but not in a straight line, but slightly upward. In everyday makeup, blush should be cooler, softer shades.
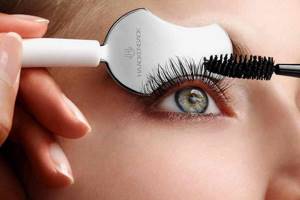
- Mascara is applied to the eyelashes from the root , and the brush should move in different directions. It is advisable to apply a light layer to the lower eyelashes as well.
Important! To make makeup look natural, you first need to even out the skin structure.
To do light makeup, you will need:
- Liquid for removing dirt and oily deposits from the skin. You can use tonic, milk or gel. Cleansed skin will acquire an even matte shade.
- A day cream that is applied to the skin after cleansing.
- Foundation to give the skin a soft and even texture. Preference is given to the tone closest to the natural shade of the face.
- Powder, preferably loose, not compact. The crumbly structure of the powder applies smoother to the skin, looks more natural and keeps makeup fresh for a longer time.
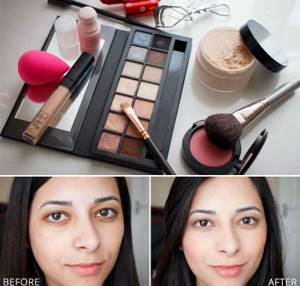
- Corrector, highlighter or concealer a tone lighter than your skin tone to disguise acne, redness and other imperfections.
- Blush in subtle shades to give the face a natural freshness.
- Three pencils - for lips, eyebrows and eyes. They emphasize the clarity of the lines.
- Eye shadow. Preference is given to dry shadows, since oily ones are only suitable for dry skin and fade quickly.
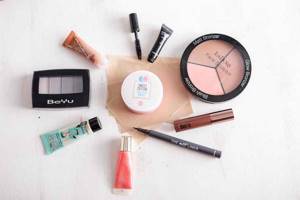
- Mascara to highlight the shape and color of the eyes. If desired, you can choose a lengthening, voluminous or lash-curling mascara.
- Lipstick or lip gloss, preferably sustainable quality.
Note! The simpler and more natural the makeup looks, the more painstaking the work to create it. But once you fill your hand, light makeup can be done in 15 minutes.
You also need to remember that for each type of face you need to choose a certain style. Korean makeup is suitable for some, while others prefer age-related makeup; the main thing is that the makeup looks appropriate and is done with high quality.
Secrets of natural makeup
A few recommendations from stylists will help you create a beautiful look.
- Choose one dominant. Remember that if you want to distract attention from some part of the body, you should not apply a bright color to it. For example, if you need to hide your neck, use a transparent gloss or balm on your lips.
- Tint your eyebrows evenly and neatly. They are responsible for youth and open-mindedness. Choose a tone that matches your hair or is slightly darker.
- Don't overuse blush. Their task is to give a light, healthy rosy tint to the cheeks.
- Use soft or damp sponges to blend your foundation. This way it will better hide unevenness and be evenly distributed and will last longer.
- Be sure to prepare your skin before applying cosmetics.
Some more tips regarding natural makeup: tutorials and videos
- Use light-colored correctors to paint over those parts of the face that you want to enlarge or bring closer. For example, the area around the eyes.
- With dark pigments, on the contrary, distance what needs to be hidden and reduced. Together with contrasting ones, they are good for creating relief.
- Apply the base on your cheeks towards your ears, along the massage lines. Smoothly move to the neck so that there is no abrupt transition if the palette contrasts with your coloring. It is also needed on the lips and eyelids.
- Avoid clear strokes; it is important to carefully shade all boundaries.
- Give preference to matte shades. Natural makeup does not accept mother-of-pearl or obvious gloss.
These are all the basic rules and recommendations. They will help beginners learn how to get easy, beautiful results the first time.
Eyebrow shaping
Thick natural eyebrows remain the current season's trend. When designing them, eyebrow gel and a special comb are used.
If you need to highlight with color and adjust the shape, you can tint your eyebrows with a pencil or eyeshadow. The shape is given depending on the type of face.
For those with an oval face, both arched and straight eyebrows with a soft curve are suitable.
For chubby people, arched eyebrows with a wide beginning and a thin tip will be appropriate.
For triangular face shapes, it is recommended to design raised eyebrows with a uniform arch.
On a square face shape, rounded eyebrows with a high arch look better.

Consider eye color for beautiful and light makeup
Light daytime makeup involves creating a natural look, not loaded with too aggressive and flashy elements. There are a number of requirements that it must meet: it is easy to apply without taking much time, gives an easy result, emphasizing the advantages of the face, and does not require a long list of cosmetics.

In any case, you will have to pay the most attention to eye makeup, because it is beautifully emphasized eyes that will help make the image truly beautiful and magical. A lot of factors are taken into account, ranging from the depth of the eyes and the distance between them, but the color of the iris is still of decisive importance. He is the one who will tell you which colors are best to use.
For green eyes
Green eyes are naturally endowed with mystery and depth; their owners, even on an ordinary day, seem like mysterious fairies. It’s easiest to highlight such beauty - makeup artists say that it is green-eyed girls who can afford the largest number of colors and types of makeup.

There are a number of rules that will help you not only create a truly beautiful make-up, but also avoid a large number of common mistakes when creating a beautiful “frame” for charming green eyes:
- shadows should not completely match the color of the iris;
- You should not focus on gray tones, and especially not use only them;
- when choosing arrows for daytime makeup, make them thin and not long and only on the upper eyelid;
- For eyeliner it is best to use black;
- when choosing the color of shadows, give preference to light pinkish, lilac, marsh, beige shades;
- You should not use both blue and green tones at the same time;
- when choosing mascara, give preference to either classic black or green, but the second option cannot be used for every occasion.
For brown eyes
According to experts, brown eyes do not need complex makeup at all - they are already expressive and deep. Using shadows you can make a beautiful accent, emphasizing the natural depth, but dark and rich tones are prohibited in light makeup, so to get the desired result you should adhere to the following recommendations:

- a categorical “no” to the color orange;
- beige shadows with a slight shine, delicate pinks and pure beige shades are perfect for light everyday makeup;
- if you have brown hair, then you can apply olive and chocolate shades on the outer corners of the eyes;
- It is better to avoid rich brown, black, bright blue and green shadows;
- For blondes with brown eyes, pastel colors are perfect - light golden, lilac and copper shades;
- if the eyes are very light, then using brown tones is not recommended;
- girls with dark skin and hair should use black eyeliner and mascara, while fair-skinned beauties should use brown colors.
For blue and gray
Do you have blue or gray eyes? The main rule remains the same - makeup should be natural and unobtrusive, which means the shadows on the eyelids should be light, light shades. Golden, silver, delicate plum, pink and lavender shades are perfect for blue-eyed girls. Those with gray eyes can stick to the same color schemes, but add green tones.
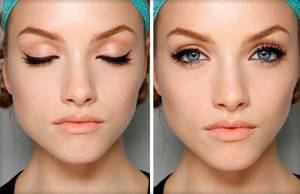
Depending on the situation, you can use not only classic black or brown eyeliner, but also colored eyeliner - silver or gold. A dark gray arrow will also look good. Natural makeup excludes the possibility of gluing fluffy false eyelashes, but if this is extremely necessary (for example, due to the structure and length of your own), then you should limit yourself to a few not too long bunches. Mascara is also applied in the classic version - black or brown.
Makeup for gray eyes
The basis for everyday makeup for gray eyes is shades of light natural shades. Apply shadows into the crease of the eyelid that will add depth to the makeup: for example, sand. You can apply dark shadows to the corner of the eye and blend thoroughly. Beautiful makeup for gray eyes is ready.
These are the basic principles of applying daytime makeup. Remember, no matter what color your eyes and skin are, they highlight your individuality, making you unique. Therefore, you need to be able to appreciate what nature has given you, masterfully making the necessary accents.
What is the name of natural gentle daytime makeup, its types
This kind of makeup has its own name. Most often you can find the definition - nude or nude. This word is also used to describe certain decorative products. For example, lipsticks, eye shadows, concealer creams. It means the most natural colors possible. This look includes long, fluffy eyelashes, glowing skin, light blush, and fresh lips.
In short, it is natural beauty. This kind of makeup can be divided into everyday and festive. The second one is most often done by brides. It differs only in the properties of cosmetics. For a celebration that lasts all day, it is better to choose durable products.
Also, daytime makeup is classified by color type. Girls with cold and warm colors will need different palettes. You will also learn about selecting the right range from our article. Another sign by which two types of nude are distinguished is accent. It can be done on the eyes - arrows, smokey eyes or on the lips - red lipstick. We'll tell you about the basic life hacks and rules that are relevant for natural makeup in principle.
