Home page » Beauty » Nails
Author of the article
Svetlana Pavlikhina
Reading time: 6 minutes
AA
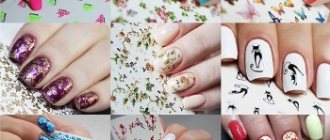
Water stickers can give your nails a sophisticated look. They are easy to use. They are not expensive at all. The main thing is to study the instructions for their use in advance. After this, you can safely apply the decoration to your nails. The result will exceed all expectations, and the manicure will look fresh and original.
Technology of using stickers
It is easy to attach decorative elements to the nail plates and use them. For manicure you need to prepare the surface.
You should also ensure that you have the necessary tools. After this, you can apply the sliders themselves. The main thing is to figure out how to use these products.
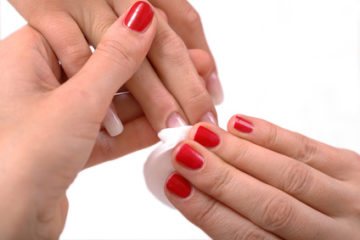
Features of nail preparation
Before gluing the sliders, the nail plates need to be prepared:
- Remove the old covering.
- Steam your fingers in warm water.
- Clean the areas under the nails and the surface.
- Using a nail file, give the plates the desired shape.
- Remove cuticles.
- Treat your nails with alcohol or a special degreaser.
- Apply base coat.
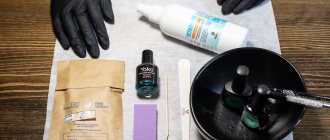
Required tools and materials
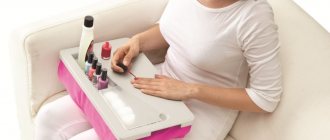
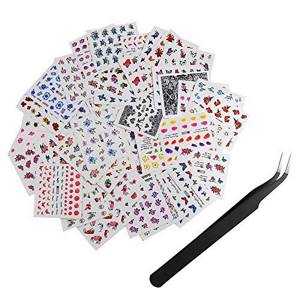
In order to create a manicure at home, you need to ensure that you have the following tools and materials:
- stickers;
- scissors;
- a bowl of warm water;
- cotton pads, sticks;
- UV lamp (when applied to shellac);
- orange stick;
- fixative
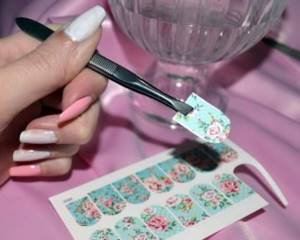
Slider gluing technology
The instructions will help you apply the stickers correctly.
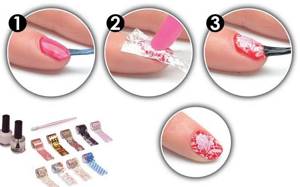
To transfer them to the surface of the plate, you need to perform the following steps:
- Place the decorative element on the surface and measure the required size.
- Cut off the desired part using scissors.
- Immerse the sticker in warm water for 20-30 seconds. The liquid should not be cold, otherwise the peeling process will be slow.
- When the protection comes off, remove the slider from the water using tweezers.
- Place the decorative element on the surface.
- Place a cotton pad on top. Such actions are necessary in order to remove excess moisture.
- Using cotton swabs, smooth the film with gentle movements.
- Dry the surface thoroughly.
- Apply a fixative to your nails.
It is important that all layers dry well. The period of wearing the manicure depends on this.
Gel polish stickers step by step: process and design ideas
The step-by-step procedure for fixing the sticker on gel polish is as follows:
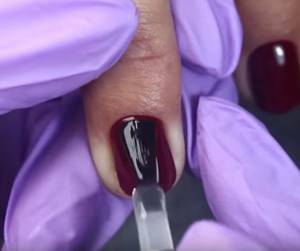
- They prepare the nails, that is, they give them a shape, paint them with varnish, apply a base that is not dried, or leave a sticky layer of gel.
- Prepare the decor: cut it out if necessary, moisten the watery sticker, separate it from the backing or remove the self-adhesive one from the base without using moisture.
- Attach the sticker to the plate and smooth it out from the middle to the edges.
- If you fixed the decor on a wet base, place your hand in the lamp, otherwise skip this step.
- Use a file to remove excess sticker from the end of the nails.
- Apply the finishing layer and dry in a lamp.
There are some nuances when using 3D stickers, stripes and lace.
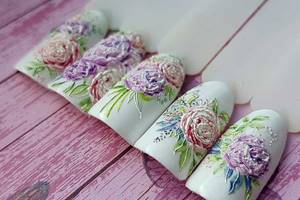
3D stickers
Gluing 3D stickers onto gel polish is a little more difficult than flat ones, due to their volume. After all, this is not just a picture; it turns out that some elements of the sticker rise above the surface of the nail. And you need to attach it securely. Otherwise, with any awkward movement, the decor will shift or fall off.
The 3D fixing process should go like this:
- Nails painted with gel polish are covered with a top coat with a sticky layer, dried and not removed.
- The required fragment of the sticker is cut out almost to the size of the nail plate, but deviating from the design by 1.5-2 mm.
- Place it with the wrong side on a damp cotton pad for a few seconds.
- The sticker backing is moved to the side and removed.
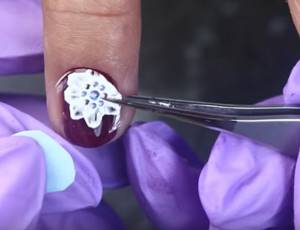
- The three-dimensional image itself is placed on the nail plate, helping yourself with tweezers.
- The decor needs to be leveled, for which a silicone applicator is used.
- Apply a small amount of topcoat on top of the nail.
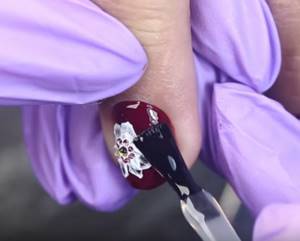
- From a three-dimensional image, use a thin brush to move it to the edges of the sticker.
- The layer must be dried.
- For greater reliability, you can once again coat the edges of the sticker with topcoat, without touching the bulk part, and polymerize it.
Instead of a top coat with a sticky layer, at stage 1 you can use a base product, but do not dry it. You should place your hand in the lamp when the sticker is already pasted on the nail. Do not use a primer with voluminous stickers, as it will dissolve the film and the 3D effect will disappear. The final coating is not too thick. Otherwise, the relief of the pattern underneath will disappear.
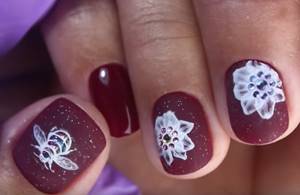
3D stickers are usually made to decorate part of the nail. Therefore, when using them, there is room for imagination: you can glue them in the center, move them closer to the side roller, fix 2 patterns on 1 plate, etc.
Watch the video on how to attach 3D sliders:
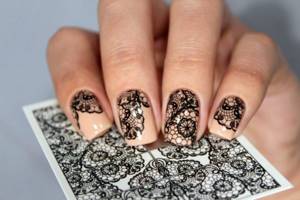
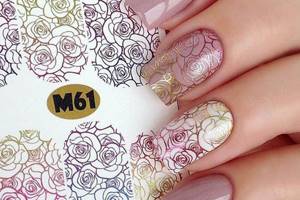
Lace stickers
Lace stickers are usually of the water type, but when using them it is important to consider several nuances:
- the base of the decor is transparent, so it looks better not on colored gel polish, but on a base product without a tint or top coat, as well as a white or black coating;
- As a rule, lace is made on the entire plate, which means that it is necessary to carefully check the size of the sticker and the nail;
- for the same reason, it is equally important to properly straighten the film around the sinuses and cuticle.
Otherwise, the process is no different from what needs to be done with other types of decor.
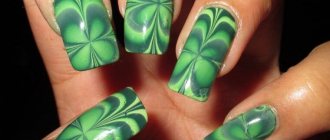
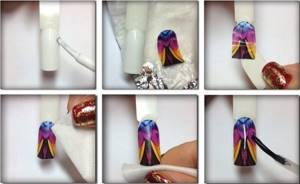
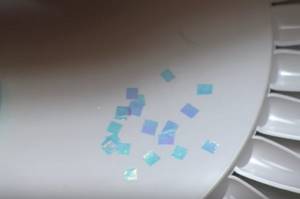
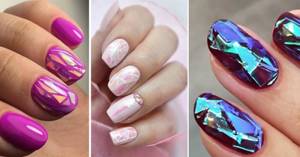
Slider design “broken glass”
The “broken glass” slider design is made using a special film that does not have an adhesive layer or backing. It can be individual fragments or a whole sheet, which will have to be cut into pieces of the desired size.
The design technique is as follows:
- First, the decor is prepared, that is, the film is cut into fragments of different sizes.
- A thin layer of top or base product is applied to nails painted with gel polish and dried.
- While the top covering is wet, pieces of film are placed on it so that there is a distance between them.
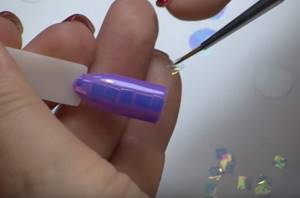
- The hand should be placed in a drying lamp.
- Then another layer of topcoat is applied and polymerized.
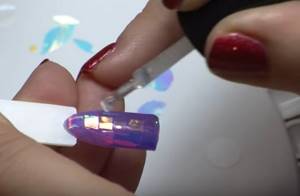
Use a thin brush to move pieces of film onto the nail. And to correct an unsuccessfully settled fragment, an orange stick will be useful.
The film can be taken in one color or used in several shades. “Broken glass” is performed in the same colors as the manicure itself, or they use decorative shades that contrast with the gel polish. You can apply it completely to the nail, form a pattern or geometric shape, or select one part of the plate of your choice.
For the whole nail
Using decor on the entire nail has its own characteristics:
- The sticker should immediately fit the size of the plate, not counting the free edge. After all, only from the end can you remove the excess. It will not be possible to do this from the cuticle or at the side rollers when the slider is glued, as you can damage the coating.
- Therefore, after it is cut out, any type of sticker should be applied to the nail for fitting. And even if it is slightly narrower than the plate, this is not a problem, since sliders are always made on a transparent basis.
- After applying the sticker to the nail, you need to smooth it out so that there are no wrinkles. To do this, work with a spatula or finger from the middle to the edges. You must act carefully, otherwise the thin film will tear.
- The slider is placed on a sticky layer of top or undried base. When it is straightened on the nail, you need to send your hand into the lamp to fix the decor.
- Only after this can you remove excess film from the free edge. This is done with a file, placing its plane at an angle of 90 degrees to the end.
- All that remains is to coat the nail with the finish and polymerize it. It is also necessary to seal the end of the plate with the product, and not just the surface of the plate. This will ensure even more reliable fixation of the decor.
How long do they last on nails?
With high-quality preparation of the nail plates and strict adherence to the rules for gluing sliders, the manicure will last at least 2-3 weeks. But the wearing time largely depends on what materials are used.
If the film begins to peel off quickly, it is most likely that it was glued to a coating that was not completely dried. It is possible that the sticker itself was very wet.
The pattern does not last long if it is glued to an excessively thick layer of varnish. Also, the service life is significantly reduced when low-quality decorative elements are used.
If the manicure turns out to be ruined due to chips in the fixative, it means that the film was not dried properly, and there was no room left for the base to adhere to the varnish, or the tips were poorly sealed.
The durability of the manicure is also affected by the fixative . You should make sure that it is designed to hold aqueous stickers.
3D stickers
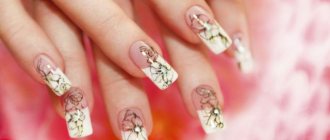
Volumetric decor always looks impressive on nails, but an important condition for the three-dimensional nail art technique is the balance of decorations. The design must be done in moderation, appropriate for the occasion (holiday, special event).
One or two fingers in the form of 3D fragments are decorated with a three-dimensional image. Small decorations (beads, bouillons, sparkles) can occupy the entire surface of the nail.
How to glue 3D stickers:
- The illusion of volume is created by the arrangement of the drawing or pattern.
- Prepare your nails for decoration by applying a base coat of polish.
- Peel stickers with a three-dimensional pattern from the backing.
- Apply to your nails with tweezers and carefully align.
The use of beads, sand, beads are not 3D stickers, but elements of three-dimensional decor. They are used to create artistic accents. Gluing 3D stickers onto your nails adds volume to your manicure due to the visual perception of the designs.
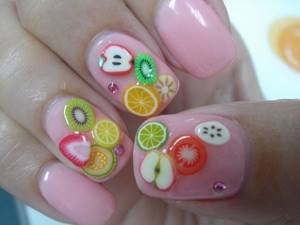
Another option for 3D manicure is using fimo
Features of gluing to different surfaces
The procedure directly depends on what surface the sticker will be glued to. Depending on this, the steps to perform a manicure differ.
On natural nails
Even a beginner can handle the technique of applying stickers to regular varnish. No special skills are required. To do this, it is enough to prepare the surface. Perform the following actions:
- Apply two layers of base coat, waiting until they dry completely.
- The sticker is soaked in water.
- Transfer it to the surface.
- Remove excess moisture and smooth with a cotton swab.
- When the surface is completely dry, a transparent coating is applied on top to secure the decorative elements.
For gel polish
Manicure using gel polish is more reliable and durable.
Execution technology:
- Nails are prepared according to the standard scheme.
The shiny layer is removed with a nail file.- The plate is given the desired shape.
- The surface is treated with a degreaser.
- A layer of gel polish is applied.
- The marigolds are dried under a UV lamp.
- The slider is placed in water.
- After 30 seconds, it is removed with tweezers and transferred to the surface.
- Wait until completely dry.
- Apply a finishing coat of varnish.
- Nails are dried under a lamp.
How to transfer self-adhesive stickers with a backing onto your nails
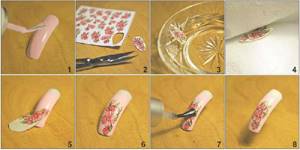
Transferring stickers with a backing and sticky base to nails should follow the required steps:
- Apply a color coating to the base in 2 layers, dry both times.
- The picture is removed from the backing, which should come off easily.
- Then it is applied to the nail, straightened, and fixed.
- All that remains is to cover the nails, not forgetting the end sides, with two layers of top (or first the base and then the finish), polymerize each one in turn. 1. 2. 3. 4.
This is how they work with expensive stickers and material from Aliexpress. But if the decor doesn’t stick well, after fixing it, you should coat it with a thin layer of base, dry it, and only then apply the top coat. For the same purpose, a primer is used as an intermediate. Take very little liquid and barely touch the nail with a brush moistened with it. Otherwise, the decor may get wet.
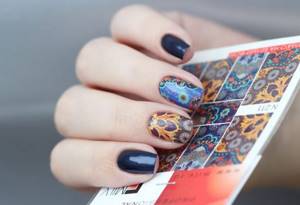
Varieties
There are several types of decorative elements:
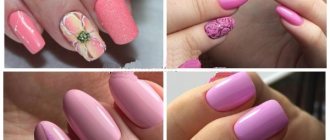
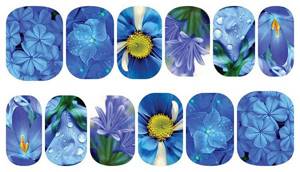
- For the entire nail . Cover the surface completely. It is allowed to use varnishes of any shades. They have the longest service life.
- On a transparent basis . Looks impressive. But this option is not suitable for bright varnish coatings. It is used only on white and light varnishes. But when using them, it is possible to create a design of any theme. Thanks to this, the manicure catches the eye.
- With a dense pattern . When using such products, the nail plate needs careful preparation. Combination with other decorative elements is allowed.
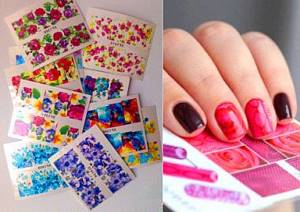
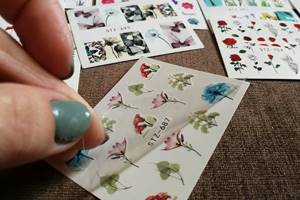
What are water stickers
Film materials with a smooth texture, patterns, images, designs - water-based nail stickers, which are also called transfers. The main advantage of the products is that using water-based stickers increases the durability and stability of the manicure. The beautiful appearance of marigolds lasts for about a week.
How to properly apply transfer stickers to your nails:
- Water-based stickers are used to decorate simple varnish, gel, and acrylic.
- Products are cut according to contour, shape and size.
- To use water-based nail stickers correctly, you need to immerse them in water for a few seconds, separate the transfer part from the paper backing using tweezers, fix them on the plates, level them and secure them.
How to transfer water materials:
- ordinary varnish - they don’t let it dry completely, they start gluing a sticker;
- gel polish or shellac - transfer the design to a sticky base layer after drying under a UV lamp for 60 seconds;
- acrylic - the fragment is fixed immediately so that the water film does not dissolve.
Using water stickers is quite simple, the stickers last a long time and do not peel off, but in water the stickers soften quickly - you should not soak them for more than ten seconds.

Water-based stickers can be used to cover the entire surface of the nail
On a transparent basis
When choosing stickers on a transparent basis, you need to keep in mind that their use is limited. Fragments are not suitable for application on bright regular varnish - they look impressive on a light or white background. But decorative films are beneficial to use for artistic applications and original compositions; the transparent backing makes the manicure noticeable. How to apply clear backed stickers:
- Remove the protective backing and clearly place the fragments.
- Flatten the pattern with a stick, removing air bubbles.
- Secure the nail decor with a light layer of clear varnish.
- There is no need to additionally apply moldings, rhinestones, bouillons, or glitter to the nail. The manicure turns out bright and expressive.
A sticker on a transparent base harmonizes perfectly with a French manicure.
Is it possible to make stickers yourself?
It is not at all necessary to purchase stickers intended for manicure. You can make them yourself. The only drawback is the simplicity of the image.
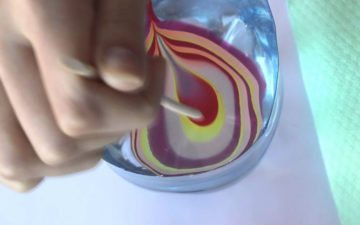
Using water and varnishes of several colors, you can create an original 3D design.
To do this, you need to drop a few drops of each varnish into water, then immerse the nail in the resulting composition, after removing the excess varnish, remove it with a cotton swab.
Wave stencils deserve special attention. They are cut out of paper with serrated scissors and coated with mother-of-pearl varnish.
The plate is covered with a base layer, then a self-made sticker is fixed on it. It is covered with a fixative on top, otherwise it will last for a short time.
Instructions for applying photo design
So, you have already covered the work area with the base color and selected a pattern for the gel polish. You can start creating a photo design. The instructions contain the following points:
- Cut the element to the desired size and separate it from the base.
- Apply the design with the sticky edge to your nail. To better bond the picture and the nail, try applying a little gel polish to the adhesive edge, then apply it to the nail.
- Photo design also requires drying in a UV lamp.
- Fold the excess edges of the design under the nail and file it off with a manicure file.
- Apply top coat, dry it, remove the sticky layer if necessary.
- If the stickers are of high quality, have a good adhesive composition and you did everything correctly, then the manicure will last for a long time.
Advantages and disadvantages
Water stickers have a number of advantages:

- the film does not harm the nail plate;
- you can change the design often;
- the products do not stretch, so they are convenient to use;
- do not stick to fingertips, which cannot be said about adhesive-based sliders;
- manicure takes little time;
- upon contact with liquid, the shape does not change, thanks to this it is possible to perfectly calculate the size;
- gluing onto gel polish is allowed;
- performing a manicure does not require special skills and effort;
- wide range, many variations of thematic products;
- affordable price;
- duration of wear: the result lasts about two weeks, while the shade does not change, chips, cracks do not appear;
- can be removed using regular nail polish remover.
There are only a few disadvantages:
- if you do not apply a fixative on top, the sticker will quickly peel off;
- difficulties when cutting elements to fit the plate (during these actions, snags are formed);
- When adjusting an image, there is a risk that the workpiece will be damaged, so you need to cut out the elements very carefully.
How to use nail transfer stickers
There are two ways to use transfer stickers for nails, the first is as follows:
- The selected shade of gel polish is applied to the base and dried.
- Next, use a special glue, which is applied in a thin layer and evenly.
- Then you need to wait a few seconds for it to become transparent.
- The wrong side of the sticker is pressed against the nail and smoothed.
- Then it is sharply removed from the surface, and the design is imprinted on the gel polish.
- All that remains is to coat the nails with the finish and dry for the required time.
The second method is similar to the first; almost all actions are repeated. But it is not the glue that acts as a fixative, but the sticky layer of the base. It is applied to polymerized gel polish, dried, but the surface is not wiped with a cleaner. Thanks to the sticky layer, the decal is clearly imprinted on the nail. It is secured on top with a finishing agent.
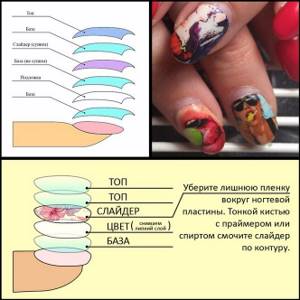
Main stage
The key point in designing with stickers is the high-quality transfer of the slide from the substrate to the plate. How to apply stickers on gel polish? How to glue the blanks so that they do not bulge, crumple, or stick their free edges together?
A leisurely, systematic implementation of the following sequential steps will be sufficient.
- Step 1: preparing stickers for work. If they are water based, you need to dip them in a saucer of water. If the slides are made on an adhesive basis, you need to cut out pieces of the photo design that best fit the shape of your nails using nail scissors.
- Step 2: successively transfer the stickers from the blank to the nail. The important point here is to separate the adhesive part from the base as delicately as possible, so that the sticker does not bend, its ends stick together, or become crowded. In this case, it would be more correct to use thin tweezers to maintain the adhesive part of the slide.
- Step 3: Selecting the correct location on the plate. If the sticker is partial, then the correct placement of the artistic element in an aesthetically correct part of the nail plays an important role, especially if the nails are long. Often girls choose the corner root zone or the corner area along the cut line. If the sticker is solid, it is necessary to apply it continuously over the entire surface of the plate.
- Step 4: smoothing out the smallest lumps of film. The thinnest texture of the sticker tends to shrink, curl and bend when pressure is applied to it. Therefore, here you need to be extremely careful and not overdo it with pressure on its surface. If, nevertheless, the sticker has moved off the nail and is too wrinkled, it is better not to regret it and use a new sample. The skill of clearly drawing slides also comes with some experience.
- Step 5: Dry the wet surface of the sticker. This mostly applies to water-based slides. How to apply water-based stickers to gel polish? You need to achieve perfect straightening of the sticker on the surface of the nail, and then dry it with a dry cotton pad or swab.
Benefits of nail stickers
Those who admire manicures with nail stickers explain their positive attitude to the following facts:
- They are simple and convenient to use. In any case, a manicure can be done much faster than painting with varnish using a brush.
- If you have questions, video lessons are available to watch on the Internet at any time. Masters are not shy about posting videos of their work to give others a source of inspiration.
- Low cost makes it possible to frequently change the manicure design. Of course, the price largely depends on the type of product, but in general the cost can be called cheap.
- The manicure itself will no longer be monotonous and boring.
- A huge range of designs and textures allows every woman to find an option according to her personal preferences.
- This material does not need to dry. This means that a manicure using it is done many times faster than creating patterns using varnishes.
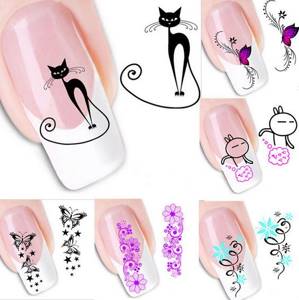
Types of stickers
The choice of nail stickers is so large that it is impossible to fit them into a small section of the article. Let's look at the main types that are popular:
- Transparent film with a pattern. Represents patterns, ornaments or designs with high pigmentation. They are translucent, and therefore are always applied to a colored base. Typically in a contrasting color.
- Continuous film (photo printing). Features a high density pattern. These stickers are designed to cover the entire nail plate. Usually they are used to accentuate a manicure and are glued to 1-2 nails. For greater clarity and brightness of the design, experienced craftsmen advise choosing a white varnish or base as a base.
- Applications and stickers with a given shape. Sliders can be small patterns, stripes, lace. Some of them are designed for a specific manicure: French, moonlit, etc. With others, you can “play around” and place it in the corner of the nail, at the base, in the center, or try a combination of several applications.
- Volume sliders. They are distinguished by their pronounced relief. Such stickers are difficult to distinguish from artistic paintings if they are applied correctly. To ensure that the designs remain voluminous, almost the entire top is removed from the relief with a brush.
Some stickers require soaking in hot water (about 50 degrees). They begin to stretch, which makes them fit better to the nail plate and do not form folds.
Peculiarities
There’s probably no need to explain what an ordinary sticker is. Since childhood, we have all been familiar with the features of this kind of application, which has different directions in its intended purpose. A sticker is a piece of paper (sizes vary) coated with a sticky layer on one side and decorated with a decorative image, illustration, design or photographic print on the other. The idea is that stickers are glued to various surfaces for the purpose of decoration, aesthetic transformation, or hiding any defects on these surfaces. Stickers can be of various formats, quality, density, and purpose. They differ from each other in appearance, fragments of artistic aesthetics depicted on them, and scope of application.
Recently, developers of nail decoration elements have proposed the use of all kinds of sliders as designs for nails. Stickers for gel polish have spread the scope of their application and are loved by many representatives of the fair half of humanity so quickly that almost every modern fashionista has already become familiar with their amazing features and aesthetic superiority. According to nail technicians and amateur girls, using this kind of decoration has a lot of significant advantages and an almost complete absence of disadvantages. But first things first.
Why sliders can peel or peel quickly
Some women note that the glued fragments do not last long, and the manicure loses its attractiveness after a couple of days. This mainly happens when design techniques are not followed. The features and nuances of attaching stickers lie in the combination of the base with the surface of the material. Water-based stickers are suitable for any base, photo designs are best attached under shellac, fragments with a transparent base fit well on gel polish, three-dimensional designs last a long time after drying with a UV lamp.
Stickers can be attached to all nails or used to decorate several nail plates.
Why do stickers quickly “fly off” and peel off:
- getting a foreign fragment or air bubbles under the sticker;
- non-compliance with the rules of gluing and fixing;
- use of low-quality material;
- Insufficient sealing of nails.
To avoid unpleasant “blunders” when performing a manicure, you need to adhere to a sense of proportion. Creative ladies can implement creative nail design ideas, experiment with color and texture. A few independent projects will help you quickly master the technique of applying stickers.
How long do stickers last?
How long the sticker will last depends on the correct execution of all stages of the manicure, the quality of the materials, and also on how correctly the woman handles the applied coating (primarily this applies to household work during which water and chemicals are used).
If the sticker does not last long, this may be because it was applied to a poorly dried layer of gel polish, or the design itself was poorly dried before being applied to the nail. Another reason could be that the sticker was of poor quality or too thick.
If the topcoat chips, this means that it was applied to a poorly dried sticker, when applying the design there was no room left for the top to adhere to the gel polish, or the sealing of the nails was done poorly. The topcoat may come off prematurely if a low-quality topcoat was applied or one that is not suitable for a design with stickers. Therefore, before purchasing, you need to clarify this point in the instructions.
Preparatory stage
Any work with nails involves the implementation of a list of manipulations with the hands, which are aimed at cleansing them of dirt and keratinized areas of the skin that can interfere with the quality of the work, and are also aimed at eliminating all kinds of obstacles in the form of remnants of the old design, gel detachments, and so on. How to apply stickers on gel polish? By performing step by step step by step and being extremely attentive and careful, you can achieve a decent result without making any supernatural efforts in the process of performing manicure work.
So, what actions mark the preparatory stage?
- Step 1: eliminating the remnants of the previous manicure, removing the varnish using a liquid that does not contain acetone with a strong odor.
- Step 2: taking a hand bath to soften cuticle growths and gently cleanse the nails of excess skin.
- Step 3: disinfect hands and nails with an antiseptic.
- Step 4: preliminary disinfection of working tools.
- Step 5: carrying out the cuticle removal procedure to prepare the nail for applying gel polish, and then slides.
- Step 6: shaping the nails and removing the top shiny layer using a buff; if the nails are not natural, but have already been strengthened with gel, then it is necessary to adjust their thickness with a file of a more severe abrasiveness.
- Step 7: after applying a primer that ensures good adhesion of the gel polish to the surface of the natural nail (optional), you need to apply a top coat to the nails, taking into account that the background color of the sticker should not “compromise” with it.
Having finished with the preparation process, you can quickly move on to the actual design of the marigolds using slides.
Advantages
Despite the huge competition, water stickers for gel polish successfully hold a leading position among all possible manicure options. And this is not surprising, because compared to other design solutions, you can apply water-based stickers under gel polish without using special equipment and even without experience or training. In addition, the use of this method has a number of other advantages;
- The ability to complement the existing design - due to the fact that the gel polish is applied before the moment when it is necessary to apply water-based stickers, a woman can choose the most optimal one and stick the option she likes.
- An easy technique to implement – absolutely anyone can stick this decoration on, which is why it is widely used. This also eliminates the possibility of transferring consumables, which significantly reduces material costs.
- Durability – properly selected gel polish allows you to reliably glue any material, so that your nails are in well-groomed condition for the longest possible time.