Not every girl has the artistic talent to create designs on her nails, and not everyone can afford regular visits to the salon.
Commercially available nail stickers can easily solve this problem. They are easy to apply and simply remove, while the manicure remains neat and attractive. And a huge number of options is a great opportunity to realize the most original idea.
Types of nail stickers
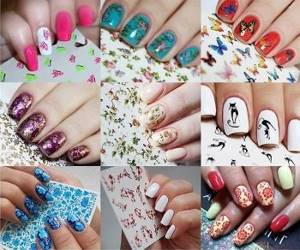
The modern nail art industry offers fashionistas and professional nail artists a wide selection of products for artistic manicure decoration. Nail stickers hold differently, differ in shape, size, application or manicure design. The image styles, colors and ease of application of art materials are amazing. Types of stickers:
- Water-based products - stick after contact with water.
- Self-adhesive materials - fixed with shellac, gel, varnish on a sticky layer.
- Materials for photo design – miniature films of photographic precision.
- Foil products - with their use, the beauty of the manicure is guaranteed.
- Volumetric 3D materials for accent design with a three-dimensional effect.
For decoration, stickers of different colors are used depending on the mood, character, and event. They glue silicone stickers, film stickers, sliders, patterns that imitate French manicure or delicate lace.
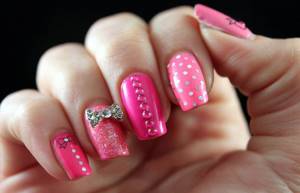
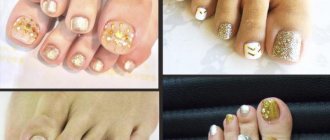
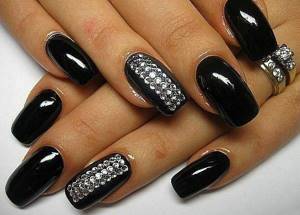
Combined nail design with rhinestones, sparkles, voluminous decorations and stickers
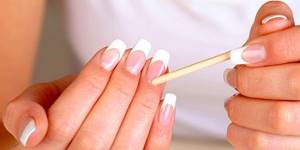
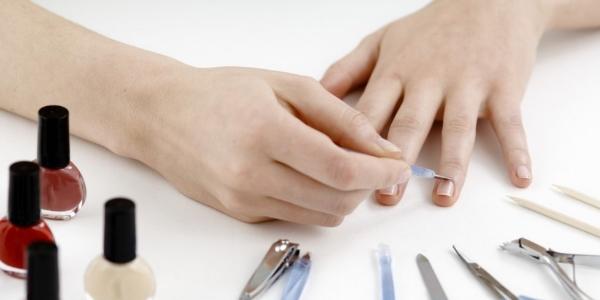
Nail preparation
The initial stage of any manicure design technique is preparation - filing, cuticle processing, hygiene procedures. To make sliders and stickers on your nails last longer, you need to carefully prepare them. It is recommended to use professional manicure kits. Pre-treatment will keep your hands looking well-groomed and help firmly fix the design. How to prepare marigolds at home:
- Remove the old varnish coating using a liquid without acetone, file the edges, and give them the required shape.
- Make a bath with salt or soap foam with a small addition of essential oil, then apply a nourishing cream to soften the cuticle.
- Wash your hands well and disinfect the surface of the nail plates with an antiseptic.
- Remove the cuticle and side skin using nail scissors or a gentle chemical composition with fruit acids.
- Polish your nails with a buff – using a special nail file will ensure better fixation of the base and art design.
- If the nails are extended with acrylic, you need to treat the surface with a pusher, brush off the dust, degrease and treat with an antiseptic.
- Apply a base - a base layer for shellac, gel polish or regular polish. The background should not “dispute” with the color of the pasted fragment.
After preparation (the procedure is performed before applying any stickers), you can begin coating with nail art materials. It’s not difficult to do a manicure yourself, but you should follow the recommendations of the experts on gluing stickers. The manicure must be covered with a transparent fixing layer to secure it from the base to the edges of the nail.
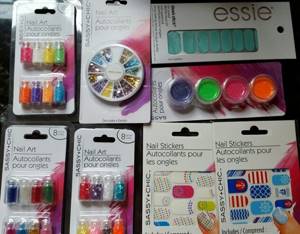
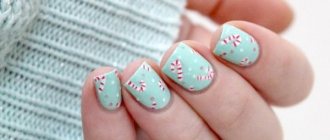
Variety of decorations used in nail art
How to prepare your nails for stickers?
The final result depends on how neat your nails are. Therefore, first remove the cuticle, clean, adjust the shape, use a degreaser.
Cuticle removal
If the cuticle grows, it slows down the growth of the nail, causing the formation of burrs and grooves.
Proper treatment of the cuticle makes hands well-groomed.
It consists of moisturizing living cells and removing dead ones. It is not necessary to do a traumatic manicure, there are more gentle ways.
For example, before removing cuticles, take a 15-minute hand bath with sea salt and 1-2 drops of essential oil. Suitable:
- tea tree - heals skin
- grapefruit - strengthens nails
- lemon - whitens
- almonds – strengthens, moisturizes
After the bath, rinse and dry your hands. Treat the cuticle with a cuticle softener. Using a pusher, push away the “living” skin. Remove keratinized areas using any special tool:
- trimmer - its working surface resembles the letter V
- cuticle files - with safe plastic ends
- cuticle pencil - with nourishing oil inside
Surface degreasing
Applying a base or sticking stickers directly on your nails depends on which sliders you use. Small stickers are attached to the varnish. But for films that cover the entire surface of the nail, varnish is not needed.
In any case, for the sticker to stick well, it must be attached to a dry, grease-free surface.
.
Suitable for these purposes:
- A dehydrator is a product for cleansing the nail plate and removing excess moisture.
- Cleanser is a product for removing the sticky layer on a top coat.
- Nail polish remover or alcohol - for degreasing unpainted nails.
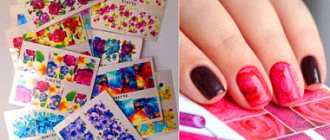
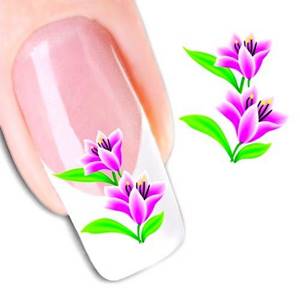
What are water stickers
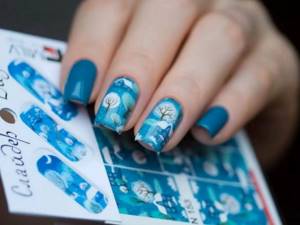
Film materials with a smooth texture, patterns, images, designs - water-based nail stickers, which are also called transfers. The main advantage of the products is that using water-based stickers increases the durability and stability of the manicure. The beautiful appearance of marigolds lasts for about a week.
How to properly apply transfer stickers to your nails:
- Water-based stickers are used to decorate simple varnish, gel, and acrylic.
- Products are cut according to contour, shape and size.
- To use water-based nail stickers correctly, you need to immerse them in water for a few seconds, separate the transfer part from the paper backing using tweezers, fix them on the plates, level them and secure them.
How to transfer water materials:
- ordinary varnish - they don’t let it dry completely, they start gluing a sticker;
- gel polish or shellac - transfer the design to a sticky base layer after drying under a UV lamp for 60 seconds;
- acrylic - the fragment is fixed immediately so that the water film does not dissolve.
Using water stickers is quite simple, the stickers last a long time and do not peel off, but in water the stickers soften quickly - you should not soak them for more than ten seconds.
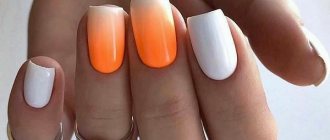
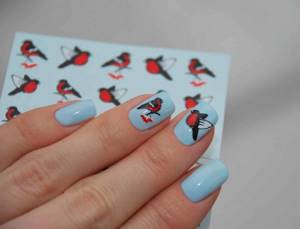
Water-based stickers can be used to cover the entire surface of the nail
On a transparent basis
When choosing stickers on a transparent basis, you need to keep in mind that their use is limited. Fragments are not suitable for application on bright regular varnish - they look impressive on a light or white background. But decorative films are beneficial to use for artistic applications and original compositions; the transparent backing makes the manicure noticeable. How to apply clear backed stickers:
- Remove the protective backing and clearly place the fragments.
- Flatten the pattern with a stick, removing air bubbles.
- Secure the nail decor with a light layer of clear varnish.
- There is no need to additionally apply moldings, rhinestones, bouillons, or glitter to the nail. The manicure turns out bright and expressive.
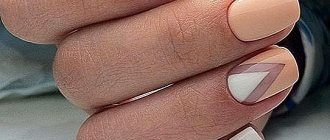
A sticker on a transparent base harmonizes perfectly with a French manicure.
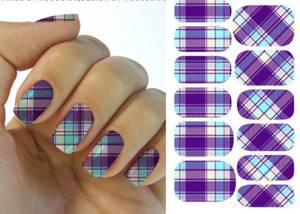
What is thermal film for nails
Manicure with thermal film
This product first appeared in the United States as a replacement for hand-painted nails. Initially, it was less durable and was used as a disposable manicure material. With the development of new technologies in the nail industry, thermal film has changed and become much stronger. Now it holds firm on natural and extended nails .
Currently, film is produced by a wide range of manufacturers, and the most popular are Omnia, NCLA and Minx. Thermal films of the latter have gained such popularity that their name has become a household name. The principle of minx manicure is that the thermal film becomes elastic under the influence of hot air, easily lies on the nail, freely repeating its shape.
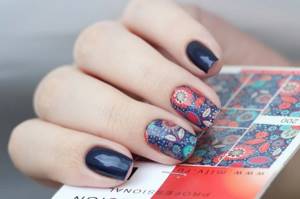
How to glue sliders on nails
Among the range of nail art materials, sliders occupy a separate category. They come with a dense pattern, a transparent base, and cover the entire nail. Such stickers can be glued to regular varnish, shellac and acrylic extensions. How stickers are applied to nails:
- Gel polish (shellac). Before performing a slider design, the cuticle is processed, the glossy layer is removed with a nail file, the nails are trimmed, degreased and disinfected. Apply the base and dry under a UV lamp for about a minute. The sliders are freed from the backing, fixed on the nails, covered with a transparent finishing layer and dried again under the lamp.
- Regular varnish. After preparing the manicure, the varnish is applied in two layers to obtain a good visual effect. Before applying the sticker, the slider is separated from the paper or cardboard backing and the adhesive side is placed against the nail plate. Use a cotton swab to expel air bubbles, and apply a thin layer of fixative on top of the slider.
- Acrylic (extension). After performing a manicure and modeling the shape of the nails, you need to go over the surface of the plates with a pusher and brush off the dust. The next step is to accurately apply the design from the slider; you cannot move it along the acrylic coating. To securely fasten the slider, use a topcoat or clear varnish.
To prevent sliders from peeling or falling off, you need to align the fragments well, use high-quality material, and follow technology. The drawings will be “in their place” if, when transferring the sliders, you retreat 1.5 mm from the cuticle and the edge of the nail.
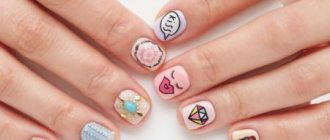
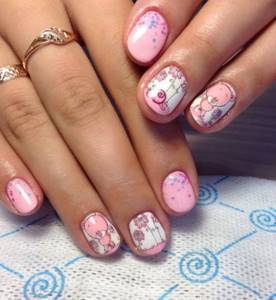
Photo design
An interesting option for manicure is photo design. The material is art stickers in the form of a thin film with a rough texture. The adhesive on the back of the sticker helps you apply stickers to your nails.
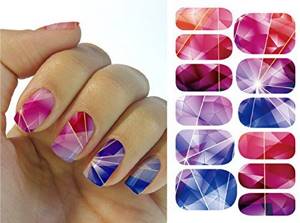
Photo printing allows you to create a unique design with a volume effect
The difference from the slider design is clearer and higher quality images on film. Art stickers are used for a complete manicure, as they provide complete coverage of the nail plates. How to glue stickers:
- Cut out pieces of stickers according to the shape of your nails.
- Apply a base layer - simple varnish, gel, acrylic.
- Release the sticker from the paper backing with tweezers.
- Carefully transfer the photo fragment to the entire nail.
To ensure that the coating adheres well and tightly, you can make small cuts along the edges of the sticker.
The manicure is smoothed with a wooden stick and fixed by applying top coat, gel or varnish. The part of the sticker that protrudes beyond the nail is folded over the edge of the plate and filed off - the file should not be held at an angle, but perpendicular to the edge. Photo design has impeccable image quality, but lasts on average three days.
Where to buy nail stickers?
Where to buy nail stickers?
Currently, manufacturers offer various designs and colors of nail applications. A large selection of stickers is presented on Aliexpress.
If you are wondering where to buy nail stickers, then take a look at what the largest market on the Internet has to offer. The selection process will give you true pleasure, and the prices will pleasantly surprise you.
Nail designs with stickers do not damage the nail plate and add sophistication and attractiveness to the look. Choose stickers and applications and change your look every day!
Self-adhesive designs
Using pictures made from self-adhesive material is the easiest way to create a designer manicure. It is convenient to apply the sticker to your nails thanks to the special layer with which the material is treated. Drawings can be made in the form of floral motifs, geometric shapes, ornate patterns, or in the form of lace. Application technique:
- Standard manicure preparation.
- “Adjusting” the design to the shape of the nail.
- Removing the backing from the sticker.
- Placing a fragment on a manicure.
- Smoothing the picture with a stick.
- Filing nails and applying varnish.
The adhesive texture of the material allows you to re-glue the fragment several times if its position is unsatisfactory or if there are air bubbles under the film. Self-adhesive designs can be made in the form of decorative tape or individual stickers. You can choose a classic or extravagant option.
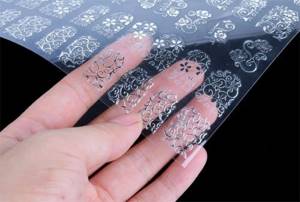
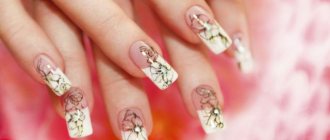
Lace is a thin and delicate decoration for nails
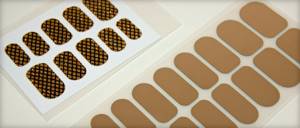
Foil products
Metallized fragments are a new feature in nail art. For production, foil is used, the matte part of which is coated with an adhesive composition. Metallized material options: solid foil and holographic nail stickers, patterned, lace, mirror elements, fragments of gold, silver, embossed, crinkled, sheet, striped foil.
How to apply foil stickers:
- Carry out hygienic treatment, give nails shape.
- Polish with a buff for better adhesion.
- If the foil has patterns and designs, apply a base coat of varnish.
- Activate the adhesive by heating it under a lamp, not in water.
- Glue the matte side of the foil onto your nails, from the cuticle to the edge.
Before applying the decor, the foil is precisely cut to the shape of the nail. Do not allow debris or air bubbles to get under the film. The metallized surface is carefully leveled, slightly pulling the material towards the edge. The decor is suitable for a base made of regular varnish or shellac. It is allowed to decorate the entire nail with foil without additional coating, but after preliminary polishing.
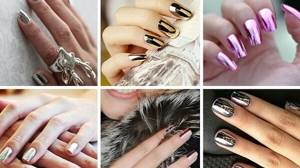
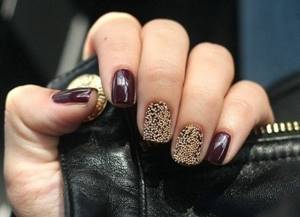
Metallic nail stickers are the most popular design
How to glue mirrors: gold and silver
Mirror stickers in technology do not have any special stages; everything is done according to a standard scenario with heating under a lamp. There are some subtleties when transferring it to the nail - here you need to make sure that the coating is as smooth as possible, and the first time, since any bend, speck under the film or unevenness will look very unsightly on a bright golden or silver surface.
Special attention should be paid to the very beginning of gluing - the plate must be placed at the cuticle, pressed with a finger, and glued to the end of the nail, as if pulling a little, in order to obtain a bubble-free surface.
Video: DIY metallic nail art
Mirror gold stickers on nails have their own nuances when transferring, and in order to avoid basic mistakes and get the best result, we recommend watching this video. Also in it you will find the answer to the question about the complexity of creating such a design and its durability.
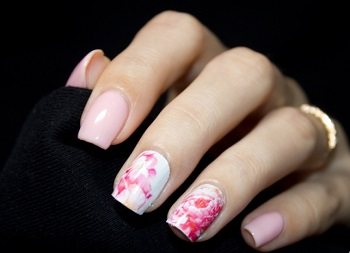
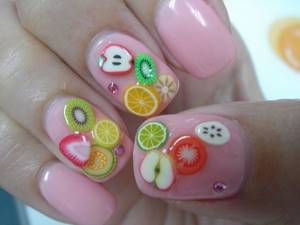
3D stickers
Volumetric decor always looks impressive on nails, but an important condition for the three-dimensional nail art technique is the balance of decorations. The design must be done in moderation, appropriate for the occasion (holiday, special event).
One or two fingers in the form of 3D fragments are decorated with a three-dimensional image. Small decorations (beads, bouillons, sparkles) can occupy the entire surface of the nail.
How to glue 3D stickers:
- The illusion of volume is created by the arrangement of the drawing or pattern.
- Prepare your nails for decoration by applying a base coat of polish.
- Peel stickers with a three-dimensional pattern from the backing.
- Apply to your nails with tweezers and carefully align.
The use of beads, sand, beads are not 3D stickers, but elements of three-dimensional decor. They are used to create artistic accents. Gluing 3D stickers onto your nails adds volume to your manicure due to the visual perception of the designs.
Another option for 3D manicure is using fimo
Shellac stickers
Natural resin lasts on nails for several weeks. The base is ideal for applying stickers. It is recommended to use nail stickers made with photo designs. The film has a denser structure than water fragments and occupies the entire surface of the nail. How to apply stickers on nails under gel polish:
- After preparing the nails, apply the base.
- The layer is dried under the lamp for 1 minute.
- Apply a colored background contrasting with the sticker.
- The sticker must be attached to a sticky base.
- The sticker is separated from the paper backing.
- Fix the film on the nail plate.
- Carefully smooth the sticker with a stick.
- The free edge of the sticker is folded under the nail.
- Processed with a 100/120 grit file.
- The top-fixer is applied in a dense layer.
- Dry the manicure under the lamp for up to 2 minutes.
It is important to properly seal the photo design so that the stickers do not peel off or peel off when in contact with water. You can use water-based and transfer stickers adhesive under shellac as decorative fragments. The application technology remains the same, but before fixing the film, the material is “heated” with water.
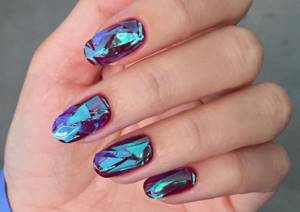
A type of nail art with foil stickers - “broken glass” design
Advantages and disadvantages
Slider design
pros:
- ease of transferring the image onto the nail plate;
- getting an interesting manicure;
- When applied to gel, this manicure lasts a very long time;
- low cost of decorative elements;
- wide range of images.
Minuses:
- when applied to varnish, the picture quickly begins to peel off;
- the difficulty of cutting an element to the size of the nail due to the formation of snags;
- When adjusting the image to the size of the nail plate, you can ruin the workpiece.
3D stickers
pros:
- ease of use
for nail design; - the ability to combine this element with others;
- the convenience of wearing such a manicure at home;
- cheap materials;
- wide variety of sticker types;
- getting an interesting rich design.
Minuses:
- To remove the sticker, you will need to make some effort, since nail polish remover only removes the design, but a film remains that needs to be scraped off.
How to glue stickers on gel polish
Making a slider design on gel polish is practically no different from gluing decorative stickers on shellac. Manicure requires a UV lamp to dry the applied layers of products. Gel polish is used by women with thin, fragile and brittle nails; it contains more gel in concentration, while shellac has more varnish. How to glue sliders:
- Prepare and apply the gel polish base.
- Dry under a UV lamp.
- After drying, apply the background.
- Lightly dry the acrylic.
- Glue the slider onto the sticky layer.
- Treat with a finishing layer of gel.
- Finally dry under a lamp.
Before fixing the nails, you can modestly decorate them with rhinestones, broths, and add dot painting with acrylic paints. If the sticker is applied to the entire plate, a colored background is not used, but is worked in the sequence: base, sticky acrylic layer, slider, fixer (finish coating).
Small bouillons are used instead of 3D stickers
Step-by-step instruction
Despite the simplicity of the procedure, it is important to follow the step-by-step instructions for its implementation, since poor quality work can lead to premature separation of the stickers from the surface.
Preparatory stage
Any manicure always begins with proper treatment of the nail plate, preparing it for applying a decorative coating. It is especially important to prepare before applying decals, as applying them to an uneven surface can cause premature deterioration of the quality of the decals.
Preparation takes up to half an hour:
- Use a file to adjust the shape of the free edge.
- Apply remover to the cuticle area (at home you can replace it with hydrogen peroxide).
- Using an orange stick or a metal pusher, push away the keratinized epidermis and lift it.
- Cut the cuticle with cuticle cutters.
- Use a buff to polish the surface.
- Remove excess sawdust from the coating.
- Apply a dehydrator to degrease it.
This concludes the main part of the preparation, and after cleaning the workplace, the girl can begin applying gel or other decorative coating.
Main stage
First you need to apply a base layer, dry it in a lamp, and then a main layer of colored gel polish, which will serve as a substrate for the stickers.
If you plan to stick the slider over the entire surface of the plate without leaving noticeable areas of decorative coating, the base layer should be made white or flesh-pink so that it does not interrupt the sticker pattern.
After drying one or two layers of colored pigment, you can attach the decor by first removing the sticky layer from the gel; the method of fixing it depends on its type:
- When using the self-adhesive option, simply remove the paper from the base of the fragment, carefully securing it to the plate;
- Water-based stickers must first be wetted using a dry, damp cloth. After 30 seconds they can be used;
- To fix the thermal decor, you will have to use a hot stream of air from a hairdryer. Be careful not to burn your fingers while heating the piece.
Be careful when securing pieces for decoration, as you will only have one chance to secure them absolutely straight.
To make it easier to work with elements, you can use tweezers to carefully pick up decorative elements and transfer them to the plate. This will reduce the risk of accidentally damaging them with your fingers or nails.
Final stage
After finally attaching the decal to the gel, give it 20-30 seconds for the adhesive to cure and then use a topcoat to seal the work to prevent the design from coming off prematurely.
Keep in mind that when applying the last layer, be sure to seal the end of the nail, preventing damage to the decorative coating and its gradual chipping.
If the thickness of the finished nail is not too large, you can make two final layers - first apply the base, dry it in a lamp for one and a half minutes, and then fix everything with a top coat. This will increase the adhesion of the decor to the gel polish, which will increase the long-term preservation of the work in its original condition to a month or more.
Some tips
Recommendations from masters and experienced nail design authors will help women create a beautiful manicure with stickers. Water-based and adhesive films adhere to the substrate in different ways. Some useful tips on how to properly apply nail art decorations:
- The base is varnish - complete drying is not required.
- Pure gel, shellac - fix the sticker on a sticky base.
- Acrylic – the sticker must be applied accurately the first time.
- Nail materials are spaced with an indentation of 1.5 mm.
- The material should not extend beyond the nail or touch the skin.
- If the sticker extends beyond the edge, it is folded over and sealed.
- On shellac it is better to glue thick stickers all over the nail.
Broths, beads, and rhinestones are used on nails to create voluminous accents. Sometimes such elements are unnecessary in the design, because stickers and sliders are quite impressive on their own.
Why sliders can peel or peel quickly
Some women note that the glued fragments do not last long, and the manicure loses its attractiveness after a couple of days. This mainly happens when design techniques are not followed. The features and nuances of attaching stickers lie in the combination of the base with the surface of the material. Water-based stickers are suitable for any base, photo designs are best attached under shellac, fragments with a transparent base fit well on gel polish, three-dimensional designs last a long time after drying with a UV lamp.
Stickers can be attached to all nails or used to decorate several nail plates.
Why do stickers quickly “fly off” and peel off:
- getting a foreign fragment or air bubbles under the sticker;
- non-compliance with the rules of gluing and fixing;
- use of low-quality material;
- Insufficient sealing of nails.
To avoid unpleasant “blunders” when performing a manicure, you need to adhere to a sense of proportion. Creative ladies can implement creative nail design ideas, experiment with color and texture. A few independent projects will help you quickly master the technique of applying stickers.