All girls want to stand out and attract the attention of others, which is why they pay such close attention to beauty issues. This includes facial, body, hair care and, of course, a flawless manicure, which is not complete without a color coating!
From the article “What is gel polish?” We have already learned how many advantages this material has! No wonder he was loved by millions of girls all over the world. But what if a girl doesn’t want to spend money and go to a beauty salon or a manicurist? How to apply color coating at home? What will you need for this?
Before applying gel polish, it is necessary to carry out preparatory procedures: do a manicure and properly prepare the nail plate for coating. And after applying a colored coating, you can complement it with a simple design and carry out care procedures that will help preserve the beauty and youth of your hand skin.
Conventionally, the entire procedure can be divided into the following stages:
- manicure;
- preparing the nail plate for coating;
- coating of the nail plate;
- design;
- hand skin care.
We will analyze the materials and tools needed for each stage, and the technology for applying gel polish at home.
Stage 1. Manicure before gel polish
Before applying gel polish, you need to get your nails in order. Treat the cuticles and give your nails a beautiful shape. At this stage we will need:
- orange stick;
- pusher;
- cuticle remover;
- scissors, tweezers or nippers for removing cuticles;
- file for natural nails.
Orange sticks medium 17.8 cm IRISK 90-100 pcs
Manicure pusher P-06 small spatula/hatchet length 132 mm Nippon Nippers
Cuticle Eliminator Be Natural 59 ml
Cuticle scissors matte S-03 length 90 mm Nippon Nippers
Disposable files 220/280 11.5 cm (03 Lemon) IRISK 10pcs/pack
Today there are 3 main types of manicure:
- hardware;
- combined;
- classical.
Hardware and combined manicures are done using a special device. Before using it, it is better to undergo training, since if used incorrectly, you can damage the nail plate.
It is better to do a classic manicure at home.
What do we do at this stage?
- Using a file, give the free edge the desired shape.
- Apply cuticle remover to the cuticle and side ridges.
- Place your hand in a bath of warm water for 3-4 minutes. We wipe our fingers and start manicure.
- Use a pusher to push back the cuticle.
- We remove the cuticle with scissors (tweezers, nippers).
- With an orange stick dipped in water, we go along the contour of the nail and clean the pterygium.

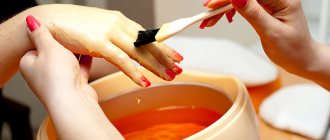
Stage 2. Preparing the nail plate for coating
Next, you need to prepare your nails for a manicure with gel polish. This stage is very important, since it determines how well the adhesion of the natural nail and the artificial coating will occur. To carry out proper preparation, we will need the following materials:
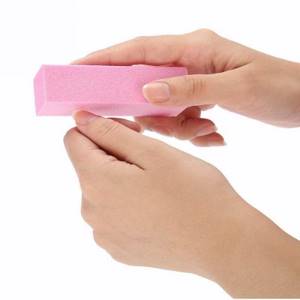
- buff;
- brush or brush for removing dust;
- lint-free wipes;
- 2 in 1 liquid: degreaser and sticky layer remover - this product removes natural deposits (grease and dust) from the surface of the nail plate, thereby preparing the plate for better adhesion to the artificial material;
- dehydrator (nail-prep) - deeply dries the nail plate and removes excess moisture from it. A dehydrator is a must for people with oily skin and prone to excessive sweating, since usually the structure of their nails is damp and oily, which impairs adhesion to artificial turf;
- primer - translated as “primer”. There are acid-free and acidic primers.
The acid-free primer acts as double-sided tape and ensures strong adhesion of the natural nail to the artificial nail.
The acid primer lifts the keratin scales of the nail plate for better adhesion to the artificial material. Since the acid primer contains aggressive components, you must be careful not to get it on the skin and cause a burn. It is recommended to use it before extensions for girls with wet or oily nail texture.
What do we do at this stage?
- We treat the surface of the nail plate with a buff to lift the scales of the nail plate and improve adhesion.
- Remove dust with a special brush.
- Apply degreaser to a lint-free cloth and wipe your nails. If you want to make the process as comfortable as possible, we recommend using liquids without chemical fragrances, such as ParisNail liquids. They have pleasant aromas and 100% rid the nail plates of germs, grease and dirt, thus guaranteeing long-lasting wear of the coating.
- If you have oily skin, then to improve adhesion, apply a dehydrator to the entire surface of the nail and air dry for a minute.
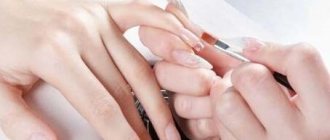
- Then you need to apply primer to the free edge of the nail. The free edge is one of the most vulnerable places, and thanks to the primer, the adhesion between the nail plate and the artificial material improves, which contributes to longer wear of the coating. We also air dry the primer for one minute.
Benefits of long-lasting manicure
Surely many girls will wonder - why do you need to use gel polish at all? And in vain: it has several important advantages over both regular varnish and persistent gel.
Unlike simple varnish, gel polish is extremely stable, does not lose its color and shine until removal, and does not require frequent repainting. This will be a big advantage for girls who don’t like to spend a lot of time on manicure: gel polish can last for almost three weeks! Of course, provided that the nails grow slowly.
And gel polish differs from gel manicure in ease of use, safety, hypoallergenicity and the absence of contraindications. In addition, gel polish does not need to be adjusted, and after it the nails do not require rest: only after removing one manicure, you can immediately replace it with another.

As you can understand, this product has a lot of advantages. It is only important to learn how to use it correctly: not everyone succeeds in applying gel polish evenly and beautifully the first time.
IMPORTANT TO KNOW: Nail design with stones: application technique and recommendations
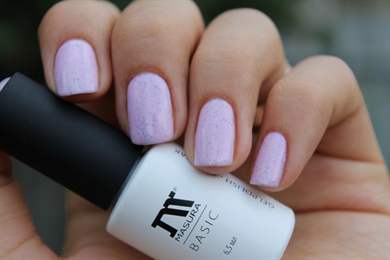
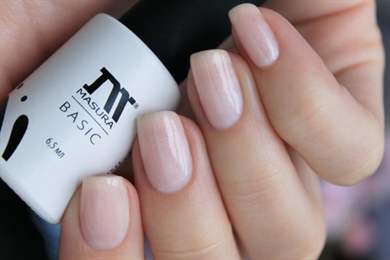
Stage 3. Covering the nail plate
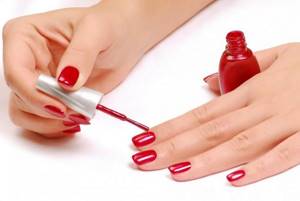
Next we move on to the most anticipated stage - coating.
We will need:
- base coat;
- color coating;
- top coat (with or without a sticky layer);
- lamp for polymerization. For more information on how to choose a lamp, read the article “How to choose a lamp for drying gel polish?”.
Rubber base for gel polish Rubber Diva 15 ml
Gel polish NR-100 Nail Republic 10 ml
Sticky Top by Mystique 15 ml
Top without sticky layer Haruyama 8 ml
Lamp UV/LED Perfect Lamp 2+ 48 W with three pads black ParisNail
If you don't want to make designs and use a top with a sticky layer, then we will also need:
- lint-free wipes;
- 2 in 1 liquid: degreaser and sticky layer remover.
What do we do at this stage?
- Apply a base coat to the surface of the nail. Dry it in a lamp. We do not remove the sticky layer.
- Apply gel polish, if necessary in 2 layers. We dry each layer in a lamp. We do not remove the sticky layer.
- Apply top coat. Dry it in a lamp.
- If you are using a top coat with a sticky layer, then moisten a lint-free napkin with a sticky layer remover and wipe your nails with it.
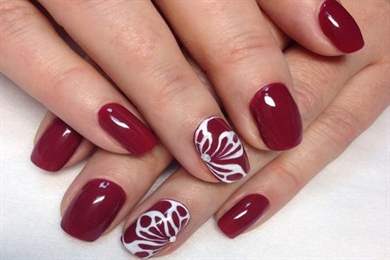
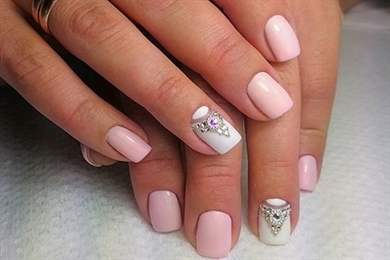
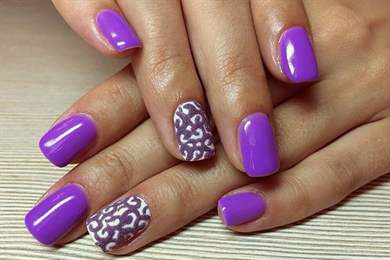
Stage 4. Nail design
Now you can move on to the designs. Since we make the coating at home and are not professionals, it would be logical to use the simplest designs. But don't be discouraged, they are very stylish and impressive!
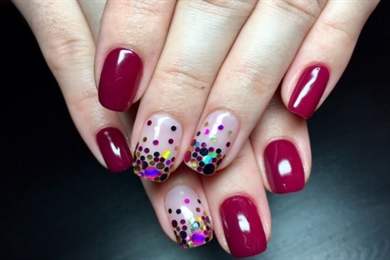
For example:
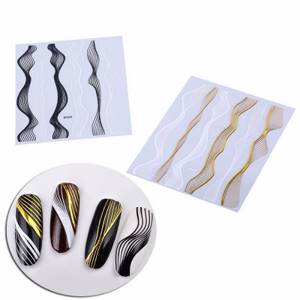
- slider designs;
- stickers;
- foil.
Slider design Ibdi_Nails AIR FOIL 13
Stickers F660 Leaves gold
Foil for casting gold 4 cm*1 m RocheNail
In addition to the designs themselves, we may need a top coat to secure the sliders or glue for the foil.
Top for designs Factor Lianail 10 ml
Glue for foil ARTEX 15 ml
Now let's look at how to make each of the proposed design options.
Slider designs:
- Those nails on which we will attach slider designs do not need to be covered with topcoat;
- Soak the pre-cut slider design in water, dry it on a napkin, then separate the film from the backing;
- Apply the base coat. We do not dry it;
- We plant the design on an undried base coat. In order not to damage the slider design when smoothing it over the nail, you can use a brush or silicone hoof;
- Dry the base coat together with the slider design in a lamp;
- Apply a topcoat to secure the sliders. Dry it in a lamp.
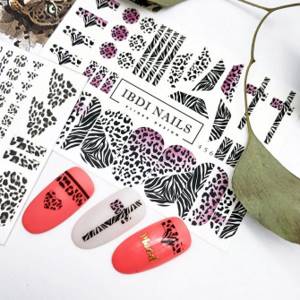
Stickers:
- If they are used, it is necessary to remove the sticky layer from the coating;
- Remove the sticker from the backing, cut it if necessary, and apply it to the nail plate;
- Cover with topcoat and dry in a lamp.
Foil:
- If you decide to use foil as a design, then after applying gel polish you do not need to use a top coat;
- We firmly press the matte side of the foil to the sticky layer of dried gel polish and sharply tear it off. Dry in a lamp;
- We apply the top coat and dry it again in the lamp.
TIP: if the stickiness of the gel polish is not enough and the foil does not print, then you should use a special glue for foil.
It's very easy to use. Remove the sticky layer from the colored coating, apply glue to the surface of the nail and wait until it becomes transparent. This means the glue has dried. Then we print the foil as described above, secure it with topcoat and dry it.

How not to paint?
Gel polish is not an ordinary polish. It does not have a specific odor, which is so irritating to pregnant and nursing mothers. Proper drying is important for a quality manicure. If the initial layer has not dried completely, the second coat will turn out smeared and unsightly.
Another mistake that results in a poor-quality manicure is shaking the bottle. After such manipulations, bubbles appear and are safely transferred to the nail. The result is an uneven coating.
It is also important to properly prepare your nails for the procedure. Beginning craftswomen need to properly moisturize and move the cuticle, as well as polish and degrease the nail well. Otherwise, the coating will peel off within a week. If you do all the steps step by step, a beautiful manicure is guaranteed.
Hand skin care
In order for the skin of your hands to maintain beauty and youth for many years, it is necessary to do skincare procedures. We will need:
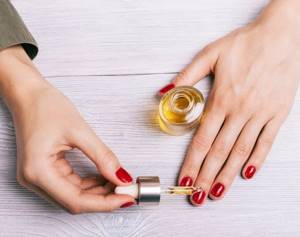
- cuticle oil;
- hand cream.
At the end of the manicure, you need to apply cuticle oil. Place a drop of oil on the cuticle of each nail and rub well. Please note that there are mineral and natural oils. Mineral oil forms an invisible film on the surface of the cuticle. If you use this oil every day, you will get the opposite effect: the cuticle will begin to dry out. This oil is more suitable for masters: the client comes for a manicure once every 3-4 weeks, and mineral oil is ideal for single use. At home, on a daily basis, it is better to use natural oil, for example “Dadi Oil”, “ruNail”.
Organic oil for nails and cuticles Dadi Oil Famous Names 3.75 ml
After the oil, you need to apply a moisturizing or nourishing cream to the skin of your hands and cuticles.
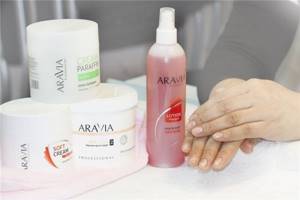
NOTE! It is necessary to take care of your hand skin not only after a manicure! Before going to bed, smear your hands with a moisturizing or nourishing cream, and in the cold season, before going outside, with a protective cream. Once every 1-2 weeks you can scrub and perform paraffin therapy. To save time and money, you can purchase cream paraffin from “Aravia”.
Cream paraffin Flower nectar with flower and beeswax ARAVIA 300 ml
Let's look at the technology for using such a cream.
- Thoroughly scrub your hands to remove dead skin cells.
- Apply a moisturizing or nourishing cream and rub it in well.
- Apply a thick layer of paraffin cream.
- We put on plastic gloves and do not take them off for 15-20 minutes.
- After the specified time has passed, remove the gloves and wipe off the remaining paraffin cream with a paper towel.
After the procedure, it is advisable not to wet your hands for two hours.
Be sure that after such care your hands will tell you: “Thank you!”
What difficulties may arise when applying gel polish at home?
- Unable to apply coating accurately
- Gel polish shrunk during polymerization in a lamp
- There are bubbles in the gel polish
- The coating peels off after a few days
The main advice: don’t get upset, be patient and practice this skill. It’s better to get trained at our licensed school “ParisNail”!
One of the reasons may be insufficient lamp power. Perhaps your gel polish is well pigmented and the lamp power is simply not enough to dry it. It is advisable to use a lamp with a power of at least 48 W. Also, the gel polish could shrink due to the fact that you applied it in too thick a layer.
This may happen due to the fact that the bottle of gel polish has been shaken. To get rid of bubbles, you need to open the bottle, but do not remove the brush. Let the material stand in this state in a dark place so that it is not exposed to daylight for a couple of hours. After this, you need to mix the composition with a brush, close the bottle and twirl between your hands.
Perhaps you made mistakes when preparing the nail plate for coating or in the technology of applying gel polish. Also, the reasons may be an incorrectly selected base or top. For information on how to choose them, read the articles “Base for gel polish. What is it and what is it for?”, “Top for gel polish. What is it and what is it for?
Lifehacks for the perfect manicure
Useful tips that greatly simplify the process of applying gel polish and extend the life of your manicure. Share your life hacks in the comments.
To make the polish last longer
- Try to carefully apply both the base layer, the varnish layer and the TOP in a thin layer. Periodically blot the brush on the neck of the jar so that there are no dangling drops on it. Be sure to remove any excess.
- During the day, try not to come into contact with water.
Read: What happens to the body during fasting?
Bubbles
To avoid the formation of bubbles, do not shake the varnish before painting.
How to save money on manicure?
Do you want to perfectly master the art of manicure from A to Z and never spend 2,000-3,000 rubles in a salon again? Then learn how to do a manicure yourself and save money, time and nerves!
Come to our School for an online course from top teacher Tatyana Svoboda “Manicure for yourself,” which can now be completed for only 499 rubles !
The teacher will tell you all about the technique of applying the coating, removing it, modern designs, how to strengthen your nails, and much more. You will become a real pro and will be able to create your dream nail designs, and, if you wish, monetize your hobby in the future!
Course bonuses:
We give all students a 15% discount on ready-made manicure starter kits, as well as a 5% discount on purchases at ParisNail and 15% on any other online course. Upon completion of the training, you will be issued an electronic certificate of completion of the course.
Useful tips
When using gel polish, there are a few tips that will help you apply it perfectly on the first try. The most important thing has already been mentioned above: do not put a large amount of product on your brush! This is a common mistake that can ruin your entire manicure.
IMPORTANT TO KNOW: Acrylic nail coating will strengthen weakened nails and lengthen short ones.
All products used are applied according to the same scheme: the brush is dipped in the product, the excess is removed from it, then a neat drop is placed near the nail root, in the center. And from this the product spreads over the rest of the nail: first to the cuticle, and from there to the edge of the nail. The drop needs to be stretched along the central side and sides!
Do not paint your nails near the cuticle. This is very difficult to do neatly and beautifully the first time: it is better to move half a millimeter away from the cuticle to avoid untidiness and problems! In addition, if you want to visually elongate your nail, move a similar distance away from the skin around your nails.

Do not apply gel polish in close proximity to a UV lamp: there is a high probability that the product will “set” even before you have time to spread it over the nail.
Contaminated skin is cleaned with a special pencil, but a strong defect should not be corrected in this way: in case of noticeable defects, the best solution would be to erase everything and repaint. This is especially true for flaws noticed after being placed in a lamp.
There is nothing complicated about applying gel polish. Of course, this takes a little more time than a regular manicure, but it will last much longer.
Video on the topic: