Rating: 5/5 (7)
The life of a modern representative of the fair sex consists of a constant search for an original, new and unforgettable image. A manicure is at first glance an insignificant, but in reality a very important detail that can highlight your beauty, add the finishing touch to your look and complete your look . Ordinary standard varnishes are almost a thing of the past, as the modern nail industry has offered us a more effective and durable product - gel polish.
Gel polish is an undeniable favorite in nail care - keeping your hands well-groomed and tidy has become much easier and simpler, and its unique strength allows you to maintain the original attractive and fresh appearance of your manicure for up to three to five weeks . In addition, the gel polish has a multifaceted palette of color shades, which allows you to create absolutely any fashionable design on your nails. Also, which is important, various decorations in the form of rhinestones, beads, patterns, and so on are glued to the gel polish very firmly and for a long time.
Manicure with gel polish gives your nails a neat appearance, strengthens them, prevents delamination and, most importantly, has high durability. At one time, I couldn’t get enough of the appearance of such a unique product, and today I decided to share my knowledge about it with beginners. I propose to jointly consider all the pros and cons, as well as analyze in detail the basics of manicure done with gel polish, including training lessons on video.
Advantages
- incredible durability and preservation of original attractiveness;
- prevents fragility and delamination, and protects against similar misfortunes in the future;
- strengthens the nail plate due to its thick gel coating;
- protects nails from negative external influences;
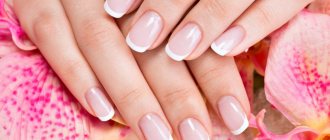
- gives fingers a neat and tidy appearance;
- refreshes the entire image;
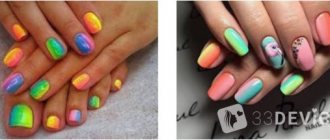
- Thanks to the huge selection of colors, you can create your own unique design on your nails;
- makes it possible to do your own painting at home;
- The technique of applying gel polish is simple even for beginners;
- If the rules are followed, the manicure will have a unique shine that lasts up to 2-4 weeks.
How to choose manicure courses?
In order to quickly master nail painting techniques, you should turn to professionals or take courses. During the learning process, teachers will help you place your hand and avoid mistakes.
When choosing courses, follow simple rules:
Learning how to paint your own nails is not as difficult as it seems. You can practice each element on paper, then on tips, and only then apply it to the nail. The processing process can take a long time. The reward for your patience and work will be a beautiful manicure with a design.
You may also be interested in:
- 10 Best Manicure Training Courses in St. Petersburg;
- 10 Best Manicure Training Courses in Moscow;
- 10 Best Manicure Training Courses in Nizhny Novgorod;
- How to Strengthen Nails at Home? 4 Simple Instructions That Will Make Your Hands Beautiful and Well-Groomed;
- How to Do a Pedicure at Home? 2 Step-by-Step Lessons and Helpful Tips for Beginners;
Flaws
- high cost of truly high-quality cosmetics;
- gel polishes create a dense film, due to which the nails lose their own protective coating and do not “breathe” at all ;
- not suitable for nails with a weak and thin structure - the manicure lasts three to six days;
- A manicure done with gel polish is difficult to remove and takes quite a long time;
- Coating with gel polish requires full compliance with the rules , otherwise the varnish may “peel off” on the same day.
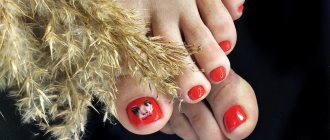
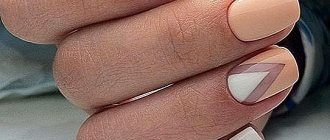
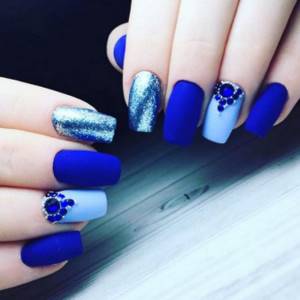
Winter design
This winter, like any other, cool shades will be at a premium. Blue, gray, metal are excellent options for a frosty winter.
You can experiment with the now fashionable black and white palette, which will also fit perfectly into a cold-weather look.
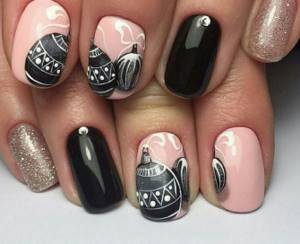
Nail designs with gel polish for winter in 2021 will tend towards monotony and femininity.
Tips from the professionals
- It is necessary to use high-quality varnishes from trusted and well-known manufacturers.
- To prevent your manicure from becoming covered in bubbles, it is important to apply the gel polish in thin layers.
- To prevent the gel polish from peeling off, when applying it, you must step back from the cuticle by one millimeter .
- If you are using white gel polish, keep it under the lamp for one and a half minutes, not two - this way you will avoid a yellowing tint.
- To get the perfect, truly desired manicure, it is better to apply several thin layers of gel polish than one thick one.
- If you want to make a design on your nail, apply it to the top coat before drying.
- Attach rhinestones or stones to the nail immediately after applying the colored layer of gel polish, then be sure to dry .
Before you start applying gel polish, you need to get your nails in order - they should be in perfect condition. To get a flawless manicure that will give others a good opinion of you, it is important to take seriously the choice of nail shape and careful removal of cuticles and hangnails. Otherwise, your efforts may turn against you, since the manicure will look sloppy and sloppy.
How to paint with nail polish?
The varnish has a thick texture and dries quickly in air. Therefore, it is difficult to paint on it with a brush. It is suitable for elementary drawings made on a wet layer with a needle or dots.
The downside of this manicure is that it doesn't last long. Rarely does polish last on your nails for a week. It is suitable for those who like to change their image.
A simple application technique is suitable for girls with no experience in nail design.
We have prepared for you simple instructions on how to design nails with varnish:
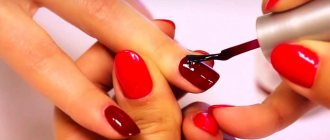
- Apply the background color of polish to the treated nails.
- Place dots of a contrasting color on the still damp surface with a brush or dot and gently stretch. This way you can make petals or artistic patterns.
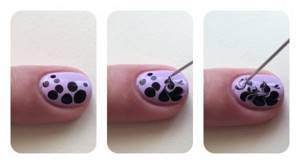
When choosing a nail polish for nail design, pay attention to the pigment. It should not be transparent, otherwise the drawing will be dull, almost invisible
Required Tools
- manicure set;
- buff;
- non-acetone nail polish remover;
- ultraviolet lamp - used to dry the varnish (I recommend purchasing a 36 W lamp - the varnish hardens in 2-3 minutes or an LED lamp - it is expensive, but the varnish hardens in 7-10 seconds);
- degreaser (can be replaced with boric alcohol );
- primer;
- pigmented varnish – used as a base coat;
- cotton pads or cotton wool (can be replaced with wet wipes);
- gel polish – top coat ;
- fixer – transparent or colorless gel polish.
Nail preparation process
- polish remover to remove old polish from nails . The liquid should not contain acetone - it negatively affects the nail surface and in the future will make it brittle and peeling.
- We wash our hands with scented soap or gel, then wipe our hands dry.
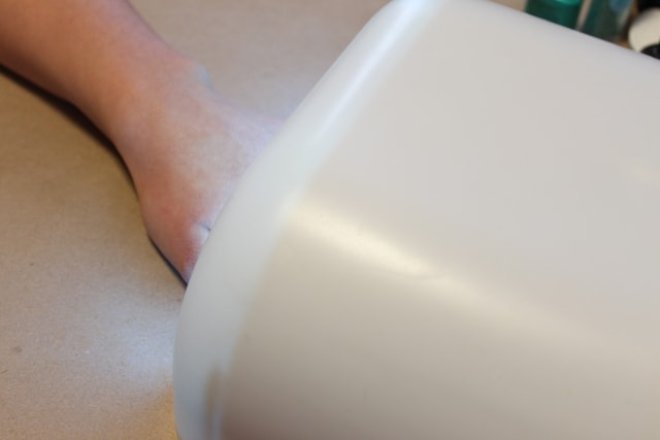
- Pour hot water into a bath or small ceramic bowl and dip your fingers in it - this will allow us to painlessly remove the cuticles. In addition, I recommend adding a few drops of iodine or a pinch of sea salt to the liquid - this will help strengthen the nail plate and make nail treatment more comfortable.
- After about seven to ten minutes, we pull our hands out of the water and pat them a little with a towel.
- Using nail scissors with rounded ends or cosmetic clippers, carefully remove cuticles and hangnails. If the cuticle becomes rough again, dip your fingers in warm water again.
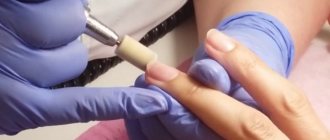
- Using a buff, remove the glossy layer from the nails and remove any remaining dust with a damp cloth. This action makes the nail plate more durable.
- After completely treating the nail plates, massage in a couple of drops of essential oil , paying special attention to the areas that have been cleaned. The oil protects the skin on the hands from infection from the outside after treating the fingers.
- After the oil is completely absorbed, use a nail file to adjust the length of the nails and give them the desired shape.
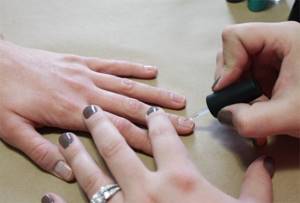
Gel polish application process
Under no circumstances touch the nail surface after drying under the lamp: oil from the skin remains on the nail, which can make the coating brittle, and then your manicure will only last for a few days.
- We degrease the nail surface and wait until the product is completely absorbed. This is done in order to remove any excess residue from the nails.
- Apply a thin layer of primer. It is necessary to increase the service life of our manicure.
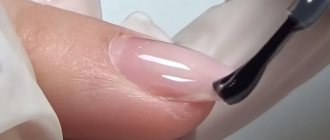
- After this, cover the nail with a thin layer of base coat and dry it under the lamp for 2 minutes. Now the main color will lie as evenly as possible.

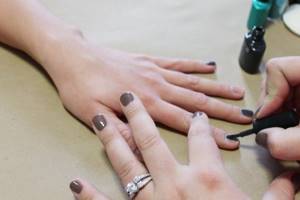
- After drying, apply a thin layer of colored gel polish (top coat) with a brush and dry the nails again under the lamp.
- Apply a second thin layer of gel polish in the same way and dry it under the lamp. Remember: the thinner the applied layer, the more natural your manicure will look. In addition, when using gel polish in a manicure, you can apply several layers, but each of them must be dried under a lamp after application.
- To consolidate our spectacular result, we apply transparent gel polish , which will extend the life of our manicure up to five weeks and keep it looking fresh.
- We dry the final result under the lamp for a couple of minutes.
- Now we blot the napkin with boric alcohol or a degreasing compound and remove the sticky layer that forms as a result of drying under the lamp.
Gel polish removal process
Under no circumstances should you remove gel polish from the nail surface without first softening it - scratches and snags will remain, which will greatly spoil the appearance of your nails. To speed up the process, you can use a buff - it will help remove remnants of gel polish and remove the dispersed layer.
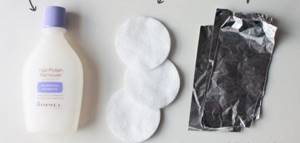
- From a napkin or cotton pad cut into pieces, the size of which should be slightly larger than the shape of the nail.
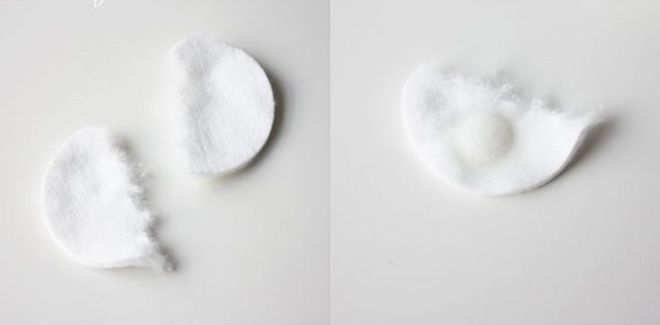
- Wet the resulting piece with nail polish remover and spread on the nail surface. The gel will soften and begin to peel off.
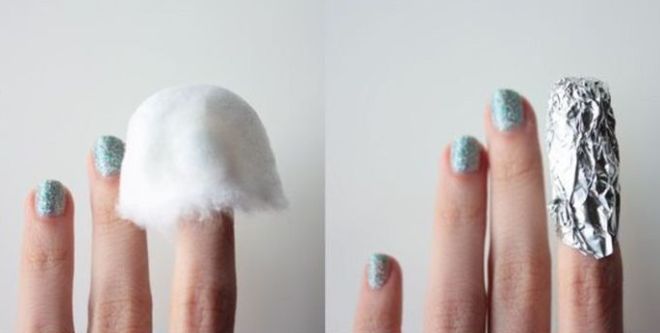
- Every finger wrap it in foil and go about our business for about fifteen to twenty minutes.
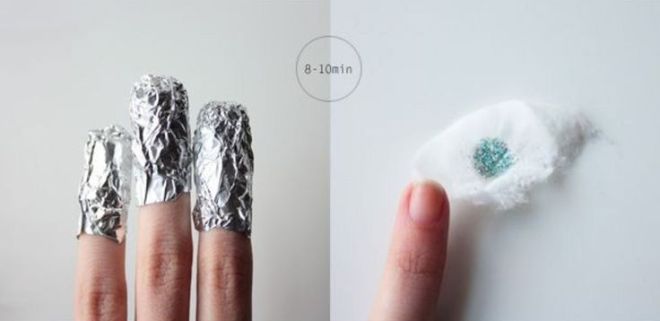
- Unroll the foil and remove the cotton pieces.
- Using an orange stick or cotton pads, remove the remaining gel polish . Repeat the softening procedure if necessary.
- Polish the nails thoroughly with a nail file.
- Using scented soap, wash your hands thoroughly.
- After all of the above, apply your favorite moisturizer .
Glitter stretch
The most impressive design is made using shiny gel polish.
What you will need:
- gel polish with glitter;
- fan-shaped manicure brush.
First, choose where the shiny stretch will come from: from the base or edge of the nail. In this place the concentration of sparkles will be greater, and then will disappear. A strip of shiny gel polish 1-2 mm wide is applied to the selected beginning of the design. Then, using a fan brush, stretch this strip to the other side of the nail and dry the layer. Repeat these steps about 3 times. Each time, apply the strip thinner and stretch it less and less.
Training on how to create a manicure and apply gel polish through video tutorials
Visual perception plays a very important role in our daily lives, helping in learning and making it possible to convey important information quickly and clearly. First we look, then we process what we see and in a matter of minutes we understand what needs to be done.
In the modern world, most women perceive visual information much better than huge canvases with many letters. Therefore, I suggest you watch a few video tutorials on how to create a manicure with gel polish . I tried to make for you a selection of the most useful video materials, which at one time helped me a lot in becoming a professional in the field of creating gel polish manicure.
Videos for beginners
Video tutorial No. 1 “Full review: starter kit for gel polish. Part 1"
Video tutorial No. 2 “Full review: starter kit for gel polish. Part 2"
Video lesson No. 3 “Removing the old coating and making a new one”
Video tutorial No. 4 “Gel polish manicure at home with a detailed discussion of all sorts of subtleties”
Video tutorial No. 5 “How to apply/remove gel polish”
Video master class from professional cosmetologists
Video No. 1 “Step-by-step instructions for applying gel polish”
Video No. 2 “Three effective ways to remove gel polish”
Video No. 3 “Removing gel polish with a cutter + hardware manicure. Part 1"
Video No. 4 “Complicated repair, extension and straightening of nails. Part 2"
Video No. 5 “Gel polish correction. Combined manicure for beginners with one cutter. Part 1"
Video No. 6 “Applying gel polish under the cuticle: leveling + strengthening + highlights. Part 2"
Nail designs: video
Nail designs: palm tree
Tags: nails
Market Analytics
- COVID-19 is changing the rules of the game in the cosmetics market
- Beauty of the future: cosmetic innovations 2021
- New ingredients are the driving force of the cosmetics industry
Convenient search for beauty salons on our website
Beauty salons in Moscow Beauty salons in St. Petersburg Beauty salons in Ekaterinburg Beauty salons in Novosibirsk
Latest blog posts on our website
- Naturecream / PEPHA-TIGHT - instant skin lifting
- Naturecream / Blue light - a danger to the skin
- Naturecream / Cocoa Butter – A treat for the skin
- Naturecream / Trylagen - supports the entire collagen life cycle.
- Naturecream / Spring skin rehabilitation
- Naturecream / Cleavage - a woman's passport
- Naturecream / Anti-cellulite “Memo”
- Naturecream / Peptides instead of beauty injections.
- Naturecream / Microplastics in cosmetics
- Naturecream / Sea buckthorn oil - “liquid gold” for the face
Other articles in this section
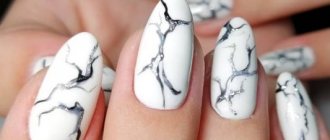
Manicure with the effect of broken glass Manicure with the effect of broken glass will allow your own imagination to run wild, since it has many options for nail design. “Broken Glass” manicure is now in trend. Beautiful manicure Exquisite ideas for creating a beautiful manicure will help you choose the best option for a laconic completion of your look. You can try to apply the polish yourself or have your nails done by a professional. We offer ideas for creating a beautiful manicure and reveal some secrets. Men's pedicure A few years ago, when asking men for their opinion about pedicure, almost every second person answered that it was some kind of female procedure. But the situation is changing, and men's pedicure is no longer exotic. Manicure with foil Nail design options are very diverse. One of the most original techniques with a wide range of design options is decorating nails with foil.
This nail art is very impressive, noticeable and immediately attracts attention to its owner. And you don’t have to be a professional to do it.
The necessary materials, instructions, a little practice - and you will succeed. Removing an ingrown nail with laser and radio waves: which method is more effective? Ingrown nails (onychocryptosis) are a common cosmetic defect that causes many problems. The process is accompanied by painful sensations, the skin on the finger becomes red and swollen. Complications in the form of purulent discharge may occur. Just 5-7 years ago, doctors resorted to a surgical method to eliminate the problem, using a scalpel and stitches. Medicine does not stand still. Currently, it is widely practiced to remove ingrown toenails using laser or radio waves. We'll talk about what the procedures are in the article. Manicure for Halloween In this article we will learn how to do a manicure for Halloween, since the holiday is just around the corner. We offer you a step-by-step simple Halloween manicure that you can easily do at home. Traditional colors of choice for Halloween manicure: black, orange and white, but we diversify it with other colors. Manicure for September 1st with a jacket September 1st is coming soon. Children will go to school, some even for the first time. And on this day you want to have a corresponding manicure. We offer you an interesting nail design with a jacket pattern for girls and boys. Your nails will be dressed in school uniform just like your kids. Gradient manicure. How to make a gradient on nails Bright and unusual color combinations, smooth transitions of shades on nails - a fashionable manicure with a gradient effect has not lost its relevance for several seasons. Despite all the apparent complexity, the gradient manicure technique is quite simple, and making a manicure with a gradient effect at home is quite simple. Read our article about how to make a gradient on your nails correctly, what techniques for creating smooth color transitions on nails exist and what shades are best to choose. Combined manicure Every girl chooses the type of manicure depending on her personal preferences, but combined manicure is becoming more and more popular manicure.Manicure: apple (photo and step-by-step instructions) Today we will look at how to draw apples on your nails. This nail design is suitable for both summer and autumn. Apples can be made red, green or yellow, or you can draw a cut apple with seeds. So let's get down to step-by-step manicure: apple.