Artistic design with acrylic paints on nails never goes out of style. At the same time, it is not necessary to run to an expensive salon and look for an artist. You can learn to work with paints yourself and create real masterpieces on your nails.
To do this, you should understand what types of acrylic there are, learn and try the most popular application techniques and listen to the recommendations of the masters.
Benefits of using acrylic paints
Nail designs with acrylic paints are very popular. They are made by both professional craftsmen and amateurs. These paints make it possible to work on various surfaces and combine patterns and colors.
Advantages of colorful acrylic coating:
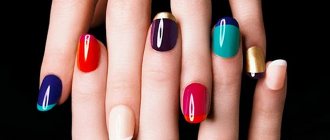
- wide color palette;
- paints can be mixed until the desired shade is obtained;
- has no smell;
- non-toxic;
- economical (low material consumption);
- both natural nails and extensions are used as a basis for drawing;
- if flaws arise during work, they can be removed with plain water;
- inexpensive - a set of excellent quality paints will cost 400-690 rubles.
Any girl can purchase such paints and paint her nails on her own.
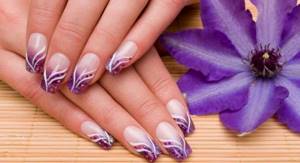
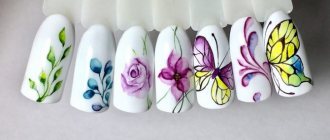
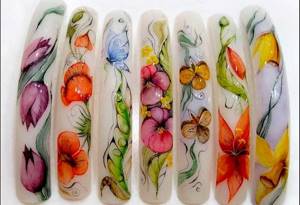
Acrylic flower
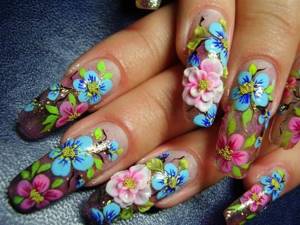
In addition to Chinese painting, there are many techniques that allow you to decorate a manicure with acrylic paints. Flowers are the most popular nail design theme, both on the hands and feet.
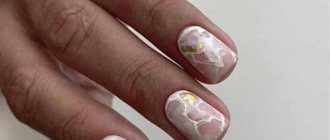
Rose
Painting a rose with acrylic paints is not difficult because the paints apply easily to the nail plate. It is important to study the drawing diagrams and practice. You need to start drawing a rose from the middle, gradually adding arc lines - petals. To make the design look more chic, the middle of the rose can be decorated with rhinestones.
Chamomile
Chamomile designs on nails are also popular. This design is made with a thin bone, first the petals are drawn, and then a yellow dot is placed in the middle using a dot. Even for beginners ,
It will be very easy to make such a drawing.
Dandelion
Recently, it has become very fashionable to depict fluffy dandelions on nails. Such a painting
can be performed both on the background color and on unpainted nails.
In the middle of the nail, you need to put a white dot with acrylic paint, from the center of which, in a circle, draw longitudinal stripes. After this, you need to draw branches on the longitudinal stripes. Finally, the dandelion leg is drawn with black paint. On adjacent nails you can add “parachutes” that look like they flew away from the flower.
You can paint absolutely any flowers on your nails. In addition to the above, they draw lilies, orchids, crocuses and others.
By the way, we have a large article about it, it contains the necessary diagrams.
Types of paint
Acrylic dyes come in matte and glossy.
They are also divided into two types:
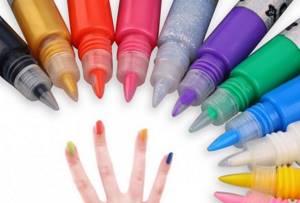
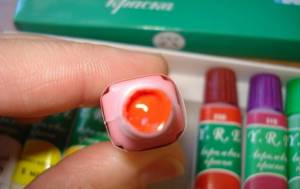
- Thick. They go on sale in jars. Before use, they need to be diluted with water.
- Liquid. Immediately ready to use. Sold in tubes. They are more convenient - they can be mixed. It is best to purchase tubes individually and periodically replenish stocks of flowers, which are used up faster.
Designers, using a variety of shades, matte or gloss, create real masterpieces on the fingers of their clients.
What you need to create a manicure
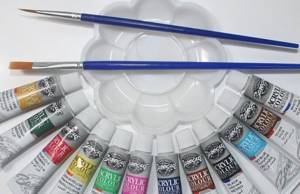
You don't need any special tools to paint with acrylic on your nails. To do this, just purchase several brushes of different thicknesses. Brushes with thin and elastic bristles are ideal - they make it possible to apply clear and thin lines. We must remember that the designs on the nail plates are a kind of miniatures.
When purchasing acrylic for work, it is not necessary to immediately buy a huge palette; it is better to choose the main one for yourself. It can be 6-12 colors. Among them must be white and black - these paints will be used up the fastest. It is better to immediately purchase white tubes or jars “with a reserve”.
Transitional tones can be easily created by mixing colors yourself. An experienced master can create up to 2000 shades.
You will also need a palette for mixing paints. If it is not included in the kit, then at the initial stage a regular jar lid or a piece of plastic will do. In the future, you can purchase a professional one.
Stages of work when creating a manicure using acrylic painting:
- removal of old coating;
- removing or pushing back the cuticle;
- grinding the surface of the nail plate;
- giving the nail length and shape;
- degreasing the nail plate;
- applying the main (base) coating;
- creating a nail design based on a pre-selected sample or creative inspiration;
- applying a fixative.
After use, brushes must be thoroughly rinsed with water and dried.
Every good manicurist who paints nails has samples of his work that are offered to clients to choose from. This greatly simplifies the work and increases the speed of drawing. But clients can also offer their own ideas for decorative coating.
Acrylic drawings on nails: step-by-step instructions
Learning how to do a fashionable manicure yourself is quite possible. To do this, you can watch the corresponding video or use special instructions that will explain step by step how to turn your marigolds into a work of art.
The technology for creating acrylic nail art is generally simple, but it must be followed as precisely as possible:
- Before creating an artistic manicure, we must give our hands and fingers a well-groomed look - we correct the cuticles and the shape of the nail plate. After such procedures, the nails are completely ready for acrylic painting;
- We degrease the nails with a special product so that the coating can maintain a presentable appearance longer;
- We apply a transparent base to all nails, since experts do not advise doing a manicure on the nail plate without appropriate protection;
- We use varnish of any shade as a base. It is necessary to take into account that both complex and simple designs made with acrylic on nails are applied only after the varnish has completely dried;
- Before creating an artistic painting, you must first try to draw a pattern or picture on a piece of cardboard. During such training, it is easy to determine the required pressure on the brush and display the desired color intensity;
- We make a drawing on the nails. At the same time, the painting should not be overloaded with images, so it is best to decorate only the ring finger with the main picture (it is the first to decorate it), and create minimalist abstract drawings on the rest;
- At the final stage of the manicure, we fix the resulting patterns with a special top coat, which will give the nails additional shine.
Five simple acrylic designs on nails
There are many ideas for acrylic manicure, but five of them are the simplest and most original to date. To create such drawings you do not need to be an artist or be able to draw intricate pictures.
To make your nails look their best, you can decorate them with the following details:
- Standard French manicure with small dots applied along the white line, or bright stripes of fancy colors and shapes;
- Floral design with images of your favorite flowers. To begin with, you can try to draw ordinary daisies. Even beginners can make such a design: put a small yellow dot in the middle of the nail, and around it draw short semicircular lines - petals. You can learn the technology for creating more complex patterns by watching a video about acrylic paintings on nails;
- Animal color. The most popular and easiest to make are tiger stripes (black stripes on a reddish background), zebra stripes (black stripes on a white background) and ladybug spots (black spots on a red background);
- Blots in pop art style. This manicure is ideal for young ladies who love discos, nightclubs and beach parties. Drawings are made with acrylic on nails step by step: first, a white background is applied, and when it dries a little, a blot of a very bright acid color is placed on each nail;
- Ethnic pattern. Typically, African motifs are chosen for such nail art - dashes, uneven spirals and circles. The colors should be natural shades - green (grass), brown (earth), yellow (sand) and reddish (clay).
A manicure made using acrylic paints has many advantages - it lasts longer on the nails, looks brighter, more original and can be easily created even by a non-specialist. Be sure to try making your appearance more interesting with acrylic nail art! Good luck with your experiments!
With the introduction of various innovations, nail art has become a common addition to manicure, and every woman strives to emphasize her style with an individual design on her nails. A good help in decorating nails is painting with acrylic paints.
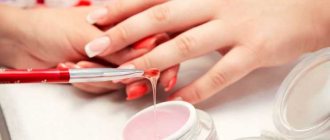
Application technique
Acrylic paints are diluted with ordinary water. You can work with them in any manner and technique. For example, miniatures can resemble works in oil, watercolor or gouache.
The composition can be diluted to a transparent or translucent state - it all depends on the final task. Each nail design artist has his own style, and original designs emerge from under their brushes. But there are several basic application techniques that can be easily combined.
Oil painting
Oil painting with acrylic paints on nails is one of the most popular techniques and is used most often. The point is that nail art masters do not dilute paints and work with a very thin brush. Strokes come in different shapes, sizes and textures.
The end result has the effect of an oil painting. Most often, work is done with several colors along the edges of the nail or the image is stretched over the entire surface. The manicure looks very bright.
It is the oil technique that is used for painting three-dimensional objects attached to the nail plates. This is a favorite sculpting technique with modeling acrylic powder or a special gel composition, with the help of which entire bouquets are created on the fingers. Finished three-dimensional objects are brightly painted.
Gouache painting
Gouache is a bit like oil painting. The difference is that paints require dilution.
In a drawing, layers of color often overlap each other. It turns out to be effective, although somewhat rough. There is no charming airiness that attracts other techniques. However, errors in work are less noticeable, and flaws in painting can be easily covered up with a new layer.
These patterns are very reminiscent of those used in the production of communist propaganda posters in the twenties of the last century. They are bright, clear and concise.
In gouache painting, paints that give a matte surface are often used.
Watercolor painting
The paints are diluted with water until translucent and applied layer by layer. As with watercolor painting, transparency is key. This technique makes excellent transitions within a picture or background.
However, the difficulty is that even when painting using a dry technique on paper, watercolors take some time to dry. Acrylic “sets” almost instantly. Water slightly slows down the hardening process, but the master needs to work very quickly.
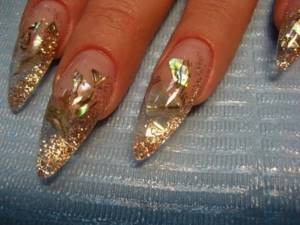
Sliding
The slide technique requires mixing structural gels and acrylic paints. At first, this mix looks whitish. But there is no need to worry - after drying, the paint will take on its real color. The manicure turns out juicy and bright. Experienced artists manage to create deep shades and complex gradations of color.
This technique requires experience as you need to know how to mix acrylic and gel to get the desired shade. An interesting “aquarium” design is performed using the sliding technique.
Glaze
Glazing is a very ancient technique. The famous Mona Lisa by the Italian master Leonardo da Vinci was painted in a similar manner. In fact, it was he who developed this complex technology.
Its peculiarity is that almost transparent layers of paint are applied to each other. After drying, the effect is amazing. Skilled artists create smooth, delicate patterns with almost imperceptible transitions. The designs on the nails come out very elegant and voluminous. They are transparent almost to the very base.
Acrylic is diluted in water and applied to the nail plate with tiny strokes. The goal is to achieve color shifts by working with many shades. And this must be done as quietly as possible. Be sure to wait until the previous layer dries.
But there is a big drawback - such a manicure takes longer than usual and requires good practical experience and mastery of drawing techniques.
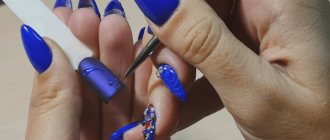
How to paint with acrylic on nails?
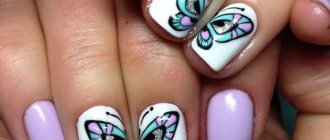
If you have no experience in painting nails at all, don’t be discouraged, but start with easier patterns. Simple designs, such as daisies or butterflies, also look interesting and beautiful. On the Internet you can find video tutorials that show you step-by-step simple drawing techniques.
To begin with, you can practice drawing on special tips or on another surface, for example, cardboard. Draw marigolds on cardboard, cover them with varnish and try to depict the chosen design. If you like everything, then you can transfer the design to your nails. To make it easier for you, we will tell you in more detail how to paint on your nails.
- Get your nails in order, do a standard hygienic manicure;
- Paint your nails with polish. For the first time, it is better to choose a light or transparent base;
- Squeeze a little paint onto a palette or other surface, it will be much more convenient for you;
- Wait until the varnish is completely dry;
- Carefully start painting with a thin brush. To begin with, it is better to decorate one or two fingers;
- Apply each new color and layer only after the previous one has dried;
- Finish the manicure with a polish or clear polish.
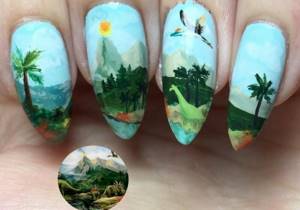
You can depict anything on your nails. It all depends on your desire and skill. Floral and geometric prints are especially popular in 2021. Various circles, triangles, stripes, squares and zigzags are not difficult to draw. Turn on your imagination and start creating. Thematic drawings look impressive: New Year's, summer, sea, patriotic and others.
Floral patterns also come in varying complexity. But in any case, such a manicure looks gentle and romantic. Let's take a step-by-step look at the simplest technique for depicting flowers. It's called oil technology. The principle is that undiluted paint is applied to the nail in strokes. To do this, use a thin brush. Gradually you can move on to more complex compositions.
- Using white paint, apply elongated petal-shaped strokes in a circle;
- Draw a yellow dot in the center, this will be the core of the flower;
- Next to the resulting flower, smoothly draw green leaves;
- You can add sparkles or rhinestones to your manicure;
- After complete drying, apply a sealing coat.
Simple and elegant daisies are ready. You can draw other flowers in a similar way. You can decorate one nail with a large composition, or you can decorate all the nails with small patterns.
Review of popular manufacturers
When purchasing dyes, it is best to opt for trusted manufacturers. You can check with your manicurist what brand he uses and choose a similar option.
Products from Chinese and domestic manufacturers are on sale. It is better to buy them in specialized stores.
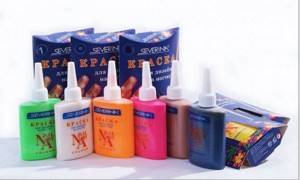
Severina (Severina)
This is a product of a Russian company. It has good quality and a very wide range of shades, there are even metallics and ones that glow under UV light. You can assemble your own palette. The average cost of one tube is 105 rubles. The necessary set will cost about one and a half thousand.
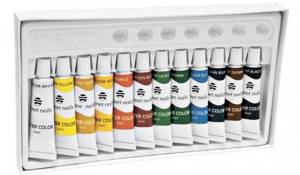
Planet Nails
The product is produced in tubes, the country of origin is China. It features bright, rich colors and dense texture.
This is a very economical option: a set of 24 tubes of 12 ml will cost 415 rubles. But there is a drawback: if the design is complex and a large layer of paint is applied, it may crack.
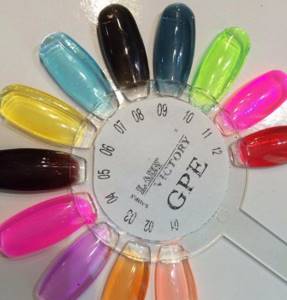
Lady Victory
Some of the cheapest paints. A set of 12 colors will cost 360-390 rubles. You can even find 18 shades on sale. Suitable for nail design at home. But professionals prefer to take other options - they note problems with the durability of the coating.
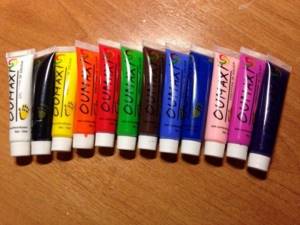
Oumaxi
An inexpensive palette for nail design from this Chinese manufacturer can be purchased for 300-390 rubles.
There are even fluorescent and metallic colors available in soft, non-metallic tubes. Masters note that they are dense, with a bright pigment and fit very well on the nail, even in one layer.
They are also used in the stamping technique - this is a method of applying a design using special plates, a kind of nail stamps.
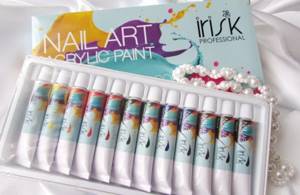
Irisk
These sets are not cheap. One tube costs about 40 rubles. The material is excellent for working with both natural and artificial surfaces. It is dense and the color is rich. Requires additional topcoat.
Masters categorically do not advise using French paint on artificial nails with this paint: the surface will crack and come off.
At the initial stage, you can buy a ready-made offer: one such set contains 12 colors. Each tube has a volume of 20 ml. The set will cost 1219 rubles.
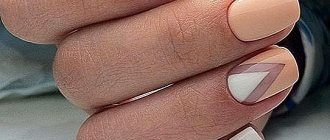
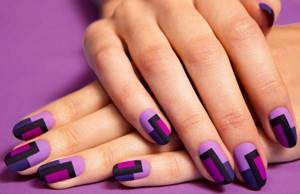
Geometric motifs
Idea #1
- Cover your nails with a base coat. The finished design will benefit doubly if you use a matte texture and play on the fashionable contrast with glitter.
- Draw a “V” of thin, contrasting lines toward the base of the nail.
- Draw 2 thin lines from the edge of the nail to its edges in the middle.
- Cover the “V” shape with glitter varnish. If you are afraid to go beyond the boundaries, create the outline of the design with tape.
Idea No. 2
- Apply a base light blue polish to your nails and wait until dry.
- Then it’s time to apply a rich turquoise shade – it should be applied to half of the nail along the vertical border.
- The final touch is black varnish, which should be located diagonally in the lower half of the nail.
Idea No. 3
- Apply the first coat of red polish and wait for it to dry.
- Draw 2 perpendicular black lines. This can be conveniently done using thread, which must first be dipped in varnish.
- The second thread should be used to apply white stripes that are parallel to the black lines.
- Take the third thread and use silver varnish to apply 3 finishing lines at the top and left edge.
- When the patterns are dry, secure the result of your efforts with a layer of transparent varnish.
Interesting: Red manicure: new designs 2019
Idea No. 4
- Cover your nails with soft peach polish.
- Armed with tape, create a wide vertical line border.
- Paint this space with gold varnish.
- When this coating has dried, draw the boundaries of the lines and patterns as in the photo with a thin brush with white varnish.
- Don't forget about the sealing layer of clear varnish.
Idea No. 5
- The first layer is a light purple varnish.
- This is followed by drawing rectangles to the middle of the nail in a contrasting color.
- On the other side of this rectangle, draw another, smaller one.
- Outline the larger rectangle with black nail polish.
- The final detail is a matte top.
Idea #6
The key to the success of such a drawing is patience and accuracy. Draw thin lines with black varnish after the beige base has dried, and then paint the resulting triangles with glitter.
Idea No. 7
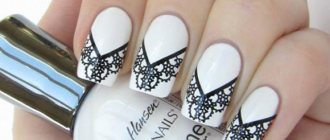
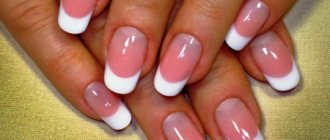
Such a different jacket
Easy nail designs for beginners are often made based on French manicure. This is a classic solution that will symbolize the elegance and good taste of a fashionista in any season.
Idea #8
This design lacks the traditional smile - it is replaced by beautiful monograms with glitter. To repeat such an exquisite manicure, you need to cover your nails with beige varnish, and after it dries, draw a thin lower border of your smile. Then the fun part begins - drawing patterns. Once the curls are dry, highlight them with silver hairspray.
Idea No. 9
This original version of the French manicure will look good on square-shaped nails. It’s not difficult to repeat it at all - draw a smile with a flat stripe at the edge of the nail, and just below, in parallel, create a thin line in the same color.
Idea #10
Floristics
Idea No. 11
- Apply a base polish to your nails - a soft pink shade is ideal.
- When the tone is dry, arm yourself with a thin brush and black varnish.
- Draw a leaf stem diagonally.
- Starting from the top, draw the details of the leaf, focusing on the photo cheat sheet.
Idea No. 12
- Paint your nails pink.
- Using the drip technique, paint the cores of the daisies with yellow, and then their petals with white varnish.
Note! You should not draw the dots too large so that the image does not blur and looks neat.
To make your manicure last as long as possible, finish it off with a clear topcoat.
Idea No. 13
- The first stage is applying the base coat.
- Using a contrasting polish from the bottom left corner, draw 2 thin lines with a beautiful curve.
- After this, you should draw the leaves on the branches step by step.
- The design will be more elegant if you paint each leaf with a contrasting or shiny varnish.
Idea No. 14
Idea No. 15
Interesting: Lunar manicure 2021: fashion trends
Idea No. 16
Recommendations
Acrylic paints are very economical, but dry quickly. In order for them to last for a longer time, several rules should be followed.
For acrylic you need:
- comply with the storage conditions specified by the manufacturer;
- check the expiration date before purchasing;
- squeeze out of the tube in small portions.
Acrylic in tubes still dries out over time - then it is diluted with water, just like in cans.
To independently master nail painting techniques at home and surprise others with small masterpieces, you should listen to the advice of professionals.
Recommendations from nail design specialists:
- The hand should lie motionless. To do this you need to choose a convenient place.
- When painting, do not press the brush with force. Masks should be lightweight.
- For beginners, it is better to choose designs that are easy to perform.
- First, the outline is drawn, then it is shaded.
- If a complex pattern is taken, then it must be performed on one finger. The rest are made of simple overlapping fragments.
- Another fashionable trend: they take one finger of each hand and draw two overlapping scenes on them. And on the rest - just a monochromatic coating.
- A special fixative is applied to the finished miniature to fix the design.
If errors occur during the drawing process, excess layers of paint can be removed with water. To do this, use a regular cotton swab.
After work, you should not leave acrylic on the brush. It will be almost impossible to wash.
Beginners are advised to practice on plain paper. Try mixing and applying paints, work with painting patterns, study the results of applying paints to each other.