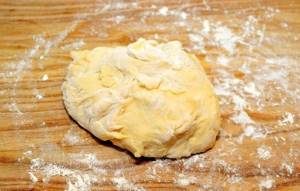
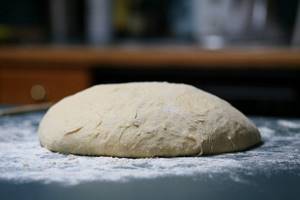
This is a common problem for many home bakers: you put a lot of effort into making good, tasty bread, but your yeast seems to be failing you. Fortunately, this is a problem that can be solved relatively easily. On this page I will tell you why yeast dough does not rise and how to make it become fluffy.
So, what to do if the dough does not rise
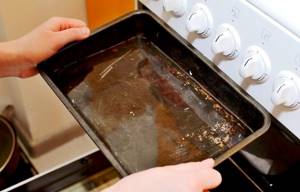
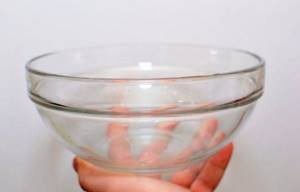
Method one: you need to increase the ambient temperature. Nothing improves yeast better than a warm, humid microclimate - in it they live their yeast life to the fullest. If you want your dough to rise well, you have to give the yeast what it wants. Fill a deep pan with boiling water and place it on the lowest rack in your oven. Place the bowl of dough on the middle rack and close the door. Leave your dough in a warm, moist environment for a while and let it rise. Alternatively, you can boil a cup of water in the microwave and then place the bowl of dough in the microwave along with the water and close the door (without turning the microwave on!). Some people place the dough on the stove covered with a wet towel. The stove retains heat and a damp towel provides moisture. In this way, yeast dough that does not rise can be made to rise.
Tip 1: Raise the ambient temperature
In order for the yeast to activate, it is important to maintain the temperature regime of the water, and in order for them to continue to multiply and contribute to the further growth of the dough, this temperature must be maintained. A cold room with dry air is not the best environment for its growth. Therefore, you should not be surprised if the dough does not rise. What to do in this case?
- Place a baking sheet with hot water on the bottom of the oven, preheated to 40 degrees. At the same time, place the container with the dough on the rack on the middle level of the oven. A moist, warm environment will help the dough rise.
- Prepare a water bath on the stove. Heat to high temperature and immediately extinguish the fire. Place the container with the dough in a water bath until it rises.
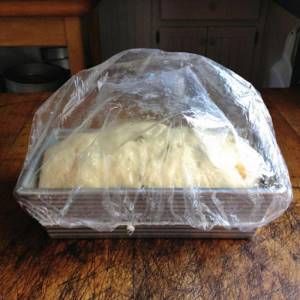
- Cover the container with the dough with polyethylene and place it near the radiator or a switched-on burner. Polyethylene will create the necessary moist environment, and from the emanating heat the dough will begin to grow rapidly.
Method two: add more yeast

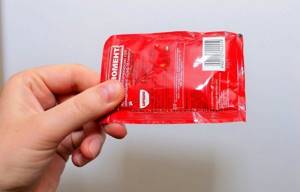
If increasing the temperature and humidity doesn't work and the yeast doesn't activate (you'll know in less than an hour), you can try adding more yeast to the dough. Please note that your old yeast has failed you and don't use it anymore. Open a new packet of dry granulated yeast, take a teaspoon and mix with a cup (200 ml) of warm water (about 43 deg C) and one tablespoon of sugar. Let this mixture sit for about 10 minutes until at least 3-4 cm of foam rises. If it doesn't, you'll have to buy fresher yeast and try again. After this, add half of the dough (or all of it, depending on the amount of dough) into the bowl with the dough and stir thoroughly. Even if the mixture turns out thinner than you need, don't worry (you'll correct this problem later). Place the bowl with the dough in a warm, damp place and let it rise well (at least an hour at a temperature of at least 38 degrees C).
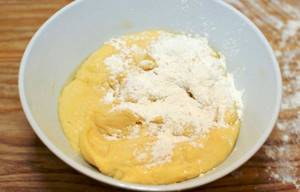
Tip 3. Add flour and knead the dough again
The optimal percentage ratio of flour and liquid is 60:40. This means that the flour should be approximately 60% and the liquid 40%. After kneading, the dough should be elastic and slightly stick to your hands. It is important not to fill it with excess flour. But sometimes this ingredient can save the situation if the dough has not risen. What to do and how much flour to add depends on the consistency of the dough.
If you add additional yeast dough, the dough will be too sticky and liquid. In accordance with the optimal ratio of ingredients indicated above, you will need to add flour to it again and knead well. After this, the container is placed in a warm place, optimal conditions of temperature and humidity are created and wait for it to rise.
Method three: add flour to a new dough as needed
Prepare a new dough as described above and add flour to it. The ratio is 60% flour and 40% liquid (this is the best ratio for bread dough). Knead the active yeast mixture into the dough and let it rise in a warm, moist place. The way it rises can also be an indication of yeast activity. This method makes the yeast very active, so when a new dough with flour is added to the dough, it should rise perfectly. If the yeast dough still does not rise, this will indicate that the yeast is not to blame for anything and, apparently, there is another problem.
Useful tips from bakers for working with dough
Experienced chefs advise:
- pre-sift the flour to remove impurities and saturate it with oxygen;
- do not add all the flour to the dough at once, but do it in portions, since its organoleptic properties can differ significantly from different manufacturers;
- monitor the amount of salt: if there is not enough salt, the dough will turn out tasteless, if there is too much, the yeast will “work” worse;
- when raising the dough after kneading, avoid cold and drafts;
- ensure that all components are warmed to room temperature;
- heat the liquid for yeast dough to 30–35 °C;
- observe the temperature regime prescribed in the recipe.
The dough can also be left in the refrigerator during slow fermentation (no less than two and no longer than three hours). This is convenient when there is a lot to do and you need to delay the baking time.
Method four: add more flour to the dough
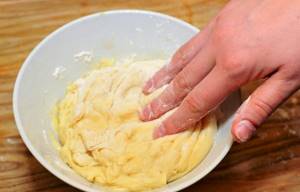
Check the dough to see if it is sticky to the touch. If so, it's probably because your dough isn't kneaded well. Knead it on the counter with additional flour until the consistency is smooth and silky to the touch and the dough no longer sticks to your hands. Let it rest and rise in a warm, moist environment. Repeat if necessary. You may need to leave it warm overnight before baking.
How to quickly rise the dough?
How to quickly rise the dough? Usually the process takes at least one and a half to two hours. But you can speed up this procedure by using a microwave. You need to do this:
- Cover the container with the dough with a towel.
- Place it in the microwave as is.
- Place a glass of water nearby.
- Set the power to higher than medium and turn on the device for three minutes.
- Then, without opening the microwave, wait three minutes.
- Next, turn on the device at the same power for six minutes.
- After this, wait six minutes without opening the appliance door.
That's all. Thanks to these simple manipulations, the dough will rise at least twice.
You can simply turn on the oven and preheat to 40-50 degrees. Place a bowl of dough there. Close the door, but leave a small gap. Under such conditions, the dough will rise approximately three times faster, that is, it will take not one and a half to two hours, but 30-40 minutes.
A multicooker is used by analogy: the “Heating” mode is turned on, it is advisable to sprinkle the bowl with flour, and put the dough inside. After about 35-45 minutes, the dough will fit well and you can start baking.
Method five: knead the dough properly
Bakers use the real art of kneading dough when baking bread. If you kneaded it too little, the yeast simply did not spread well into the dough. Therefore, this dough will be too weak to rise. Knead the dough for at least 10-15 minutes, but remember that kneading it too long can make the dough so tough that it won't rise. The dough should be smooth and elastic, but not stiff like a rubber ball or soft like a runny dough.
The dough does not rise in the bread machine: what to do?
Many housewives bake homemade bread not in the oven, but in a bread machine. But even in this case, sometimes yeast dough does not rise well.

What to do with the dough in a bread machine to increase its germination, and why it does not rise:
- Insufficient fluid. For the dough to rise, it must be elastic and soft. A small amount of water added to the bowl while kneading will help correct the situation.
- It is possible that the lid of the appliance was opened during kneading and warm air escaped.
- Expired yeast or incorrect working conditions (too hot).
In any case, the dough can be revived. To do this, you need to take it out of the bread maker and knead it with your hands, using the raising methods suggested above.
Yeast dough is called unpredictable by many. Today it makes fluffy and airy buns and pies, but tomorrow it doesn’t rise at all and remains flat, like a flatbread. How to increase the germination of the test? What to do if the dough doesn't rise? There are several simple recommendations, following which you can get an excellent basis for delicious homemade buns and bread.
Tips on how to prevent poor dough viability
If your yeast dough is not rising, it is possible that increasing the heat and humidity will solve the problem without further effort. But knowing about the possibility of such a problem, try to take some steps in advance. Check your yeast type. Some sourdough cultures grow very slowly and may take several hours for the dough to rise. Make sure the yeast has not expired. Both fresh and dry yeast are best stored in the freezer. At the same time, both fresh and dry yeast have an expiration date; after its expiration, they will act weakly or not be suitable at all.

Before diluting the dough and kneading the yeast dough, check the temperature and humidity in your kitchen. The ideal microclimate is around 38 degrees. C at high humidity. If your readings are too different from these, it's not good for the yeast. This may cause the dough to not rise.
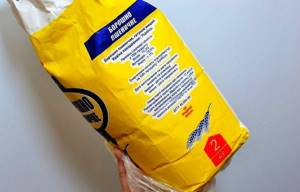
Check the type of flour. All-purpose white flour has low gluten and protein content, so your dough may rise and then fall. This can also happen if your dough is too runny. Some manufacturers add antifungal ingredients to flour to extend its shelf life. Since yeast is also a fungus, these impurities will inhibit its growth. Organic, additive-free, unbleached white bread flour is best for baking a good loaf of white bread. Using heavier flours, such as whole wheat, rye, and other whole grains, will make the loaf heavier and the dough will rise less well, as will finely ground white flour.
Create the perfect rest for rising dough. Do not disturb the dough while it is rising, especially if it is a particularly wet dough. Use the correct container for rising dough. In a bowl that is too large, the dough has no support to rise to the top. Instead, it will spread out and possibly fall off. The small buns on the baking sheet should also be placed quite close to each other to have support.

Check the supplements you are using. Some spices, such as cinnamon, are naturally antifungal. For sweet fruit scones or cinnamon rolls, use instant yeast, otherwise the cinnamon will eventually kill the yeast. Some dried fruits are also coated with antifungal additives as a preservative. Therefore, it is better to take natural organic dried fruits, although it is expensive, it is much better for baking. It is best to add dried fruit at the last moment - after the final proofing.
Don't over-salt the dough.
Salt is an essential element for the development of gluten proteins, which make the dough smooth and elastic. But too much salt will kill the yeast. Add it at the very beginning only in the required amount, and add it to the flour, not to the water. By the way, the opposite problem can also happen: if the yeast is too active, it works faster than you expect. You put the dough to proof, and an hour later you see that the batch has risen too high. Should it be happily sent to the oven? Read about what to do if the dough is too cold on this page.
Main reasons
There are several reasons why the dough does not rise. They are associated with ingredients added to the dough to make it rise and fluffy. It is equally important to know how these products affect the dough and what to do if trouble occurs.
The problem is the soda
Baking soda is an ingredient that is added to the dough to give it fluffiness. If the product is not added to baked goods, it simply will not rise. The problem may also be that they forgot to extinguish the soda with vinegar or citric acid.
The main reason is baking powder
Baking powder is often added to baked goods to help the dough rise. But when the dough doesn't rise, it's important to save the situation. Therefore, the expiration date of the product is initially checked: if it is expired, then there is nothing to be surprised about what happened. You need to buy fresh baking powder or use baking soda slaked with vinegar.
Poor quality flour
Be sure to check the type of flour. For example, flour intended for any purpose is not suitable for baking bread - the dough can rise and immediately fall due to the low gluten and protein content. This can also happen if the dough is made with a high flour to water ratio. Organic flour without additives is most suitable for baking white bread.
The yeast has expired
Be sure to check the expiration date of yeast before using it for baking. It is not surprising if the dough has not risen at all in volume if the expiration date has expired. Therefore, it will be possible to solve the problem only by remaking the dough using fresh yeast.
Yeast shortage
When you plan to bake a lot of goodies, but little yeast was put into the dough, it will definitely not rise. Maintaining the correct proportions is important. Many recipes require using at least 4 g of fresh granulated yeast per 600 ml of liquid.

No sugar in the base
This is an equally common reason why yeast dough does not increase in volume - granulated sugar is important for activating the yeast. When sugar has not been used, you need to prepare yourself for the fact that the dough will remain sticky and will not increase.
Cooking the product
Occasionally, inexperienced housewives make the mistake of putting yeast in hot water or milk. It's not surprising that the dough didn't rise. Any recipe intended to make a fluffy base requires yeast to be placed exclusively in warm water sweetened with sugar.
Excessive amount of fat
If you add a large amount of butter, you may end up with an unsuccessful yeast dough, from which you will not be able to make normal, tasty baked goods. The only way to avoid this problem is to add oil only after the yeast starts to act in the dough.
The dough is frozen
If after an hour it is noticeable that there are no changes in the dough, it has not risen or increased in volume, you need to think about where it stands. In order to get a fluffy yeast base, you need to place it in a large container, cover it well with a cloth that allows air to pass through, and put it in a warm place. You can send the dough to the windowsill where the rays of the sun penetrate or place it near the radiator. Only with the correct kneading and placement of the dough will it be possible to obtain not only fluffy, but also tasty baked goods.
Gymnastic exercises for shoulders
Sometimes the fear of not being able to raise an arm forces one to do gymnastics; the pain in the shoulder is so severe that the patient is ready to do anything to overcome the problem. Fortunately, gymnastic exercises are not the worst “treatment.” The patient’s main task is to provide conditions for regular physical therapy exercises.

Let's look at some basic exercises that will help you eliminate shoulder pain:
Exercise 1
You will need a regular chair. Take a comfortable sitting position with your hands on your waist. In this starting position, begin to rotate your shoulders at a slow pace: first forward, and then back.
For greater effect, it is recommended to perform the exercise first with one shoulder, then with the other. Try to do the exercise for at least 5-10 minutes.
Exercise 2
While sitting on a chair, try to clasp your hands behind your back in a kind of lock. While in this position, pull your arm to the side until you feel slight pain. Then return to the starting position. Perform the exercise for 10-15 minutes, trying to hold for a couple of seconds while stretching.
Perform the exercise slowly, without sudden or fast movements, so as not to injure your shoulders and joints.
Exercise 3
Place the palm of the injured arm on the opposite shoulder, and bring your elbow as close to the chest as possible. Now grab your elbow with your healthy hand and try to lift it up, straightening your arm. Perform the exercise at an average pace without sudden movements.
Be sure to make sure that your elbow does not leave your chest, but glides smoothly over it. At the peak of raising your arm, do not forget to hold for 7-10 seconds, while straining your sore arm. When you return to the starting position, slow down the pace of the exercise and relax all muscle groups so that your arm rests a little.
Five to ten approaches will be enough. Do not overwork your sore arm.
Exercise 4
The starting position remains the same. Move the injured arm to the side, and then bend the elbow at an angle of 90 degrees. In this position, tilt your shoulder towards your chest and return back to the starting position. When you feel slight pain in your arm, relax your muscles and rest for a while.
After that, repeat everything again. The exercise should be performed at least 5 times, but do not neglect breaks, which should be at least 10 seconds
It is very important that all muscle groups rest enough time. Otherwise, you will aggravate the problem even more, rather than prevent the disease.
Now you not only know why your shoulder hurts and your arm cannot rise, but you also have all the necessary information to eliminate such an ailment. Shoulder pain, arm inability to lift, sleep disturbances are reasons to consult a specialist and get to the bottom of the problem.
You must understand that many illnesses are asymptomatic, and therefore pose a special danger. Listen to your body and respond in a timely manner to its slightest attempts to inform you of possible problems!
httpv://www.youtube.com/watch?v=embed/arCkWJ6aShs
The dough does not rise in the bread machine: what to do?
Many housewives bake homemade bread not in the oven, but in a bread machine. But even in this case, sometimes yeast dough does not rise well.
What to do with the dough in a bread machine to increase its germination, and why it does not rise:
- Insufficient fluid. For the dough to rise, it must be elastic and soft. A small amount of water added to the bowl while kneading will help correct the situation.
- It is possible that the lid of the appliance was opened during kneading and warm air escaped.
- Expired yeast or incorrect working conditions (too hot).
In any case, the dough can be revived. To do this, you need to take it out of the bread maker and knead it with your hands, using the raising methods suggested above.
Even if experienced chefs and bakers sometimes encounter situations where yeast dough does not rise, let alone ordinary housewives. Especially for those who are just beginning to master this difficult science. Therefore, every woman needs to know what to do in this situation, how to correct it. And if the dough still hasn’t risen, then what tasty things can you make from it?
Tricks of housewives and bakers
There are also options when everything is done according to the recipe, but the dough still does not rise. Notes from experienced bakers will tell you how to correct the situation. A bowl of warm water can help dough made from dry yeast rise. It is necessary to place a container with a “harmful” composition in it and let it stand there for at least 30 minutes. A bowl of water can be replaced with a preheated oven, but this method requires constant attention so that the dough does not overheat.
Other housewives act differently when the dough does not rise. They know exactly how to correct the situation. Craftsmen add an incomplete tablespoon of vinegar to the dough. It will definitely react and rise. But you shouldn’t put the dough in the oven after adding vinegar, otherwise it will acquire a strong yeast taste and the baked goods will spoil.
When preparing yeast dough, it is worth using a little trick. You need to make the dough in 150 ml of warm (not hot) milk, into which you need to add 1 tablespoon of sugar and the same amount of sifted flour, a packet of yeast comes last. The mixture must be thoroughly mixed and hidden in a warm place, wrapping the container in heated towels. After 15-17 minutes, a foam cap should form in the mixture. It is into this that the remaining ingredients need to be mixed in later. Then the dough will be soft and pleasantly airy. This is exactly how yeast dough is prepared step by step. We hope everything is clear to you.
Most inexperienced housewives are primarily afraid of working with yeast dough. And this is not surprising: it is like alive and senses your mood and atmosphere in the house. Therefore, it is better not to take on it with bad thoughts. And you need to tinker with it more than with any other test. But soft, airy baked goods are worth your time and effort, and the satisfied faces of your family are perhaps the best reward!
Let your mood remain with you, and I will tell you about the main points that you should pay attention to when preparing yeast dough.
First, a little theory.
There are two types of yeast dough: sponge and straight.
Sponge - to prepare it, first a dough is made - a batter made from warm liquid, yeast and half the amount of flour - which must ferment for quite a long time, and only then all the other ingredients are added to it. Products prepared using the sponge method have a larger volume, i.e. the air bubbles in them are larger. The dough is more elastic and not crumbly.
Safe – mixes right away, you just need to wait for it to fit well, i.e. rose.
The main difference here is the following. If we want the dough to be rich - i.e. it contained more eggs, sugar, butter, milk - we make sponge dough. We bake from it kulebyaki, pies, buns, Easter cakes, braids, buns.
Unleavened dough is more suitable for baking pies, buns, pizza, yeast pancakes and pancakes. We also use this dough if we are going to deep fry – for example, donuts.
But in fact, this border is quite arbitrary. Experienced housewives can bake anything using straight dough.
And now the secrets of making yeast dough:
1. The products from which the yeast dough will be prepared must be fresh.
Pay special attention to the choice of yeast. Pay attention to their smell and color, especially pressed ones. They should smell pleasantly of alcohol, and the color of the pressed yeast should not be too dark. Dark color indicates dryness and practically guarantees limp and fluffy dough. There is an easy way to ensure the freshness of the yeast: prepare a small portion of the dough and sprinkle with a layer of flour. After 30 minutes, cracks should appear in it. Otherwise, to avoid risking the entire dough, you will have to discard the yeast.
2. The better quality the flour, the better the dough will be. To do this, first of all, pay attention to the gluten level indicated on the packaging. In premium flour, this indicator should be at least 24%. In addition, the flour should not be stale or underdried, otherwise it may “float”, that is, if you need one amount of flour according to the recipe, then with bad flour you will have to increase this amount and the product will not be airy. The flour should be dry with a fresh taste, a beautiful white-cream color
3. Yeast does not like very hot or, on the contrary, cold ingredients.
Therefore, remove the food from the refrigerator in advance (about an hour in advance). They need to come to room temperature otherwise the dough will rise more slowly.
Milk needs to be heated to a temperature of 30-35 degrees - in such conditions yeast fungi are most active. Instead of milk, you can use water or kefir.
If you add melted butter or margarine to the dough, they should not be hot either.
4. The flour for the dough must first be sifted so that it is enriched with oxygen, which will also increase the quality of the dough.
5. If you want to make the dough more crumbly and soft, add only egg yolks to it. Use egg whites to brush pies before baking. Then they will be covered with a golden brown crust.
6. Butter (or margarine) should be melted a little before adding to the dough. Please note - a little, so the structure of the dough will be better.
7. If you have prepared the dough, then fat, eggs and salt should be added to the flour, and the rest of the products directly into the dough. Then mix everything and knead the dough.
8. Do not overdo it with sugar, otherwise these pies may burn, and the dough will be less fluffy. The same goes for soda and vanillin; if there is too much of them, the product will turn out dark and unpleasantly smelling.
9. In order for the dough to rise well, you need to find a place for it without drafts. Place it in a warm bowl and cover with a towel. A well-proportioned dough should double in volume and have a beautiful surface without a hard crust.
You can put the dough in a warm water bath or even on a large turned on household appliance (TV, for example). Also, modern electric ovens have a special function - the temperature at which the dough is suitable. You can also put the bowl of dough in a drawer or cabinet.
If you make the dough in advance, you can put it in the refrigerator, where it may rise longer.
10. Do not let the dough stand for more than 3 hours, otherwise its quality will deteriorate significantly.
11. When the volume of the dough has doubled, you need to start preparing the pies. Again, make sure that there is no draft in the room where you are working with the dough, otherwise it will form a dry crust.
12. The stiff dough is usually transferred from the bowl in which it was risen to a work surface. It is important to knead the dough well so that it comes away from your hands and knead well in flour.
13. If the recipe calls for raisins or candied fruits, they are added only after the dough has risen and kneaded. When adding raisins to the dough, wash them and dry them thoroughly, and then mix them with flour. Then it will be evenly distributed in the dough.
For the same purpose, mix cocoa powder, cinnamon, cardamom, ground into powder, with a small amount of flour or sugar, and then sift into the dough.
13. After you prepare the dough pieces, be sure to let them rest (15-20 minutes). Otherwise they will not bake well.
14. In an open pie, the fruit filling should be sprinkled with sugar after baking, otherwise all the juice will flow out of the filling; you can also sprinkle starch on the fruit products, then the released juice will not flow.
15. When kneading the dough for the last time, you add to it a potato boiled without salt and rubbed through a fine sieve and 1-2 tbsp. spoons of vegetable oil (unscented), your baked goods will be even more fluffy and will not go stale for a long time.
16. To ensure that yeast dough products rise and bake better, leave some free space around them on the baking sheet. And you can stick large pasta into the dough so that the dough “breathes.”
17. To give the products a beautiful look, they are brushed with egg yolk, egg or milk before putting them in the oven. If you brush the products with beaten egg before baking, they will be shiny and rosy. If pies or other products are moistened with sugar syrup after baking, they will acquire a beautiful shine, and vegetable oil will also give them an aroma.
18. Bake pies over medium heat. Then they will bake evenly, and the filling will not dry out. Typically, products made from both doughs are baked at a temperature of 200-220 degrees; in a gas oven it is better to set it to 180 degrees. Time - from 10-15 minutes for small products to 50 minutes for large ones. But again, it all depends on the oven.
And be sure to preheat the oven, otherwise the top of the pie may fall off.
19. To prevent the dough from burning and drying out during baking, the best way is to place a frying pan or something else with boiling water on the bottom of the oven.
20. To check the baked goods for doneness, press on them. If the dent disappears instantly, the pies are ready.
21. If you have trouble removing the cake from the pan, try using a string.
22. After baking, finished pies must be greased with oil or at least tea, warm water, placed immediately on a dish and covered with a napkin or towel. Otherwise, in the heat of the moment, they will steam and dry out instead of becoming soft.
23. After this, place them on a dish, let them cool, and then store them in an earthenware container with a lid, then they will remain fresh and soft for a long time.
If you decide to change the dough recipe, what awaits you is:
Excess water - the dough is poorly shaped, the products turn out flat, blurry;
Lack of water - the dough does not ferment well, the finished products are hard;
Replacing water with milk or cream - the finished products have a beautiful appearance and their taste improves;
Increasing the amount of fat - the products become more crumbly and tasty and do not go stale for a long time;
Excess salt - the dough does not ferment well, the products acquire a salty taste, the color of the crust is pale;
Insufficient amount of salt - products turn out vague and tasteless;
A large amount of sugar - the surface of the product quickly becomes tinted during baking, and the middle bakes slowly; in addition, the dough does not ferment well; when more than 35% sugar is added, fermentation of the dough stops completely;
Insufficient amount of sugar - the resulting products are pale and not sweet;
Increasing the number of eggs - the products are made more fluffy and tasty;
Replacing eggs with egg yolks - the products are more crumbly and have a beautiful yellow color;
Increasing yeast - fermentation accelerates; Too much yeast gives the products an unpleasant yeasty smell.
How to correct mistakes when preparing dough
If the dough does not ferment and is not suitable, then the dough cooled below 10 degrees must be heated to 30 degrees.
If the dough is too warm, cool it to 30 degrees and add fresh yeast.
The dough may not ferment due to poor quality yeast.
To check the quality of the yeast, prepare a small portion of the dough and sprinkle it with a thin layer of flour. If after 30 minutes no cracks appear in the flour layer, then the quality of the yeast is poor.
Over-salted dough also does not ferment well, it becomes stale, and the products turn out pale and salty in taste. To correct such a dough, you need to knead a new portion without salt and combine it with the salted dough. If, on the contrary, there is not enough salt, you need to dissolve it in a small amount of water and mix it with the dough. The same method can be used if the dough is oversweetened.
And remember that pie dough loves caring and warm hands! If you put your soul into the dough, it will definitely respond in kind and will delight you with a wonderful taste.
Method one: you need to increase the ambient temperature.
Nothing improves yeast better than a warm, humid microclimate - in it they live their yeast life to the fullest.
If you want your dough to rise well, you have to give the yeast what it wants. Fill a deep pan with boiling water and place it on the lowest rack in your oven.
Place the bowl of dough on the middle rack and close the door. Leave your dough in a warm, moist environment for a while and let it rise.
Alternatively, you can boil a cup of water in the microwave and then place the bowl of dough in the microwave along with the water and close the door (without turning the microwave on!).
Some people place the dough on the stove covered with a wet towel. The stove retains heat and a damp towel provides moisture. In this way, yeast dough that does not rise can be made to rise.
Method two: add more yeast
If increasing the temperature and humidity doesn't work and the yeast doesn't activate (you'll know in less than an hour), you can try adding more yeast to the dough.
Please note that your old yeast has failed you and don't use it anymore. Open a new packet of dry granulated yeast, take a teaspoon and mix with a cup (200 ml) of warm water (about 43 deg C) and one tablespoon of sugar.
Let this mixture sit for about 10 minutes until at least 3-4 cm of foam rises.
If it doesn't, you'll have to buy fresher yeast and try again.
After this, add half of the dough (or all of it, depending on the amount of dough) into the bowl with the dough and stir thoroughly. Even if the mixture turns out thinner than you need, don't worry (you'll correct this problem later). Place the bowl with the dough in a warm, damp place and let it rise well (at least an hour at a temperature of at least 38 degrees C).
Method three: add flour to a new dough as needed
Prepare a new dough as described above and add flour to it. The ratio is 60% flour and 40% liquid (this is the best ratio for bread dough).
Knead the active yeast mixture into the dough and let it rise in a warm, moist place.
The way it rises can also be an indication of yeast activity. This method makes the yeast very active, so when a new dough with flour is added to the dough, it should rise perfectly.
If the yeast dough still does not rise, this will indicate that the yeast is not to blame for anything and, apparently, there is another problem.
Method four: add more flour to the dough
Check the dough to see if it is sticky to the touch. If so, it's probably because your dough isn't kneaded well.
Knead it on the counter with additional flour until the consistency is smooth and silky to the touch and the dough no longer sticks to your hands.
Let it rest and rise in a warm, moist environment. Repeat if necessary. You may need to leave it warm overnight before baking.
Method five: knead the dough properly
Bakers use the real art of kneading dough when baking bread. If you kneaded it too little, the yeast simply did not spread well into the dough. Therefore, this dough will be too weak to rise.
Knead the dough for at least 10-15 minutes, but remember that kneading it too long can make the dough so tough that it won't rise. The dough should be smooth and elastic, but not stiff like a rubber ball or soft like a runny dough.
If your yeast dough is not rising, it is possible that increasing the heat and humidity will solve the problem without further effort. But knowing about the possibility of such a problem, try to take some steps in advance.
Check your yeast type. Some sourdough cultures grow very slowly and may take several hours for the dough to rise.
Make sure the yeast has not expired. Both fresh and dry yeast are best stored in the freezer. At the same time, both fresh and dry yeast have an expiration date; after its expiration, they will act weakly or not be suitable at all.
Before diluting the dough and kneading the yeast dough, check the temperature and humidity in your kitchen.
The ideal microclimate is around 38 degrees. C at high humidity.
If your readings are too different from these, it's not good for the yeast. This may cause the dough to not rise.
Check the type of flour. All-purpose white flour has low gluten and protein content, so your dough may rise and then fall.
This can also happen if your dough is too runny. Some manufacturers add antifungal ingredients to flour to extend its shelf life. Since yeast is also a fungus, these impurities will inhibit its growth.
Organic, additive-free, unbleached white bread flour is best for baking a good loaf of white bread. Using heavier flours, such as whole wheat, rye, and other whole grains, will make the loaf heavier and will not rise as well as finely ground white flour.
Create the perfect rest for rising dough. Do not disturb the dough while it is rising, especially if it is a particularly wet dough.
Use the correct container for rising dough. In a bowl that is too large, the dough has no support to rise to the top. Instead, it will spread out and possibly fall off.
The small buns on the baking sheet should also be placed quite close to each other to have support.
Check the supplements you are using. Some spices, such as cinnamon, are naturally antifungal. For sweet fruit scones or cinnamon rolls, use instant yeast, otherwise the cinnamon will eventually kill the yeast.
Some dried fruits are also coated with antifungal additives as a preservative. Therefore, it is better to take natural organic dried fruits, although it is expensive, it is much better for baking. It is best to add dried fruit at the last moment - after the final proofing.
Don't over-salt the dough.
Salt is an essential element for the development of gluten proteins, which make the dough smooth and elastic.
But too much salt will kill the yeast. Add it at the very beginning only in the required amount, and add it to the flour, not to the water.
In order for the dough to rise, baker's yeast is added to it.
Yeasts are single-celled fungi. At low temperatures (in the refrigerator) they fall into anabiosis - a state of temporary almost complete cessation of vital activity. But if they are placed in an environment that is optimal for them, the life processes in them are activated, and they begin to reproduce. For this they need: a) warmth, b) water, c) food, d) oxygen. Saccharomyces cerevisiae
)
There is always moisture in the dough; sugar or honey is placed in it as food for the yeast, and the dishes with the dough are placed in a warm place. And then the yeast in the dough “comes to life”. During their life, sugar is fermented, and as a result of fermentation, alcohol and carbon dioxide are formed. We would like to reassure you right away: there is no alcohol in the finished baked goods; it evaporates during the baking process. But carbon dioxide is what causes dough to rise.
Bubbles of carbon dioxide inflate the dough, cavities are formed in it - pores, which make the dough loose.
Carbon dioxide is light; like any other gas, it tends to escape, but gluten, a substance that forms when flour starch comes into contact with water, prevents it from doing so. Viscous and durable, gluten envelops carbon dioxide bubbles and does not let them out. And the more gas is formed, the more the dough rises in volume.
The dough "ran away"
When a dough product is placed in the oven, the gluten dries out from the heat, its elasticity decreases - it becomes loose (and on the surface, where the heat is the strongest, it turns into a fragrant crust). The walls of the sacs that held carbon dioxide captive burst and the gas is released. Each hole in the bread pulp is a trace left by a bubble of carbon dioxide.
In some types of yeast-free dough, to prevent it from becoming too dense, a chemical reaction is used: a solution of acetic (or citric) acid and soda are added to it. Interacting with each other, they also form carbon dioxide. But, unlike yeast, which works continuously and multiplies, releasing new portions of carbon dioxide, acid and soda produce a limited amount of carbon dioxide, and housewives try to knead such dough and put it in the oven as quickly as possible. But still, no yeast-free dough turns out as fluffy and airy, tasty and aromatic as yeast dough.
By the way…
- With an excess of carbon dioxide, the fermentation process slows down. To fix this, knead the dough and mix it carefully. In this case, excess carbon dioxide leaves the dough, and in addition, it is enriched with oxygen. All this stimulates the growth of yeast fungi.
- The optimal temperature for alcoholic fermentation of yeast is 30-33°C, for reproduction - 25-28°C. At temperatures of 45-50°C and above, yeast cells die.
- Frozen yeast retains its properties if it is slowly thawed at a temperature of 6-8°C.
Method one: you need to increase the ambient temperature. Nothing improves yeast better than a warm, humid microclimate - in it they live their yeast life to the fullest. If you want your dough to rise well, you have to give the yeast what it wants. Fill a deep pan with boiling water and place it on the lowest rack in your oven. Place the bowl of dough on the middle rack and close the door. Leave your dough in a warm, moist environment for a while and let it rise. Alternatively, you can boil a cup of water in the microwave and then place the bowl of dough in the microwave along with the water and close the door (without turning the microwave on!). Some people place the dough on the stove covered with a wet towel. The stove retains heat and a damp towel provides moisture. In this way, yeast dough that does not rise can be made to rise.
Method two: add more yeast
If increasing the temperature and humidity doesn't work and the yeast doesn't activate (you'll know in less than an hour), you can try adding more yeast to the dough. Please note that your old yeast has failed you and don't use it anymore. Open a new packet of dry granulated yeast, take a teaspoon and mix with a cup (200 ml) of warm water (about 43 deg C) and one tablespoon of sugar. Let this mixture sit for about 10 minutes until at least 3-4 cm of foam rises. If it doesn't, you'll have to buy fresher yeast and try again. After this, add half of the dough (or all of it, depending on the amount of dough) into the bowl with the dough and stir thoroughly. Even if the mixture turns out thinner than you need, don't worry (you'll correct this problem later). Place the bowl with the dough in a warm, damp place and let it rise well (at least an hour at a temperature of at least 38 degrees C).
Method three: add flour to a new dough as needed
Prepare a new dough as described above and add flour to it. The ratio is 60% flour and 40% liquid (this is the best ratio for bread dough). Knead the active yeast mixture into the dough and let it rise in a warm, moist place. The way it rises can also be an indication of yeast activity. This method makes the yeast very active, so when a new dough with flour is added to the dough, it should rise perfectly. If the yeast dough still does not rise, this will indicate that the yeast is not to blame for anything and, apparently, there is another problem.
Method four: add more flour to the dough
Check the dough to see if it is sticky to the touch. If so, it's probably because your dough isn't kneaded well. Knead it on the counter with additional flour until the consistency is smooth and silky to the touch and the dough no longer sticks to your hands. Let it rest and rise in a warm, moist environment. Repeat if necessary. You may need to leave it warm overnight before baking.
Historical facts about shoulder disease.
In 1867, a short note written by the French anatomist and surgeon Jean-François Jarjavet appeared in the scientific literature.
He talked about how, after injuries to the shoulder, pathological changes may appear in the subdeltoid mucous bursa (bursa of the shoulder joint). And five years later, the French surgeon Simon-Emmanuel Dupleix proposed considering these changes as an independent disease and coined the term for it - glenohumeral periarthritis.
However, he believed that this illness could only arise as a result of injuries to the shoulder girdle. However, Dupleix later admitted that inflammation of the tendons of the shoulder can develop under the influence of other causes.
It should be noted that some doctors did not agree that glenohumeral periarthritis is an independent disease. And they considered it a variety of other ailments. Thus, New York surgeon William Colley categorically argued that inflammation in the shoulder joint bursa is a form of bursitis. And Boston physician Ernest Amory Codman suggested that glenohumeral periarthritis was damage to the periosteal muscle.
Be that as it may, modern doctors quite clearly understand the essence and causes of glenohumeral periarthritis. And most importantly, we learned how to treat it successfully. If, of course, patients see a doctor on time and do not progress the disease to the point of becoming disabled.