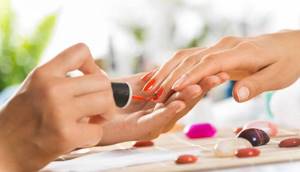
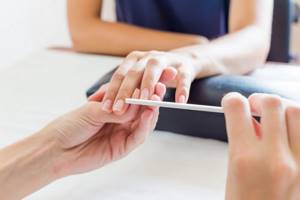
The basis of any manicure is caring for the nails and skin of the hands. Such a classic procedure as a European manicure allows you to put them in order. In this material we will talk about the distinctive features of such a manicure, the tools that will be required in the process, and also give instructions that will help you not get confused in the sequence of actions when you decide to get a manicure in the European style.
© iStock
Without preliminary preparation, in general, there is no point in painting your nails with varnish. If the shape is not corrected, the cuticle has grown into a hole, and the nail plate is surrounded by hangnails, the manicure will never look beautiful, no matter what fashionable varnish you choose. On the contrary, color will only emphasize these imperfections, and as a result your hands will take on an unkempt appearance.
- To be able to correct this, it makes sense to master the technique of European (or unedged) manicure - this knowledge will always be relevant. But the first thing you need to do is find out what it is and what its features are.
© es.studio.perm
The origin of unedged manicure
European manicure has many millions of fans around the world. This technique is loved not only by girls, but also by men who are accustomed to monitoring the condition of their hands and nails. The unedged technique first appeared in France, which is why European manicure is sometimes called French.
European manicure is suitable for everyone, without exception, and for people who have close capillaries or thin skin on their hands, experts recommend using only French manicure.
Miss Marlene is the woman thanks to whom the technology of performing European manicure began to gain popularity. Since the first half of the twentieth century, it became known to a small circle of people, and several decades ago this type of manicure began to gain increasing popularity, first in Western countries, and a little later throughout the planet.
Step by step description
Performing a European manicure does not take much time. Especially if you choose the dry method:
- Before performing the procedure, you need to remove the old coating from your nails. It must be removed very carefully. If it is a regular varnish, it will take a little time. If your nails have previously been coated with shellac, you will have to be patient. First you need to soak it. This will take 10-15 minutes.
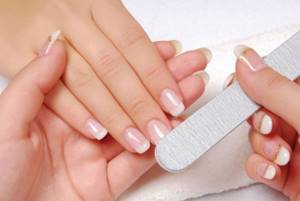
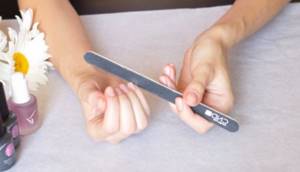
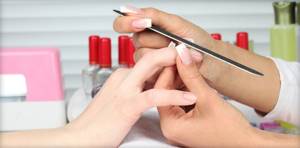
- Adjust the shape of your nails. To do this, use files with different abrasiveness levels - from small to larger and, accordingly, coarse. If you need to greatly reduce the length, you can use scissors. It is worth saying that filing is a rather traumatic procedure for nails. That's why you need to act very carefully. The file should be moved in one direction so that the nails do not peel off in the future. It is also important to remember that they must be dry. You cannot file wet nails.
- Polishing. To achieve a beautiful shine, it is recommended to use a buff. They are passed along the nail plate. You need to move in the same direction. Fine dust is removed with a brush.
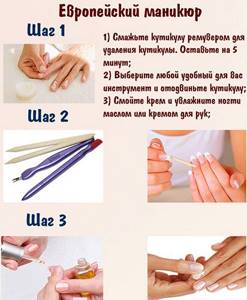
- Cuticle treatment. To soften it, carefully apply a special product. Usually it contains useful substances that soften the effect of aggressive components. It is also recommended to apply a special oil to the side rollers and the skin around the cuticle before applying the composition. It will protect the skin from harmful effects. All this must be chosen in advance and done especially carefully. High-quality cuticle products usually contain solvent components (for example, fruit acids) and caring ingredients (usually nourishing oils).
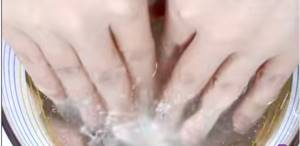
- When performing a wet manicure, take a steaming bath; when doing a dry manicure, skip this step. Craftsmen note that when choosing the second method, the applied varnish coating will last longer. If you choose a wet manicure option, you need to prepare a bath with warm water, where you add a drug that softens the cuticle. After such exposure, the fingers will be ready for further processing.
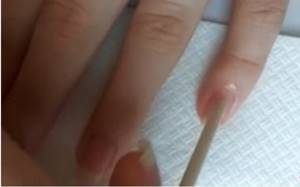
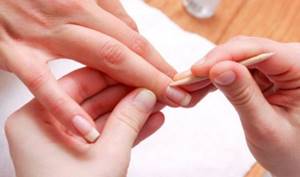
- After keeping the softener for the time specified by the manufacturer, the cuticle is carefully removed with an orange stick. You can use a pusher instead. A metal tool is relevant when carrying out the first European manicure procedures. Over time, when the cuticle becomes thinner, a disposable orange stick will be enough.
- After treatment, the skin of the hands is lubricated with a nourishing cream, while simultaneously performing a massage. The nail folds and cuticles can be treated with oil to soften and heal irritated areas.
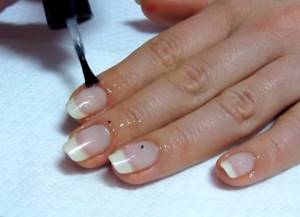
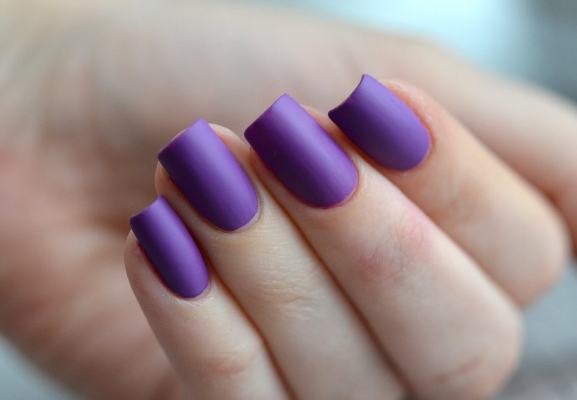
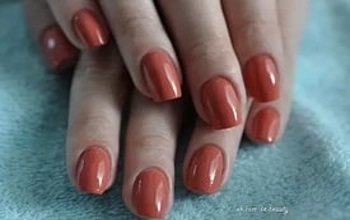
- An unedged European manicure is completed by applying decorative or medicinal varnish to the nail plates. These products give an attractive look to women's hands and make them truly well-groomed.
A European manicure can take about half an hour. Agree, this is not so much to get an excellent result.
Types of European manicure
There are several varieties of European unedged manicure; all the differences come down to the type of softening of the cuticle and skin of the hands. Beauty salons offer four methods:
- Wet - to soften the skin around the nail, use a warm bath with the addition of a special lotion, which nourishes and softens the skin. You need to constantly add hot water to the bath so that the temperature is forty degrees.
- Hot - slightly similar to the first type, but the procedure uses a cream or lotion without water. For such a procedure, it is necessary to have a device that will maintain a constant temperature of the product. The temperature should be no more than 50 degrees, keep your fingertips in the bath for about ten minutes. After completing the procedure, the remaining lotion should be rubbed into the nail plates and skin of the hands. This type is suitable for people with fragile nails and wounds on the fingertips.
- Dry is an excellent option for creating a quick manicure. To remove dead skin cells and soften the skin, a special product is first applied. It may look like a cream or gel. The product is applied in small portions to each nail, then distributed throughout the skin around the nail. For damaged nails, this method is not beneficial, since it does not provide nutritional procedures.
- Brazilian manicure perfectly nourishes the skin around the nail, but also rejuvenates the skin of the hands. SPA manicure involves the use of ceramides, nourishing and aromatic oils, as well as hand massage after completion of the procedure. For this type of manicure, gloves are put on your hands, which contain all the necessary products. These gloves are sold in sets. Only after the product is absorbed into the skin of the hands are the gloves removed, then you can begin to process the nails and push back the cuticles.
How much does a European manicure and other types of procedures cost in beauty salons?
It is clear that nail treatment costs differently everywhere. Its price will depend on a number of conditions, such as:
- type;
- quality of service provided;
- the price of materials used in the manicure process;
- cost of specialist work;
- execution speed;
- depreciation of equipment and tools;
- professionalism of the master;
- fame of the nail studio.
You also need to remember about additional materials that the salon purchases and then includes them in the final price of the service:
- Softening agents (for maceration) are substances to be added to the bath during soaking. They are used in traditional types of skincare procedures.
- Disinfectants – for disinfecting the hands of a specialist and a client.
- Caring and protecting oil for the cuticle and nail plate - it is applied at the end of the procedure.
- A softening agent for the skin rim at the base of the nail - makes it easier to work with this part of the nail plate.
These costs are taken into account when setting the final cost of the procedure in any salon in our country.
We will try to determine the pricing policy for different types of nail services. For example, on the SPR website (directory of enterprises of the Central Federal District of Russia) you can find out the cost of services, including manicure, by region (regional centers such as Voronezh, Yaroslavl, Ryazan, Vladimir, Tver, Tula, Orel, Tambov, Obninsk are included , Bryansk, Murom, Lipetsk, etc.).
In particular, a ladies' classic manicure will cost from 140 to 990 rubles (with an average price of 565 rubles - 123 options). Hardware manicure has a price from 210 to 1,000 rubles (with an average price of 605 rubles - 47 options).
The extension procedure for our ladies will cost more:
- acrylic extensions – from 800 to 2,000 rubles (average price – 1,400 rubles, 36 offers);
- gel on tips – from 750 to 2,000 rubles (average price – 1,375 rubles, 50 offers);
- gel for forms – from 850 to 2,500 rubles (average price – 1,675 rubles, 70 offers);
- Gel polish coating for a European manicure is less expensive than the extension procedure - from 300 to 1,270 rubles with an average price of 785 rubles (102 offers).
- Japanese manicure – from 350 to 1,200 rubles, average price – 775 rubles (32 offers).
Nail studios in the northern capital keep prices for services in the following range:
- manicure (price varies depending on the type) – up to 400 rubles;
- extension (the cost also depends on the type) - from 1,300 to 3,000 rubles;
- nail decor (depending on the price of the material) - from 50 to 500 rubles.
Only until August 7
Win an IPhone 12, a YEAR pass or a bunch of other gifts!

In Moscow, shellac in its various forms is in constant demand. In addition to the usual, including European manicure for ladies, there is also a manicure for men and even for children. Of course, for children under 8 years old only classic shellac is made, the price of which is three hundred rubles. The male procedure is slightly more expensive than the female one - about 100–200 rubles (depending on the type).
Here are the prices for services in Moscow:
- classic – 400–450 rubles;
- European – 500–600 rubles;
- hardware – 650–750 rubles;
- Japanese – from 1,200 rubles.
In nail studios in Yekaterinburg, getting a manicure is cheaper (prices in rubles):
- decor – 200;
- French – 300;
- mirror – 300;
- biogel – from 1,500 to 2,000;
- shellac - from 1,200 to 1,700.
Thus, the prices are quite affordable; the distinguishing feature of expensive types is their durability: with this coating, a European manicure can last from a couple of weeks to a whole month. At the same time, your nails do not split or break off, they look neat and aesthetically pleasing, almost perfect. During the procedures, in addition to chemical materials, natural ones are also used, so your own nails become stronger and gain additional protection from the influence of harmful external factors. A master in the studio will make nails of any shape and extend them to the desired length, which is not easy to do at home. Although in fact, a European manicure can be done independently.
Professional unedged manicure
There are a large number of beauty salons, but despite this, the technique of performing European manicure is practically the same.
Technology:
- Initially, the master asks the client the desired method of softening the cuticle; a remover is often used.
- The master applies a disinfectant to his hands and the client’s hands.
- Using a cotton pad and without acetone liquid, remove the old coating from each nail.
- Using various files, the shape of the nail plate is corrected. If the nails are too long, at the client's request, they are trimmed with scissors. Filing a large section of the nail plate can lead to delamination.
- Next, a cuticle softening agent is applied to the cuticle. This occurs in the case of a dry type. The remover remains on the skin around the nail for two minutes, during which time the dead skin cells are broken down.
- If another technique was chosen, the master prepares a bath with a special product or puts gloves on the client. The procedure lasts about ten minutes.
- Use an orange stick or pumice to remove the cuticle. Pumice is used when the cuticle is thick.
- The remaining droplets of product and skin are wiped off with a damp towel.
- Apply the oil to the skin around the nails.
- Using massage movements, a nourishing cream is rubbed into the skin of the client’s hands.
- Finally, the specialist adds shine to the nails using a polisher.
People with thin cuticles can see results after the first application of a European manicure.
Technology for doing it at home
The technology of the presented untrimmed technique is not complicated, however, to obtain the maximum effect, the following step-by-step actions must be strictly followed:
- First, you need to thoroughly wash your hands and treat them with antiseptic agents. Tools must be disinfected.
- If pumice is used during the procedure, it should be slightly moistened, which will make the stone softer and not injure the tissue adjacent to the nail plate.
- Initially, you will need to correct the shape and length of your nails using a special file, holding it at an angle of 90° while working. The best option would be a glass tool that will not cause damage to the skin and prevent cracks or splitting of the nails. The file should be directed in one direction. To prevent the plates from peeling off later, manicurists recommend giving your nails a square or oval shape.
- After this, you can begin steaming the skin of your hands using fragrances and softening compositions. It would be a good idea to pre-treat your fingers with a scrub to soften the skin, and at the same time remove small burrs.
- If you don’t have any special products at hand, you can make a solution from 3 liters of purified water, 10–12 drops of base oil, 5–6 slices of lemon, 2 tbsp. l. sea salt.
- At the next stage, you need to blot your fingers with a towel or disposable paper napkins, then you need to apply a special softening agent (remover) to the area of the cuticle and surrounding tissue. Its duration of action is indicated by the manufacturer on the packaging jar.
- After this, use an orange stick to carefully, without pressing hard on the plate, push the cuticle to the base of the nail root.
- Now you need to treat the vacated bed with pumice. This should be done with gentle movements, directing the stone in one direction, as if erasing some inscription with an eraser. If you use cream for such purposes, it should be applied to the skin and nails in a circular manner.
- After the manipulations, you need to remove the remaining cosmetic product with a napkin and apply a softening cream to your hands with massage movements.
- If you are going to cover your nails with colored varnish, you need to degrease the plates with a primer, and before applying the paint, use a pre-purchased base, as well as a top coat.
European manicure is a universal technique, so the presented procedure is fully suitable for both the fairer sex and the stronger half of humanity.
Performing a European manicure at home
If you don’t have time to go to salons, or you need to slightly correct the shape of the nail plate before applying a new coating, you can master the technique of performing a European manicure at home. Let's see how to do this correctly below.
Tools
Before you start treating your nails, you should purchase a certain list of tools and products. The list is not very large, the tools can be used repeatedly, so the monetary costs will be one-time.
Inventory list:
- file;
- buff whose abrasiveness is from 180 to 240 grit;
- soft towel;
- remover;
- nutritional product with vitamins;
- special coating for restoration;
- deep bowl;
- liquid for removing previous varnish;
- a stick for removing cuticles, it is better to use an orange one.
Types of removers
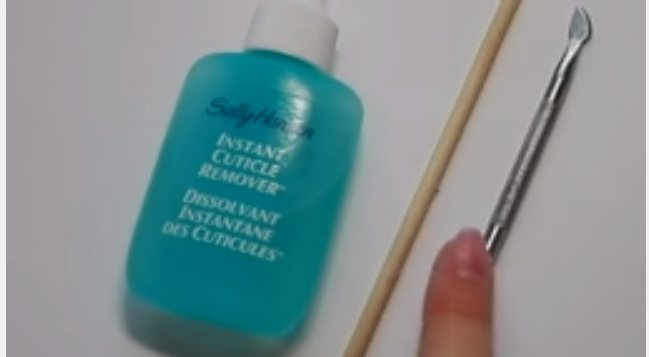
There are a large number of different gels, varnishes and liquids for removing cuticles. Not only the quality of cuticle removal, but also the health of the nail plate depends on the right choice.
The gel is best suited for home use; due to its thick structure, it does not spread, it is easy to use and apply to the skin.
There are three main types of removers, differing in composition:
- Acid gel – used in salons, quickly softens and removes rough skin. The composition contains aggressive components that, if used incorrectly, can damage the skin on the fingers.
- Alkaline - contains soft components, can be used at home. The main disadvantage is its weak effect; the gel must remain on the skin for more than twenty minutes.
- Fruit - the composition of such gels includes acid isolated from fruits. They quickly remove rough skin, while filling the nails with vitamins A and E. Such gels are great for use at home.
The most popular products for treating the dermis are gels from such manufacturers as: Severina, Belweder, Kalyon, CND Cuticle Away, Sally Hansen.
European manicure kits
There are special manicure kits on store shelves and on the Internet. These sets contain all the necessary tools and products that will help you quickly do a manicure. The advantages of the kits are the price, as well as time savings. Once you buy a set, you won’t have to waste time shopping around looking for the right materials. The kits are divided by name, price and number of tools.
| Name | road | home | express | universal |
| Laser file | Yes | Yes | Yes | Yes, 547 and 966. |
| Cuticle remover pencil | Yes | No | Yes | Yes |
| Cuticle gel | No | No | No | Yes |
| Derma removal scrub | No | Yes | No | No |
| oil | No | Yes | Yes | Yes |
| Buff, double-sided | No | Yes | Yes | Yes |
| Laser grater | No | No | No | Yes |
| Orange sticks | No | Yes | No | Yes |
| Price, rubles | 560 | 989 | 995 | 2570 |
The table shows the main sets; other names with modified configurations may also be on sale. For independent use, a “home” kit is best suited.
Video
In the video tutorial you can learn how to do a European manicure, as well as the secrets of this technique.
Step-by-step instruction
After purchasing the tools and choosing a good gel to remove dead skin cells, you should proceed directly to the manicure.
Steps:
- The first step is cleansing. First you need to wash your hands and remove the old coating, if any.
- The second step is giving shape. Next, shape your nails and file off the side ridges using a laser or regular file. The nails are filed from the corner to the center, be sure to stick to one direction. To give a more elongated shape, the nail does not need to be filed too much at the corners.
- The third step is processing the cuticle. Under no circumstances should cuticles be removed with a file. In order to treat this area, you need to apply a special cuticle product. After 4–5 minutes, the product is removed with a napkin, and the cuticle itself is pushed back using an orange stick. Next, wash your hands and wipe dry.
- The fourth step is adding shine. Buff your nails if necessary with a file or buff.
- The fifth step is completion. As a finishing touch, the nails are coated with a special oil that protects against the formation of hangnails. Handles are treated with cream, and a pencil is applied to the cuticle.
Before the third step, if you have time and desire, you can steam your hands in warm water with a few drops of lemon juice or with the addition of a softening gel.
What you need for a manicure
European manicure is, first of all, equipping the home procedure with special accessories and required products.
The kit for the upcoming session should include the following set of tools and related components:
- Hand towel. This attribute will bring maximum benefit if it is made from natural cotton fabric and has excellent hygroscopicity (the ability to give up and absorb moisture) of the fiber. Disposable paper napkins are also suitable for these purposes; although they are consumed in increased quantities, they are recognized as being as hygienic as possible.
- Water reservoir. The container should be chosen in such a way that your hand can easily fit into it.
- Cotton pads/swabs, as well as nail polish remover. The choice of the necessary liquid compositions (with or without ammonia) depends on the specific type of coating - with regular or gel polish.
- Orange sticks. This item, made from the tree of the same name, has antiseptic properties and is intended for one-time use. Each stick is made sharp on one side, designed to clean the space under the nail plates, and beveled on the other, to remove the cuticle after it has softened.
- (a manicure spatula made in the shape of a hatchet or spear) or a scraper will serve similar purposes instead of orange sticks Which tool to give preference needs to be decided individually. High-quality pushers, made of medical steel, do not slip in the hand during operation, but require careful handling, since sharp blades can damage the nail plate. Plastic varieties of such devices are considered short-lived, and therefore are not popular with manicurists. At home, at first it is still safer to use wooden objects.
- File or polishing buff . This accessory, most often made in the shape of a polyhedron, is covered with a special natural or artificial material with a high degree of abrasiveness (hardness). This tool is designed to prepare the nail for applying varnish - grinding and smoothing out existing irregularities in the plate. You should not overuse the file; using it 1-2 times a month is quite enough.
- Cuticle oil. You can purchase a similar composition at the pharmacy, giving preference to such saturated substances as, for example, peach, tea tree product, shea, and other components. The product is used at the final stage to remove the cuticle. When choosing removers or keratolics, it is recommended to pay attention to components that contain: vitamin E, lactic and fruit acids.
- Base. The substance is represented by a thick rubber mass, which serves to level the plate before it is directly painted with gel polish, improves adhesive (“sticking”) abilities with the nail, and serves as a prevention of chipping.
- Primer. The role of this component lies in the translation of the term from English and means the word “primer”. The product performs a function almost similar to the base, but has fundamental differences - the substance does not create an independent layer, is intended for degreasing and drying the nail plate, acts as a kind of adhesive tape, providing “adhesion” between the artificial material and the nail. An updated version of a slightly soft-touch nail coating with a translucent satin effect is a matte or glossy top coat.
- Pumice. This is a universal tool in the unedged technique, created from natural material. It is advisable to choose a product with rounded ends and small cells.

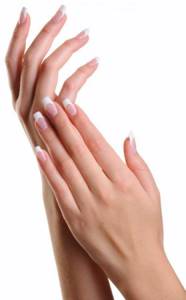
European manicure means well-groomed hands with soft, velvety skin and perfectly manicured nails. At the final stage, you should definitely use a high-quality hand cream.
This standard product, necessary to smooth out the feeling of dry skin, performs another important function - it acts as an epidermal (lipid) barrier, effectively solving many skin problems.
Combined manicure
People with thick skin, hangnails and large cuticle growths will not be able to immediately switch to the unedged look. For such cases, masters offer to undergo a combined manicure procedure, which is selected individually for each client. There are two types of European combined manicure, one is performed using scissors and nippers, the other requires a special apparatus.
Edged
European edged manicure can be performed either independently or using the services of a specialist. This look is especially suitable for men and women with rough skin and large ridges of skin at the edges of the nails. Before you begin the trimming method, the nail plate should be given the desired shape.
Next, depending on the dryness and condition of the dermis on the hands, the specialist selects the drugs that will be included in the bath. Baths can be done with strengthening, healing and softening agents. A special softening agent is applied to the cuticle, then the fingertips are steamed in water for several minutes. When the skin has steamed, use a spatula to remove the dead part of the cuticle. Next, the hangnails that could not be removed with a cotton pad are cut off with nippers; no further cutting tools are used.
Hardware
Hardware manicure techniques are performed without the use of baths and other liquids. The nails are first filed, then using a special machine with small attachments they begin to process the cuticle. The device has several attachments that differ in thickness and abrasiveness.
Purpose of cutters:
- A wide nozzle is used to process the side walls and raise the cuticle.
- A fissure attachment is used for smoothing.
- The nail plate is polished using a carundum cutter.
- A cutter resembling a bullet is needed for rough skin and deep cleaning.
- In order to smooth the cuticle and give it a beautiful look, a spherical cutter is used.
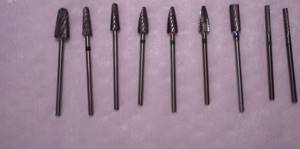
When using the device, the attachments should lie on the nail; you should move from the center, first in one direction, then in the other. Do not press on the sharp nozzle; do not place it deep under the skin, so as not to cause harm.
Tools and materials
Not a single hand care procedure is complete without the use of auxiliary products. European manicure is no exception. It is noteworthy that to perform it you need a minimum of tools. More attention is paid here to the use of high-quality cosmetics.
Here's what you'll need:
- a product that softens the cuticle;
- pusher (it can be replaced with a wooden stick);
- nailfile;
- buff for polishing;
- nutritious cream;
- oil.
If there are burrs, you will have to use tweezers to remove them.
It’s also worth saying a few words about the choice of files. Since European manicure is performed on natural nails, do not choose a tool that is too hard. A universal choice can be a saw-bar, with edges of different abrasiveness. However, such a tool is not convenient for everyone.
Differences from other types of manicure
Let's summarize how classic manicure differs from the European look. The main difference between French manicure and other techniques is its safety. The skin is not harmed, it is not cut with sharp instruments, so there are no bruises or small cracks.
Thanks to the European style, the risk of getting a disease is minimized, since infections practically do not penetrate into intact skin. Cuticle softeners contain ingredients that slow down the growth of the cuticle, and in the case of the classic technique, the cuticle begins to grow faster and becomes stiffer.
FAQ
How can I switch to an unedged manicure?
If you have thick skin and tight cuticles, then this type of treatment simply may not be suitable for you, as it will not give the desired result. In reality, to switch from edged to unedged, you need five to six visits to the specialist. Constant careful nail care is also necessary: softening the cuticle, treating with oils and agents that stop its growth. As you can see, even with thin skin and cuticles, it will not be easy to give up scissors.
Is it possible to do a European manicure yourself?
This look doesn't seem difficult because no scissors are used. But, as stated above, the difficulty lies in preparing the nails and cuticles for a permanent European manicure. It is better to entrust the implementation of the unedged method to a master, at least for the first transition time.
Is an edged manicure worth all this trouble?
Of course it's worth it. It’s not even a matter of the illusory danger of all kinds of infections: if you use the services of a highly qualified specialist, then there is no danger. An unedged manicure is good because it is painless and requires you to constantly keep your hands in perfect condition.
Pros and cons of European manicure
As we have already said, this manicure is the safest. By doing a European manicure, you will never get a terrible disease, and also protect your skin from cracks. This manicure technique takes little time and is perfect for women with small children. Unedged manicure is quite economical, because the set includes only the most inexpensive items. Thanks to French manicure, you will no longer have to experience discomfort after unsuccessfully trimming the skin.
European manicure is not suitable for women and men with thick cuticles . More precisely, it is still possible to switch to it, but it requires a lot of time and effort. Moreover, unedged manicure requires more care.
Whatever type of manicure you choose, remember that nails should always be well-groomed, because hands are the calling card of every woman. They are the ones who attract the attention of others and can become a powerful argument and a fundamental factor that will form the first impression of you.
Pros and cons of the European type of manicure
The undeniable advantages of the procedure include the following theses:
- the risk of infection and injury to the nail or skin is minimal;
- due to the gentle impact, any unpleasant sensations are eliminated during the process;
- this type of manicure is possible even for those with thin skin with closely spaced blood vessels;
- With the constant implementation of such an event, the growth of the cuticle slows down somewhat, and the hands remain well-groomed and neat for a longer time.
Unedged manicure, although considered the most preferable from a safety point of view, also has its negative sides, including:
- not suitable for severely neglected nails;
- if there are unkempt nails during the first procedure, they will acquire an ideal appearance only after several sessions, and not at one time;
- when using a cuticle remover, an allergic reaction to the composition may develop;
- European manicure is not suitable for those with extended nails.
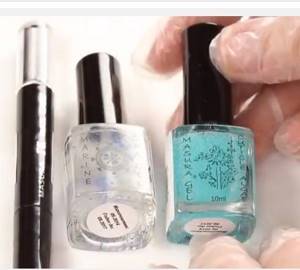
The process of creating a manicure
- Applying base coat. Apply base coat. This stage is very important, because this coating protects, nourishes and hides all the unevenness of the nail;
- Degreasing. Nails should be degreased so that the polish lasts 2-3 times longer;
- Applying varnish. When applying, try not to go beyond the edges of the nail. However, if this happens, then use a cotton swab dipped in the solution to remove excess coating;
- Apply top coat. This polish is just as important as the base coat.
Types of European manicure
The technique of performing a European manicure can begin in three ways, each of which has its own characteristics.
- Dry European manicure speaks for itself. The cuticle is treated with a softening and removing agent without prior soaking. Therefore, dry manicure is not recommended for brittle and injured nails. The procedure does not take much time and can be performed not only at home, but also, for example, on the road. Take note: after dry treatment, nail polish lasts longer! This is due to the fact that when steamed, the nail plate becomes flat, and after drying, it returns to its original shape, which is why the coating cracks faster.
- The wet version of the European manicure requires mandatory softening and moisturizing of the cuticle in an aqueous environment. Special lotions and oils are added to the hand bath.
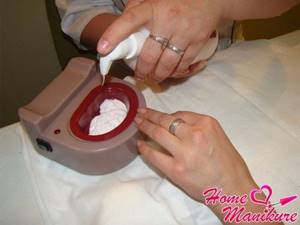
- Hot manicure is recommended when working with injured cuticles, brittle and dry nails. The skin is steamed in a lotion (cream) heated to a temperature of 50°C. For these purposes, we recommend that you purchase an electric bath, as in the photo.
This will be needed
Tools you will need:
- Towel (you can also use a napkin);
- A product designed to remove cuticles;
- A special stick made of pink (orange) wood;
- Various nail files;
- Restorative agent;
- Base varnish and fixer (top coat);
- Colored varnish (use if desired).
Once everything you need is in front of you, you can begin the preparatory part.
Nutrition of nails
If the nail bed is very weak, then it is better to postpone the manicure.
Regenerating oil should be applied to the skin around the nail. The product can be replaced with a special varnish for slow cuticle growth. After application, the skin should be massaged so that the product is better absorbed.
Don’t forget to clean your workplace and disinfect your instruments after the procedure!
Before performing a manicure, you should carefully examine the condition of your nails. If there are no defects, then you can proceed to the European manicure.
Preparing for a manicure
Preparation begins with choosing the shape of the nails. It should be understood that owners of long nails are better off choosing a square shape. She will visually shorten her fingers. For any other type of fingers, you can choose the classic oval shape. Pointed nails are completely unsuitable for everyday wear.
Preparation includes:
- Varnish selection;
- Removing old varnish. To do this, soak a cotton pad in nail polish remover solution and press it onto the nail for a few seconds. During this time, the varnish coating will lose its adhesion to the nail, which will make the procedure more comfortable;
- Giving the desired shape. To do this, you should use various nail files;
- Cuticle removal. If it is rough, then it can be softened with a special solution designed to soften the cuticle.
The preparation is complete and now it’s time to proceed directly to the creation stages.