Benefits of yeast-free bread from the oven
Many of us don’t even think about what goes into the bread we buy in stores almost every day. But there is no more useful in it than in a stone.
In order to reduce production costs, factories producing baked goods actively use a variety of powders, flavor enhancers and chemicals.
It's easy to track this down.
How long can a purchased palyanitsa stand on the table before it becomes stale or moldy?
How does it taste if you try it the next day?
The answers will definitely not please us. Perhaps. that is why it is not a pity to throw away such bread or give it to feed the birds in the park.
But our ancestors, who always made bread with their own hands, treated every piece with care.
The reasons why we don't usually bother baking at home are simple. This requires time, effort, money.
But a freshly baked culinary masterpiece flies off the table in the blink of an eye, which is proof of its excellent taste.
In addition, by baking ourselves, we know exactly what ingredients are inside the product.
Accordingly, such bread is useful for any diet, even if you play sports and especially watch your diet.
Let's take a closer look at the pros and cons.
So, the positive properties of bread:
- The absence of yeast in the flour product guarantees excellent digestibility, which, in turn, greatly facilitates the digestion process
- No negative impact on the microflora of the stomach and intestines
What about the negative properties? There are none at all!
Homemade bread is healthy, nutritious and has excellent taste, so feel free to make it a rule to prepare it daily (or at least weekly).
Features of yeast-free bread
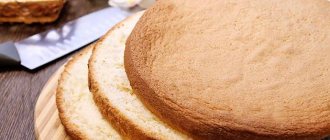
For many, baking bread at home is no longer a daily chore, but simply a pleasure. Your own loaf turns out softer and tastier. And bread without yeast stays fresh longer.
Its peculiarity is the preparation of a starter containing lactic acid bacteria. They produce carbon dioxide, which makes the dough porous. This bread is more fermented and therefore better digestible.
Preparing sourdough takes a long time - 6 days, during which it becomes strong and rich.
The best recipes for making excellent yeast-free bread at home
We have reached the climax - the practical part. Even a novice housewife can master it.
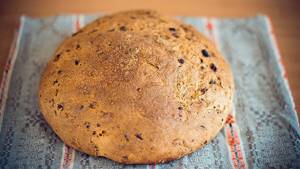
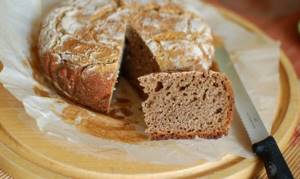
Yeast-free sourdough bread
Don’t worry if the “first pancake” is lumpy. The following masterpieces will satisfy your family more than once.
Sourdough bread “Eternal”
This delicious bread can even be made in a slow cooker or a regular oven.
Having tried this culinary experiment at least once, you will never be able to forget its aroma.
You will need:
- Flour (wheat) - 3 cups
- Plain water - 1 glass
- Vegetable oil - 3 tbsp. spoons
- Sourdough (see above) - 7 tbsp. spoons
- Salt - 2 teaspoons
- Sugar - 2 tbsp. spoons (without slide)
Sift the flour, add two tablespoons of butter, salt and sugar, then the starter.
While kneading, pour water here (the mixture should not stick to your hands). It is better to follow the advice of our grandmothers and leave it all under a towel overnight and continue working in the morning.
Punch down the dough and place in the chosen form.
It will rise during cooking, so be aware of this. Leave it like this for several hours (2-3). Just don’t touch it after, it’s hot right away! Use medium heat.
Recipe for delicious yeast-free rye bread at home
It is suitable for those who have their own bread machine. It will take about three and a half hours to do everything.
Rye bread
You will need the following ingredients:
- Rye flour - 1.4 cups
- Wheat - 2 cups
- Sourdough (see above) - 9 tbsp. spoons
- Water - 1 glass (a little more)
- Vegetable oil - 2 tbsp. spoons
- Cumin - Art. spoon
- Salt - teaspoon
- Sugar - two teaspoons
- Powdered milk - one tbsp. spoon
- Allspice - half or whole teaspoon
We put all this in the bread machine and set the appropriate program.
The weight turns out to be a little less than a kilogram, choose “medium crust”.
Australian "Dumper"
The following recipe will tell you how to bake yeast-free bread at home:
- Wheat flour - 460 gr.
- Baking powder - 16 g
- Vegetable oil (for lubrication)
- Olive (inside) - 1 tbsp. spoon
- Salt - a good pinch
- Rosemary
- Water - an incomplete glass
- Garlic - a couple of cloves for piquancy
- Sesame
- Sweet paprika
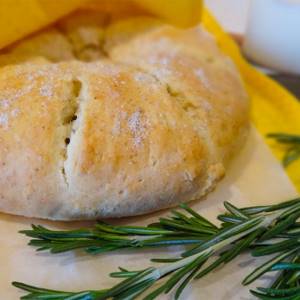
Australian "Dumper"
Preheat the oven to 180°C, sift the flour with baking powder.
Add oil, spices and mix thoroughly until smooth. Grease the mold and form a high “pancake” (3–5 cm).
Mix the garlic with the rest of the oil and coat the top. We bake for about half an hour, but adjust the temperature and duration yourself.
Quick and inexpensive bread
- Whole wheat and wheat flour - two parts cup
- Highly carbonated mineral water - cup
- Salt - a pinch
Immediately turn on the oven to preheat. Sift the powder and add salt. Open the bottle, pour out the liquid and quickly mix the mixture with your hand, it should not stick.
Quickly form a “sausage” and place it on a baking sheet. It will take 60 to 70 minutes.
Brown bread with kefir
The set is standard, only a cup of kefir, soda and butter are added to the usual recipe.
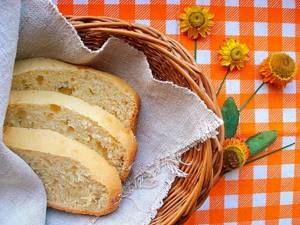
Kefir bread
Prepared on the basis of rye and wheat flour.
We mix the set, form a “bun”, and make a shallow cut on the cap. Place the mixture on a greased baking sheet and coat the top with the remaining kefir.
It will take a little less than an hour (it all depends on the size).
Oat bread
Milk, a little honey, kefir and flaxseed are added to the basic ingredients. The seeds are placed directly into the flour.
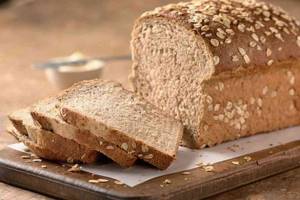
Oat bread
The ingredients are combined and formed into a loaf. A fun way to check for doneness: tap it with a stick.
An empty sound indicates a positive result - the bread is completely ready! On average, it will take 40 minutes at medium heating intensity.
If you have never made yeast-free bread at home before, this video will help you:
Quick bread without sourdough
Yeast-free bread can be baked at home without sourdough at all. It is prepared as follows.
Components:
- 350 g baking flour;
- 150 ml water;
- 50 ml vegetable oil;
- 1 tsp baking powder;
- 7 g salt;
- white from one chicken egg.
Cooking sequence:
- Place sifted flour in a bowl, add baking powder, salt, and any vegetable oil. Make a well in the flour and pour water into it. Knead the dough, first with a spatula, then with your hands. The consistency will be cool. It should be covered and left to rest for 10 minutes, after which it will become more elastic;
- Knead the dough a little more and then roll it out into a layer about the thickness of a finger. Place it in a mold covered with parchment. Then cover with a towel and again allow to rest for about 15 minutes. Before baking, make deep enough cuts in the dough so that the bread is baked. Brush the pastry with egg white and sprinkle sesame seeds on top;
- Place in an oven preheated to 200 for 20-25 minutes. The baked goods can be removed when the top is covered with a yellow-brown crust. Cool, covered with a damp cloth for 30 minutes, then cut or break into portions.
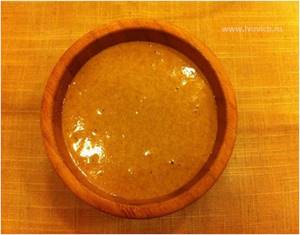
Recipe 1. Sourdough bread made from whole grain wheat flour
Place 5 tablespoons of whole grain wheat flour in a small enamel container, dilute with warm water, bringing to the consistency of thick sour cream. Add 1 teaspoon of honey and mix thoroughly. Cover with a lid, wrap and place in a warm place for a day, stirring three times a day. On the second day, add 3-5 tablespoons of flour and again bring with warm water to the consistency of thick sour cream. Return to a warm place and stir three times a day. On the third day, add the starter in the same way and leave it warm. On the fourth day, the starter is ready (see photo).
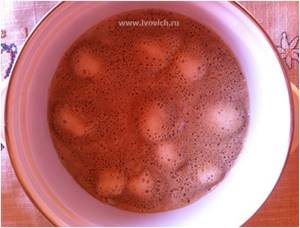
Dough (for 2 loaves of bread)
Pour 500 ml of warm water into an enamel container, add 100 grams of honey (3 tablespoons) and thoroughly dissolve the honey in the water. Then add 75-80 grams of thoroughly mixed starter (3-4 tablespoons) and 2 cups of whole grain wheat flour (250 ml cup).
Whisk the mixture until smooth. Cover with a lid, wrap the container and place in a warm place for 5-8 hours, or overnight.
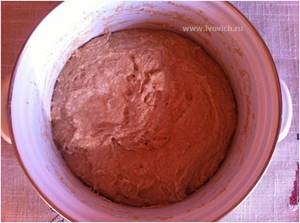
The finished dough looked like this. You can hold it a little longer, or you can already start preparing dough from it.
Dough
Add 1.5-2 tablespoons of salt to the prepared dough and mix thoroughly with a whisk. Then gradually add flour in bulk and mix with a whisk, bringing the dough to a thick state. As soon as it becomes difficult to stir with a whisk, switch to kneading with a spoon.
The dough must be brought to an elastic state by adding flour, so that it lags behind the walls of the pan.
Then cover the pan with a lid, wrap it up and put it in a warm place to proof the dough for 1 hour, if the room is warm. If it's cool, the dough will take longer to rise.
During this time, prepare the baking dish. It must be lubricated with vegetable oil and rubbed with a pen, brush or napkin so that there are no drops. It is also advisable to warm it up slightly.

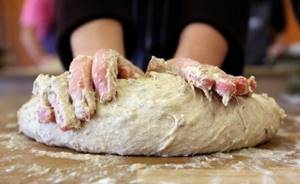
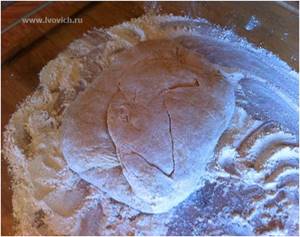
It is important not to miss the moment when the dough gains maximum volume. At this point, it must be kneaded by hand and placed in a baking container. The dough should be porous
Place it on a board sprinkled with flour
The dough should be porous. Place it on a board sprinkled with flour.
Knead the dough until it no longer lags behind your hands. The dough should be non-sticky on the outside and moist on the inside. You can lightly toss it in your palms, like a live ball, simultaneously bending the edges inward.
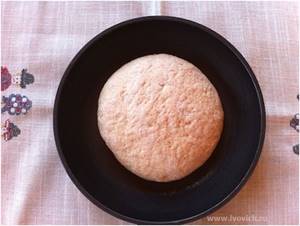
Place the future bread, seams down, in a pre-prepared and slightly warmed pan, cover, and place in a warm place. You can sprinkle flour, bran or seeds, sesame seeds on top - to taste. Some housewives use a rattan basket sprinkled with flour, and then transfer the bread into a baking dish or onto a baking sheet.
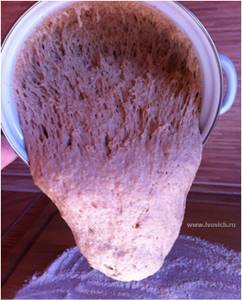
In just 40 minutes the dough rose; there was no point in waiting any longer, as the surface quickly became porous. Place the pan in a preheated oven with a container of water at the bottom. Close the door carefully, without slamming. Bake at a temperature of 220-230 degrees for 15 minutes, then reduce the temperature to 200 degrees and continue baking for another 30-40 minutes. The oven must not be opened during baking.

This time the bread turned out to have a porous crust. Well, probably “increased solar activity.”